How to Make the Perfect Bluey Cake: Step-by-Step Guide
Table of Contents
If you’re looking for the perfect way to celebrate your child’s birthday, why not bring their favorite character to life with a Bluey cake? Based on the beloved Australian animated series, Bluey has captured the hearts of children worldwide, making it the ideal theme for a fun and memorable birthday party. Whether your little one is a fan of Bluey, Bingo, Bandit, or Chilli, a Bluey-themed cake can truly transform the party atmosphere.
In this step-by-step guide, we’ll walk you through the process of creating a stunning Bluey cake from start to finish. From choosing the right cake flavors to decorating with fondant, this guide is perfect for both beginner and experienced bakers. By the end of this post, you’ll have all the tips and tricks needed to make a cake that not only looks amazing but also tastes delicious—making your celebration one to remember. So, let’s get started and make that dream Bluey cake a reality!
Preparing for Your Bluey Cake
Gather the Necessary Ingredients and Tools
Before diving into the fun part of decorating, it’s important to gather everything you’ll need for your Bluey cake. This ensures that the process goes smoothly, and you’ll be able to focus on the creativity of making your cake perfect.
1. Cake Ingredients
For the base of your Bluey cake, you’ll need to start with the right ingredients to create a moist and delicious cake. You can choose from various cake flavors like vanilla, chocolate, or even a fruity option like lemon depending on your preference or your child’s favorite flavors. Here’s a basic list of what you’ll need:
- Flour (self-raising or all-purpose, depending on your recipe)
- Sugar (white granulated or caster sugar)
- Butter (unsalted, to ensure the cake isn’t too salty)
- Eggs (large, to help bind the ingredients together)
- Baking powder (if using all-purpose flour, to help the cake rise)
- Milk (whole milk or buttermilk for a more indulgent flavor)
- Vanilla extract (for a lovely base flavor)
- Cocoa powder (if making a chocolate-flavored cake)
2. Cake Decorating Ingredients
The cake’s appearance is where the magic happens. To recreate Bluey, you’ll need specific cake decorating ingredients that help you achieve that iconic look.
- Fondant (blue, white, black, and other colors to match Bluey’s features): Fondant is a versatile sugar paste that can be molded into shapes and smoothed onto your cake to create the clean, polished look you need.
- Edible food coloring (if you need to color fondant or frosting): Use gel or paste food colors for bright, vivid shades without changing the consistency.
- Buttercream frosting (for covering the cake layers and providing a base coat): Buttercream is perfect for applying a smooth coat on the cake before you add fondant or for piping decorations.
- Edible markers (for fine details): These markers are great for adding details to your fondant, such as Bluey’s eyes, nose, and mouth.
- Sugar flowers or sprinkles (optional, for extra decoration): You can add these to enhance the overall look or add some fun, colorful touches around the cake.
3. Tools for Cake Construction and Decoration
The right tools will help you create a flawless Bluey cake. Gather these tools before you begin the process:
- Cake pans (preferably round, but you can use any shape you want): Choose pans that are the right size for your cake layers. For a simple design, a round cake pan (8-inch or 9-inch) is typically sufficient.
- Rolling pin (for rolling out fondant): A smooth rolling pin will allow you to roll fondant to the right thickness without sticking or tearing.
- Cake board (to support the cake): This is essential for easy transport and presentation.
- Spatulas (for frosting and smoothing): A straight spatula helps apply and smooth frosting, while a smaller offset spatula is perfect for delicate details.
- Piping bags and tips (for details and decorations): Piping bags help you create designs like borders or Bluey’s collar, while tips allow for precise frosting application.
- Fondant tools (optional but helpful for shaping): These include modeling tools, cutters, and embossing tools to add intricate details to your cake, such as the facial features of Bluey.
- Cake leveller (to level cake layers): This is helpful to make sure your cake layers are perfectly even and flat before stacking them.
4. Optional Tools for Advanced Decoration
If you’re looking to take your Bluey cake to the next level, these advanced tools might come in handy:
- Cake airbrush (for an even color application on fondant): Airbrushing can give your cake a beautiful gradient effect or add highlights to Bluey’s features.
- Mold or cutter for shapes (for Bluey’s face or ears): Pre-made cutters can save time and give you more precise shapes when working with fondant.
- Stencil or edible image sheets (for quick decoration): If you’re short on time or want to get more intricate with the design, edible image sheets with Bluey’s character can be applied directly to the cake for an easy way to bring Bluey to life.
Choosing the Right Cake Pan
Choosing the right cake pan is a crucial step in creating the perfect Bluey cake, as it helps ensure your cake has the right shape, size, and texture for decorating. Here’s how you can select the ideal pan for your cake:
1. Shape of the Cake
The shape of the cake pan determines how your Bluey cake will be assembled and decorated. Depending on the design you’re aiming for, there are a few common options to consider:
- Round Cake Pans: A classic choice for any cake design, round pans are versatile and perfect for creating a basic Bluey face or layered cake. Typically, 8-inch or 9-inch pans are ideal for most cake recipes, providing a good size for stacking layers and decorating.
- Square Cake Pans: Square pans give a modern, clean-cut look, perfect if you’re creating a more structured or geometric design for Bluey’s face or body.
- Novelty Cake Pans: If you want to take your design to the next level, consider investing in a Bluey-themed novelty cake pan. These pans are specifically designed to form shapes of characters, like Bluey, and can help you achieve a detailed, 3D appearance. For example, there are pans available that mold the cake into the shape of Bluey’s head, ears, or full-body shape.
2. Size of the Cake
The size of the cake pan determines how much batter you need and how many people the cake will serve. Here are some key considerations:
- Servings: A typical 8-inch round cake pan yields about 12 servings, making it ideal for smaller birthday parties. If you’re expecting more guests, you may want to go for a 10-inch or 12-inch pan to create a larger cake.
- Height of the Cake: If you plan to stack multiple layers of cake, consider using a taller or deeper pan. Deep cake pans (about 3 inches high) help create thicker layers, which are necessary for multi-tier cakes or cakes with more intricate designs.
- Stacking Layers: For multi-layer cakes, it’s important to ensure your pans match in size. If you’re stacking two or three layers, make sure they are of similar size so they don’t look uneven. Also, if you want to carve the cake into specific shapes (like Bluey’s head), using a deeper pan will give you more flexibility to work with.
3. Nonstick vs. Regular Cake Pans
When choosing a pan, consider the material and finish:
- Nonstick Cake Pans: Nonstick pans are easier to work with, especially when you’re trying to remove a delicate cake without it breaking. These pans help release the cake smoothly, reducing the chances of sticking. If you’re working with a Bluey cake that requires intricate details, nonstick pans are a great option.
- Regular (Aluminum) Cake Pans: Aluminum pans are a popular choice for professional bakers because they provide even heat distribution, which ensures your cake bakes evenly. However, they may require more effort to grease and flour properly, as cakes can stick if the pan isn’t prepared well.
4. Cake Pan Liners and Accessories
To ensure an easier release and cleaner edges, consider using parchment paper liners or cake release spray in your pan. This is especially helpful when baking multi-layer cakes or novelty shapes. For extra support, you can use cake strips around your pan, which helps prevent the cake from rising unevenly, giving you a smooth, flat surface that’s easier to decorate.
Creating the Perfect Cake Base
The cake base is the foundation of your Bluey cake and plays a crucial role in both the taste and structure of your creation. A perfect cake base sets the tone for the whole design, ensuring your cake not only looks great but also tastes delicious. Here’s how to create the ideal cake base for your Bluey cake:
1. Choosing the Right Cake Flavor
The first step in creating a perfect base is selecting the flavor that will complement the Bluey-themed design. Some popular options include:
- Vanilla: A classic, light flavor that pairs well with a variety of fillings and frostings.
- Chocolate: For a rich, indulgent base, chocolate cake is always a crowd-pleaser.
- Carrot or Red Velvet: These options provide a unique twist and offer a slightly denser texture, ideal for holding intricate decorations.
When selecting your cake flavor, consider the birthday child’s preferences and any dietary restrictions, such as gluten-free or dairy-free options.
2. Baking the Cake Layers
For the Bluey cake to be structurally sound, you’ll need to bake your cake layers properly. Here are a few tips:
- Prepare the pans: Grease and flour your cake pans before pouring in the batter, or line them with parchment paper for easy removal after baking.
- Evenly distribute the batter: Pour the cake batter evenly into the pans to ensure uniform layers. If using more than one pan, measure the batter to ensure consistency in height.
- Watch the baking time: Follow the recipe’s baking instructions carefully and avoid overbaking, as this can dry out your cake. A toothpick inserted into the center should come out clean.
For best results, bake your cake layers a day ahead of time, giving them time to cool completely before decorating.
3. Cooling the Cake
After the cakes are baked, they need to cool before you can proceed with frosting or fondant application. Here’s how:
- Cool on a wire rack: Remove the cakes from the pans and set them on a wire rack to cool evenly. This prevents condensation and ensures the cakes remain light and fluffy.
- Allow enough time: It’s essential to let the cakes cool for at least 30 minutes to 1 hour before attempting to frost or handle them. If you try to decorate while the cakes are still warm, the frosting or fondant will melt and slide off.
4. Leveling the Cake Layers
Once your cakes are cool, it’s time to level the layers for a smooth and even surface:
- Trim the domes: Most cakes will have a slight dome after baking. Using a serrated knife, carefully trim the top of the cake to make it level. This ensures that your cake layers will stack neatly.
- Cut into even layers: If you plan to create multiple layers, slice the cake horizontally with a cake leveler or serrated knife, making sure each layer is even and flat.
5. Preparing for Fondant or Frosting
Before you begin decorating your Bluey cake, you need to prepare the cake for fondant or frosting:
- Apply a crumb coat: A thin layer of buttercream or ganache is spread over the entire cake to seal in crumbs. This will create a smooth base and prevent crumbs from mixing with your final layer of frosting or fondant.
- Chill the cake: After applying the crumb coat, refrigerate the cake for about 15 to 30 minutes to set the layer and ensure a smooth surface for the next steps.
Bluey Cake Design Basics
Decorating the Cake with Fondant
Decorating a Bluey cake with fondant is one of the most rewarding parts of the cake-making process, as it allows you to achieve a smooth, professional finish and intricate character designs. Fondant is a pliable, sugar-based icing that can be rolled out and applied to a cake, transforming a simple dessert into a work of art. Here’s how to decorate your Bluey cake with fondant to bring Bluey’s lovable character to life:
1. Preparing Your Cake for Fondant
Before applying fondant, make sure your cake is completely cool. This prevents any melting or uneven texture when applying the fondant. Trim any uneven edges or tops to ensure that your cake is level. If you’re using multiple layers, stack the cake and cover it with a crumb coat — a thin layer of buttercream or ganache that helps seal in crumbs and provides a smoother surface for fondant application.
2. Rolling Out the Fondant
Roll the fondant to about 1/8-inch thickness on a clean, smooth surface, lightly dusted with powdered sugar or cornstarch to prevent sticking. Roll it out large enough to cover the entire cake, leaving extra space around the edges for trimming. Make sure the fondant is evenly rolled, with no thin or thick spots.
3. Applying the Fondant
Carefully lift the rolled fondant using a rolling pin or your hands and drape it over the cake. Gently press the fondant down onto the sides and top of the cake, smoothing out any air bubbles or wrinkles as you go. Use a fondant smoother to achieve a smooth and flawless surface, working from the top of the cake down to the sides. Ensure that the fondant is snug against the edges of the cake and trim off any excess at the bottom, leaving a small overhang that can be tucked under the base.
4. Creating Bluey’s Character Design
Once the cake is covered, it’s time to start bringing Bluey to life! Use fondant to sculpt the character’s face, ears, eyes, and other features. Roll small pieces of fondant to form Bluey’s eyes and facial details. To achieve the correct colors, you can either use pre-colored fondant or dye white fondant with gel food coloring.
For Bluey’s signature blue color, knead the fondant with a small amount of blue food coloring until you get the perfect shade. Don’t forget about Bluey’s adorable ears and the pink details around her nose and eyes — these smaller details will bring more personality and authenticity to the cake.
5. Adding Final Touches and Detail Work
To make the Bluey cake even more personalized, you can add extra touches such as:
- Bluey’s collar: Create a small fondant collar by rolling out a thin strip of fondant and placing it around Bluey’s neck.
- Facial Expression: For added realism, give Bluey a fun and cheerful expression by shaping her smile and eyes.
- Additional characters: If desired, you can add Bingo, Bandit, or Chilli alongside Bluey on the cake, either in fondant or by using printed edible images.
6. Optional Decorations and Edible Paint
For more advanced decorators, you can use edible paint to add intricate details or accents. This could include painting Bluey’s fur texture or creating a more vibrant background with edible glitter or luster dust. Airbrushing is another technique you can use to add dimension and depth to Bluey’s character and the overall design.
Conclusion
Decorating a Bluey cake with fondant is a fun and creative way to make your child’s birthday extra special. By mastering the techniques of rolling, applying, and sculpting fondant, you’ll be able to create a cake that captures Bluey’s charming character in a way that will wow both kids and adults alike. Whether you choose to keep the design simple or go all out with detailed fondant sculptures, your Bluey cake is sure to be a memorable centerpiece for the celebration!
Shaping Bluey’s face or body is one of the most exciting—and creative—parts of making your Bluey cake. Whether you’re aiming for a simple Bluey face design or a more detailed 3D version, this step is all about precision and imagination. Here’s how you can approach this task:
1. Preparing the Cake Layers
Before you start shaping, it’s important to have your cake layers ready. For a Bluey face cake, you’ll typically want to bake round or square cakes. If you’re aiming for a 3D cake that includes Bluey’s body, you may need to stack and carve several layers to create the proper shape.
- For a face design: Start by baking a round cake. If you prefer a larger face or more dimension, you can stack multiple layers of cake and use a serrated knife to carefully trim it into a round, flat shape.
- For a 3D version: You may need a combination of round cakes and additional sculpting to achieve Bluey’s body, legs, or other features. You can also use a half-sphere mold for the head.
2. Carving the Shape
Once your cakes have cooled, it’s time to carve them into the shape of Bluey’s face or body. This is where you can get creative, but make sure to follow these tips:
- Bluey’s face: Use a sharp serrated knife to carve out the rough shape of Bluey’s head. Think about the key features: Bluey’s round face, large ears, and big eyes. Once the overall shape is defined, trim off any uneven edges and smooth the surface with a spatula.
- For a 3D cake body: Begin by stacking and shaping the layers of the cake into a cylindrical form. The front part of Bluey’s body can be slightly rounded, with a flatter back. Use a carving tool or a sharp knife to refine the curves for her legs, paws, and tail.
3. Adding Bluey’s Features
After you’ve shaped the cake, the next step is adding Bluey’s recognizable features using fondant and edible markers.
- Eyes, Nose, and Mouth: Roll out white fondant to create the base for her eyes. Use smaller pieces of black fondant for the pupils and outline the eyes with edible black food markers. For Bluey’s nose, roll a small ball of black fondant, flatten it, and attach it to the middle of the face. Then, shape the mouth and attach it with edible markers or thin pieces of fondant.
- Ears: Bluey’s ears are large and distinctive. Use dark blue fondant to create two oval shapes and place them at the top of the head. Make sure they are proportionate and placed symmetrically for a cute look. You can also add a little texture by gently pressing the fondant with a tool to mimic fur.
- Paws and Tail: If you’re making Bluey’s full body, shape her paws from white fondant. You can roll small pieces and use a knife to mark the paw pads. For Bluey’s tail, form a small, curved shape from fondant and attach it to the back of the cake.
4. Perfecting the Details
- Textures and Smoothness: Once you’ve applied the base layers of fondant, smooth out any bumps or wrinkles. Use a fondant smoother tool to achieve a clean, sleek surface. To add texture to Bluey’s fur, lightly press a small, fine tool against the fondant to create fur-like patterns.
- Fondant Placement: Pay attention to the placement of each fondant piece. Bluey’s features, such as her ears, eyes, and nose, should be positioned in a way that makes the cake’s face appear friendly and recognizable. If you’re making a 3D body, ensure that the limbs are symmetrical and in the right proportions.
5. Color Matching
Bluey’s fur color is a soft blue, so you’ll need to match the fondant to her color by adding edible food coloring to your fondant or buying pre-colored fondant in the correct shade. If you’re using food coloring, make sure to knead the color in well until you achieve a consistent shade. For the white details (her paws, eyes, and belly), ensure the white fondant is bright and clean to contrast beautifully with Bluey’s blue fur.
6. Final Touches
Once Bluey’s face or body is shaped, the final touches can really bring the cake to life. You can use edible glitter, colored sprinkles, or piping gel to give her a fun shine. If you want, add some texture with a small brush and edible shimmer powder to create a realistic, animated look.
Adding Other Character Features (Bingo, Bandit, Chilli)
When creating a Bluey cake, it’s a fun idea to bring the entire Bluey family into the design, including Bingo, Bandit, and Chilli. Adding these characters will make the cake even more special, especially if your child loves the whole Bluey family. Here’s how to incorporate them into your cake design:
1. Creating Bingo (Bluey’s Younger Sister)
Bingo is Bluey’s sweet, orange-furred little sister, and adding her to the cake can bring another layer of fun and color.
- Fondant Creation: Use orange fondant to create Bingo’s face and ears. You can cut out the shape of Bingo’s head and use smaller pieces to form her ears, eyes, and nose.
- Facial Features: Add delicate details like her smaller eyes and the characteristic nose and mouth with edible markers or fine fondant pieces. Bingo’s sweet, innocent expression is key to capturing her personality.
- Positioning: Bingo can be positioned next to Bluey, either sitting or standing, to create a family-style design.
2. Adding Bandit (Bluey’s Dad)
Bandit, the loving and playful dad of Bluey, has a striking blue-gray color and a unique, dad-like character. He’s often seen in his signature light blue shirt.
- Fondant Techniques: Use gray fondant to create Bandit’s face, ensuring to add his distinctive snout and pointed ears. You can use dark blue fondant to add small details like his shirt or even his glasses.
- Character Details: Bandit’s playful and laid-back personality can be reflected in his expression. Create a slight smile and a fun, dad-like expression to give Bandit a joyful vibe on the cake.
- Placement on the Cake: Bandit can be placed on the cake standing or sitting, depending on your preferred design. Having him interact with Bluey and Bingo will create a family scene, giving the cake a wholesome and loving feel.
3. Incorporating Chilli (Bluey’s Mom)
Chilli, Bluey’s kind and caring mom, often wears a light teal-green outfit and has a calm demeanor. Adding her to the cake completes the family dynamic.
- Fondant Details: Chilli’s face and ears can be made from light teal or blue fondant, and her facial features can be crafted with edible markers. To emphasize her loving and nurturing side, you can create her with a soft, affectionate smile.
- Finer Details: Chilli’s long ears and slightly rounded snout are key characteristics to capture. You could also add small accessories like her dress collar or a flower pattern on her clothing.
- Placement: Chilli can be positioned on the cake either behind or beside Bluey and Bingo, giving her a maternal presence. You might also consider a hugging pose to reflect her caring nature.
4. Bringing Them Together as a Family
Once you have the individual character elements for Bluey, Bingo, Bandit, and Chilli, it’s time to assemble them into a cohesive design. Here’s how to make it look like a real family celebration:
- Balanced Composition: Ensure that the characters are balanced on the cake, with Bluey as the centerpiece, and the others placed around her. If you’re using multiple tiers, consider having each tier represent a different part of the family, with Bluey on top.
- Interaction: Position the characters in a way that makes them appear to interact with each other. For example, you could have Bluey holding hands with Bingo, while Bandit and Chilli stand behind them. This creates a heartwarming family moment on the cake.
- Family Props: Adding small props like toys, balloons, or other little decorations that tie into the theme can help emphasize the family atmosphere and bring the entire Bluey world to life on your cake.
Creative Bluey Cake Decorating Ideas
Making a Bluey Cake with Simple Designs
If you’re new to cake decorating or want to create a beautiful Bluey cake without feeling overwhelmed, opting for a simple design can be a great choice. Simple designs are not only achievable but can also be incredibly charming and effective. Here’s how to make a Bluey cake with minimal complexity while still impressing your guests:
1. Choose a Basic Cake Shape and Flavor
For a simple Bluey cake, start with a basic round or square cake shape, which is easy to work with and requires fewer special pans or tools. Vanilla, chocolate, or any of your child’s favorite cake flavors will work perfectly as the base. Bake the cake and let it cool completely before decorating to avoid any melting or mishaps when adding the fondant or icing.
2. Use Smooth Buttercream or Fondant for Coverage
To create a clean, professional look without too much detail work, consider using smooth buttercream or fondant to cover the cake. For a soft look, buttercream is an excellent choice. It can be spread evenly across the cake using a spatula, giving it a neat appearance. If you prefer fondant, roll it out to a thin layer and drape it over the cake, smoothing the edges with your hands to avoid any wrinkles.
- Buttercream Option: Pipe simple decorations like Bluey’s eyes, nose, and mouth using black and white buttercream. You can even use a Bluey cake topper (such as a fondant cut-out) to make decorating easier.
- Fondant Option: After covering the cake with fondant, you can create Bluey’s face using fondant cut-outs for the eyes, nose, and ears. You can make this even simpler by using edible markers or paints to draw Bluey’s face onto the fondant layer.
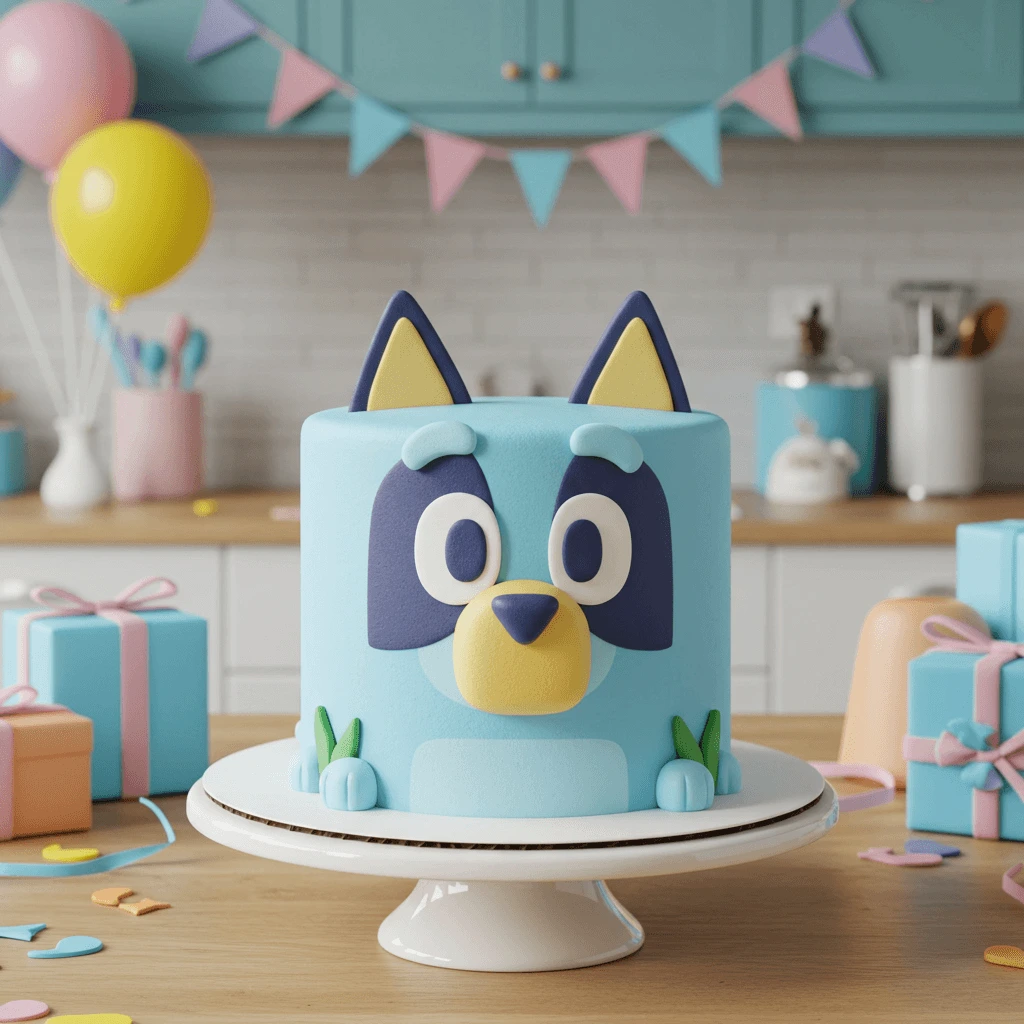
3. Create a Simple Bluey Face Design
For a basic but effective design, focus on just Bluey’s face. You don’t have to cover the entire cake in fondant; simply use a round or oval shape for the face. Draw Bluey’s eyes, nose, and mouth on the cake with edible markers or pipe them using buttercream. You can also use fondant for the ears and other facial features.
A simple face design is not only cute but also easy to replicate. If you’re not comfortable with detailed features, don’t stress—keeping it simple with shapes and basic details will still capture Bluey’s likeness effectively.
4. Add Fun and Easy Decorations
Once the basic face design is done, you can add a few simple decorations around the cake to enhance the theme. For example:
- Blue and Yellow Balloons: Use fondant or colored candies to create small balloon shapes around the cake, mimicking a birthday party theme.
- Paw Prints: Place edible paw prints (made of chocolate, fondant, or colored frosting) around the bottom edge of the cake, symbolizing Bluey’s adventures.
- Colorful Border: Use piping bags to add a fun, colorful border around the bottom of the cake, either in Bluey’s signature blue color or in complementary colors like yellow or orange.
5. Easy Bluey Cake Toppers
If you’re looking for an even easier approach, opt for a Bluey cake topper. You can find plastic, edible, or paper cake toppers featuring Bluey, Bingo, or other characters. These pre-made toppers can be added to the center of the cake, allowing you to skip the intricate decorating process while still creating a visually appealing cake.
6. Keep It Fun and Stress-Free
The key to a simple Bluey cake design is to keep it fun, lighthearted, and stress-free. Focus on the main elements—Bluey’s face, fun colors, and a couple of simple decorations—and you’ll end up with a cake that looks fantastic without requiring expert-level skills.
Additional Tips:
- Don’t worry about perfecting every detail. Kids will love the playful and vibrant design, even if it’s not flawless.
- If you’re short on time, consider using store-bought fondant or pre-made edible decorations to save on prep time.
- Always have fun with the design! Bluey’s friendly and quirky look allows for creativity, and simple touches like a smiley face or playful expressions will bring your cake to life.
Advanced Bluey Cake Designs
Creating an advanced Bluey cake design takes your baking skills to the next level, allowing you to create a show-stopping cake that’s perfect for a more elaborate party. While the basic Bluey cake designs are fun and straightforward, advanced designs allow for extra creativity and impressive details. Here’s how you can elevate your Bluey cake with more intricate techniques and designs:
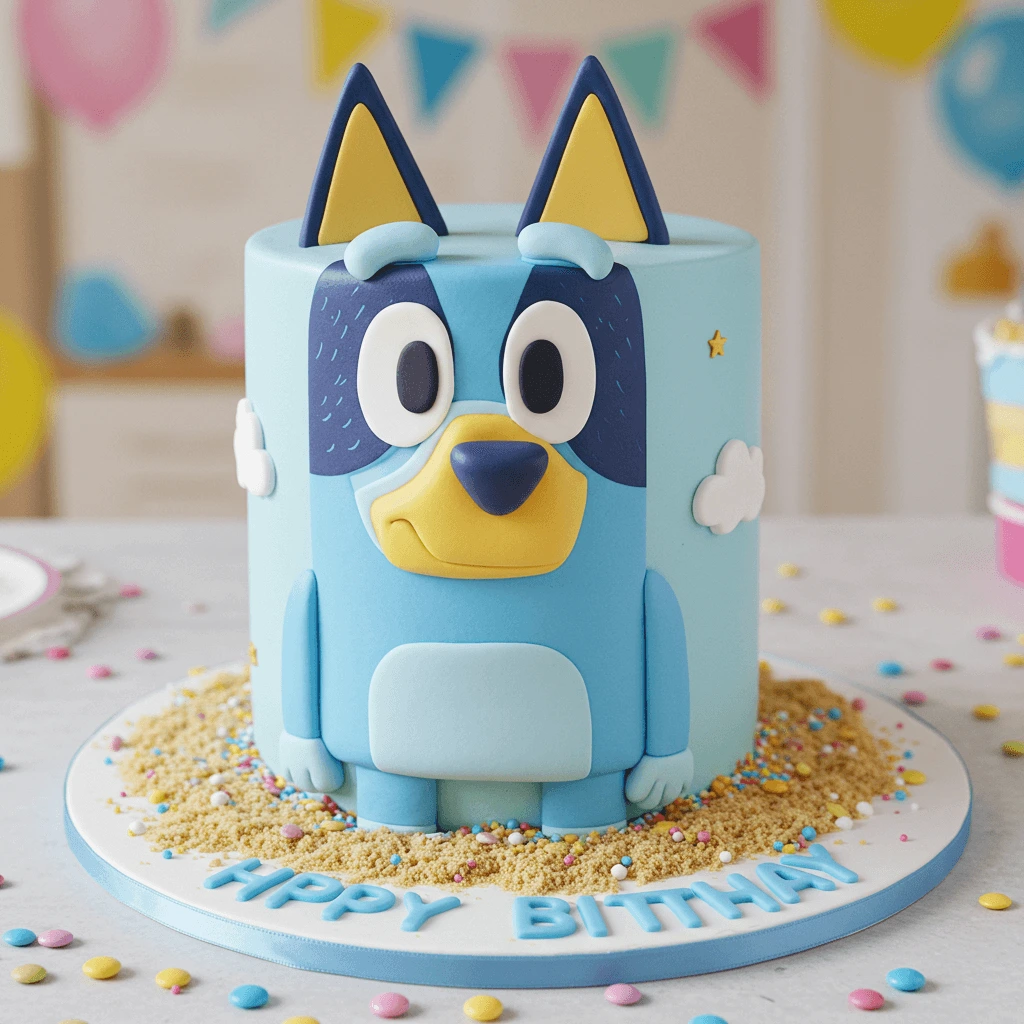
1. 3D Bluey Cake Designs
- Shaping a 3D Bluey cake allows you to take the character to new heights. Instead of just decorating a flat cake with Bluey’s face, you can mold and carve the cake to create a full 3D version of Bluey or even Bingo. This method requires carving and stacking multiple layers to form a rounded, sculpted figure, which you then cover with fondant to create the character’s recognizable shape.
- You can use a combination of cake carving tools and dowels for support to ensure the cake holds its shape. For a Bluey face cake, consider creating a spherical or dome-shaped base and carving out the face with delicate detailing, like Bluey’s ears, nose, and eyes.
2. Tiered Bluey Cake Designs
- A tiered Bluey cake adds an elegant, impressive element to your celebration. Each tier can showcase different aspects of Bluey’s world. For example, the bottom tier could have a landscape design, featuring Bluey’s house or a play area, while the top tier can be decorated with Bluey’s face or full character design.
- Tiered cakes allow you to add multiple flavors to the mix, offering variety to your guests. If you’re creating a Bluey birthday cake, make sure each tier is aligned and secured with dowels to maintain the cake’s stability.
3. Bluey Cake with Hand-Painted Details
- Adding hand-painted details to your Bluey cake can make it look like an art masterpiece. Using edible paints or food-safe gel colors, you can paint intricate details like Bluey’s fur texture, her whiskers, and facial expressions. This can be a great way to give your cake a personal touch and add layers of creativity that are unique to your skills.
- Hand-painted designs can also extend beyond Bluey’s face and into the cake’s background. You can paint things like Bluey’s favorite toys, her family, or a fun scene from the show, bringing the cake to life with vibrant colors and details.
4. Bluey Cake with Interactive Elements
- Make your cake even more interactive by incorporating fun elements like edible figurines or cake toppers of Bluey, Bingo, Bandit, and Chilli. These can be hand-crafted from fondant or modeling chocolate, or you can use pre-made Bluey cake toppers to add charm and fun to the cake.
- Consider adding motion to the cake as well. For example, you could create a Bluey character with moving parts, such as a spinning birthday candle or a pop-up element within the cake that surprises guests. These elements add an extra layer of excitement to the cake and make it a real focal point at the party.
5. Themed Bluey Cake with Special Effects
- Take your Bluey cake design to the next level by incorporating special effects like edible glitter, lights, or smoke for a more dramatic reveal. For example, a Bluey cake with a “magical” theme can include sparkles around the edges of the cake, or glowing candles placed at the top, adding to the excitement of the moment.
- You can also add a unique texture to the cake by creating fondant ruffles or incorporating fondant cutouts for more visual depth. This could involve things like Bluey’s tail, paws, or background features that give the cake a layered, almost 3D effect.
6. Incorporating Other Bluey Elements
- To elevate your design even more, think about including other elements from the show, such as Bluey’s toys, family members, or her famous adventures. The scenes and settings from Bluey’s world are rich with visual appeal and can help transform your cake into a much more intricate and detailed design.
- For example, you could create a Bluey cake with a playground scene, using edible fondant to create swings, slides, and playsets, giving the cake an immersive feeling. Or, try creating a Bluey cake inspired by the family’s backyard, complete with fondant details like flowers, grass, and Bluey’s favorite ball.
Fun Bluey Cake Decorations for Extra Flair
When creating a Bluey cake, the decorations are what make it truly come to life. Not only do they add visual appeal, but they also make the cake more interactive and fun for kids. Here are some creative ideas for adding extra flair to your Bluey cake that will wow both the kids and the adults at the party:
1. Colorful Sprinkles and Edible Glitter
Adding colorful sprinkles or edible glitter to the cake can instantly make it more festive. Choose bright colors like blue, yellow, and pink to match the Bluey theme and create a joyful, celebratory look. You can sprinkle them around the base of the cake, on top of fondant, or use them to accent Bluey’s character features. Edible glitter can be used for a touch of sparkle, especially around the edges or on the eyes to make them pop.
2. Bluey-Themed Cake Toppers
A simple and effective way to elevate your Bluey cake design is by adding Bluey-themed cake toppers. These can either be figurines of the characters—Bluey, Bingo, Bandit, or Chilli—or even a custom-designed cake topper printed with an image of Bluey. These toppers can sit on top of the cake to create a dynamic scene or be scattered around the base for a more subtle touch. Toppers are perfect for busy bakers who may not have time to sculpt fondant characters.
3. Creative Piped Buttercream Borders
Piping decorative borders around the base or top of the cake can add texture and elegance to your Bluey cake. You can use piping tips to create different effects like rosettes, shells, or ruffles in coordinating colors like pastel pinks, yellows, and whites. For an extra touch, try blue and white buttercream swirls to echo Bluey’s fur color, or pipe a cloud effect to create a sense of whimsy and playfulness.
4. Playful Fondant Details
Going the extra mile with fondant details can take your Bluey cake from simple to show-stopping. Sculpt small fondant elements that reflect the world of Bluey, such as paws, dog collars, or a birthday hat for Bluey. You can also create fondant flowers for a softer, more whimsical look or use fondant to create fun accessories like a ball or bone that Bluey might play with. These tiny details will add life to the cake and help tell a story, creating an interactive scene for your guests.
5. Personalized Message or Name
To make the cake even more special, consider incorporating the birthday child’s name or a personalized message in the design. This could be a fondant banner or piped lettering with a fun, bold font that matches the playful Bluey theme. For example, “Happy Birthday, [Child’s Name]!” can be elegantly piped on the cake’s surface or even added with colorful edible letters. Personalizing the cake adds a memorable touch that enhances the overall experience.
6. Fun Party Elements as Cake Decorations
Lastly, don’t forget to bring in some fun party elements that complement your Bluey cake. Small, non-edible decorations like mini balloons, party hats, or streamers can be strategically placed around the cake for a festive atmosphere. You can even go the extra mile by setting up a mini birthday scene using edible sugar paper or a backdrop for a more interactive setting.
How to Assemble and Finish Your Bluey Cake
Layering and Assembling the Cake
Layering and assembling your Bluey cake is a crucial step to ensure it not only looks great but also holds together well when cut. This process requires careful attention to detail to create a sturdy, professional-looking finished cake.
1. Preparing the Cake Layers
Before you start assembling, make sure that your cake layers are completely cooled. If the cakes are still warm, they may become too soft and cause the frosting or fondant to melt or slide. Once cooled, trim off any uneven edges to create flat, smooth surfaces. This step helps to prevent the cake from tilting or collapsing when stacked.
If you’re making a multi-layered cake, consider using different-sized cake pans for a tiered effect. You can stack smaller cakes on top of larger ones, securing each layer with frosting or ganache in between.
2. Applying a Crumb Coat
The crumb coat is a thin layer of frosting applied to the cake to seal in any loose crumbs. This coat acts as a base layer that provides a smooth surface for your final layer of frosting or fondant. Use a spatula or cake scraper to spread a thin, even layer of frosting over the entire cake, making sure to cover the top and sides.
Once the crumb coat is applied, refrigerate the cake for about 30 minutes to let it set and harden. This will prevent any crumbs from ruining your final frosting layer.
3. Stacking the Cake Layers
When the crumb coat has set, you can start stacking the cake layers. If you’ve made multiple layers, use a cake board or a cardboard disc between each layer for extra support. Start with the bottom layer, place it carefully on your cake stand or board, and gently press it down to secure it in place.
Apply a layer of frosting (either buttercream or ganache) between each layer to keep them stuck together. Use a piping bag or offset spatula to spread the frosting evenly, making sure each layer is level and flush with the cake below it. Continue adding layers and frosting until your cake reaches the desired height.
4. Smoothing the Frosting
After stacking the layers and applying the final layer of frosting, it’s important to smooth out the frosting to create a professional, clean finish. You can use a cake scraper or an offset spatula to gently smooth the sides and top of the cake. The smoother the frosting, the easier it will be to apply the fondant later.
At this point, you can decide whether to leave the frosting as is, or if you prefer a perfectly smooth finish, apply a final layer of fondant. If you’re covering the cake with fondant, make sure the frosting underneath is smooth and free of air bubbles.
5. Adding Support for Tall Cakes
If you’re creating a tall or multi-tiered Bluey cake, it’s essential to use dowels or straws for support between layers. These can be inserted through the cake and cut to size, ensuring that the top tiers don’t sink into the lower ones. This is especially important if you are using fondant or heavy decorations that may weigh the cake down.
6. Final Touches
Once the cake layers are stacked and the frosting is smooth, you are ready for the next step: decorating your Bluey cake! Whether you’re adding fondant to create the character designs or piping on extra frosting for texture, the foundation laid during the layering and assembling process is crucial for achieving a stable and visually appealing cake.
In conclusion, layering and assembling the cake involves patience and precision, but with these steps, your Bluey cake will have a sturdy structure and smooth surface ready for decoration. Proper layering ensures your cake stays intact during transport and cutting, while also giving you the best canvas to showcase your Bluey character designs.
Applying Bluey’s Character Details
When it comes to creating the perfect Bluey cake, the magic lies in the details. Bluey’s character design is iconic, with her playful features and bright blue fur, making her instantly recognizable to fans. Applying these unique details to your cake will bring it to life and make it stand out at your party.
Here’s how you can achieve a professional-looking Bluey cake with perfectly crafted character details:
1. Shaping Bluey’s Face and Features
Start by rolling out fondant in the appropriate colors to create Bluey’s face. You’ll need:
- Blue fondant for Bluey’s head, ears, and body.
- White fondant for the eyes and mouth.
- Black fondant or edible markers for the nose, eyebrows, and pupils.
- Brown or tan fondant for Bluey’s inner ears.
To begin, use a round or oval shape for Bluey’s head. You can either mold the fondant directly onto the cake or cut it into a flat shape to fit on top. To shape her ears, create small triangular pieces of blue fondant, and attach them to the sides of the cake.
2. Creating the Eyes
The eyes are one of the most defining features of Bluey’s character. Start by cutting out two small circles from white fondant for the whites of her eyes. Then, roll out smaller black circles for the pupils, and carefully position them on the white circles. You can use an edible food-safe marker to add small details like pupils and eyelashes to make her eyes look more realistic.
3. Adding Bluey’s Nose and Mouth
Bluey’s nose is small and black, sitting at the center of her face. Roll a tiny ball of black fondant, flatten it slightly, and attach it to the middle of the face. You can then draw her smile or mouth using an edible marker or pipe it using black frosting if you prefer a more dimensional look.
4. Creating the Inner Ears
Bluey’s ears have a soft inner lining that’s usually a lighter shade of brown or tan. Roll out small pieces of tan fondant and cut them into small oval or petal shapes. Attach these pieces inside the blue ear shapes to give them dimension.
5. Detailing the Eyes and Face with Edible Markers
For even more realism, use edible markers to add small lines, freckles, or texture to Bluey’s face. You can use a black marker to lightly sketch out the facial features, including her eyebrows and details around her eyes, to give the cake a more hand-drawn appearance, mimicking the animated style of the show.
6. Additional Decorative Elements
Once the main character details are applied, you can add some finishing touches to make your Bluey cake even more vibrant:
- Use bright colored frosting to pipe additional details around the cake, such as a colorful border or pattern that matches Bluey’s world.
- Add fondant accessories such as a collar or a small toy dog bone, if you want to make the cake feel even more playful.
- Consider placing fondant flowers or small cake toppers to enhance the theme and make the cake look like a scene from Bluey’s adventures.
Tips for Precision and Cleanliness:
- Use a small, sharp knife or fondant tools for intricate details.
- Moisture is key to getting fondant to stick, so lightly brush water or edible glue onto the cake where needed before placing the fondant.
- Practice the details on a separate piece of fondant first to ensure precision.
By carefully applying Bluey’s facial features, ears, and accessories, your cake will truly come to life and capture the charm of the beloved character. With these detailed techniques, you’ll have a Bluey cake that’s not only visually stunning but also a hit at the birthday party!
Final Touches for Presentation
The final touches are what turn a simple cake into a masterpiece. After putting in all the hard work to bake, decorate, and design your Bluey cake, it’s time to focus on the finishing details that will make your cake look polished and professional. These finishing touches will elevate the look of your cake, making it a showstopper at the party.
1. Smooth & Polished Finish
- Smooth out the fondant: To achieve that perfect, professional look, make sure the fondant covering is smooth with no wrinkles or air bubbles. Use a fondant smoother or a rolling pin to ensure even pressure. You can also lightly mist the surface with a bit of water to help the fondant stick.
- Trim excess fondant: Carefully trim the excess fondant from the base of the cake using a sharp knife or pizza cutter. This will give the edges a clean, crisp look.
2. Decorative Borders & Edges
- Add a fondant border: Use a small piece of fondant to create a decorative border around the base of the cake. Roll out a thin strip and gently attach it to the bottom, or use a silicone mold for a textured pattern. This will frame the cake beautifully and add a touch of elegance.
- Piped frosting borders: If you prefer frosting over fondant, use a piping bag with a star tip to pipe a decorative buttercream border along the top and bottom edges. You can add color or use contrasting colors to match the theme, like white or pink to complement the blue fondant.
3. Adding Cake Toppers
- Custom cake toppers: To make your cake extra special, consider adding Bluey-themed cake toppers like Bluey, Bingo, or other characters from the show. These can be fondant figurines you’ve made yourself or pre-made toppers available from baking stores.
- Edible images or printed designs: If you’re short on time or need a simpler option, you can purchase or print edible images of Bluey and place them on the top of the cake. These can be printed using edible ink on sugar sheets and placed directly on the cake, giving it a polished look.
4. Final Flourishes
- Sprinkles and edible glitter: To give your Bluey cake some sparkle, gently sprinkle some edible glitter or colored sprinkles on top. These additions can catch the light and create a festive, fun vibe, perfect for a child’s birthday party.
- Cake topper message: A sweet birthday message written with piping gel or colored frosting can add a personal touch. For example, you can write “Happy Birthday” or the birthday child’s name in vibrant colors that match the Bluey theme.
5. Presenting the Cake
- Cake board or stand: To elevate the overall look, present your cake on a decorative cake board or a cake stand. A simple white or colored board can make a world of difference by adding a polished, professional touch.
- Party setting: Ensure that your cake is placed in an area with good lighting, such as near a window or under soft party lights. A well-lit cake will allow all the intricate details, like Bluey’s face, to stand out, and it will be a perfect photo opportunity.
By paying attention to these final details, you can transform your Bluey cake into a work of art that looks as good as it tastes. These finishing touches not only enhance the overall aesthetic but also add a personal and fun flair to the cake, making it an unforgettable part of the birthday celebration!
Tips and Tricks for a Perfect Bluey Cake
Making Your Bluey Cake in Advance
Making your Bluey cake ahead of time can save you a lot of stress and allow you to focus on other aspects of the party, like decorations and fun activities. Proper planning is key to ensuring your cake not only looks great but stays fresh and maintains its shape. Here’s how you can prepare and store your Bluey cake in advance without compromising on quality:
1. Baking the Cake Layers Ahead of Time
Start by baking the cake layers at least one or two days before the event. Once baked, allow them to cool completely, then wrap each layer tightly in plastic wrap. This prevents the cake from drying out and helps it stay fresh. You can store the wrapped layers at room temperature for up to 2 days, or freeze them for longer storage.
2. Preparing the Fondant Decorations
Fondant can be made ahead of time and stored properly, so you don’t have to worry about doing everything at once. If you’re creating Bluey’s face, ears, or other details, you can roll out and cut the fondant decorations in advance. Simply let them air dry so they firm up and hold their shape. Store them in an airtight container or wrap them gently in plastic wrap to prevent them from drying out further.
3. Assembling the Cake the Night Before
To save time on the day of the party, you can assemble the cake the night before. Begin by frosting the cooled cake layers with buttercream or ganache, creating a smooth base for the fondant. Once the layers are stacked, refrigerate the cake overnight to set the frosting. This will ensure that the cake is stable and easy to decorate. On the day of the event, you can focus on applying the fondant and final details.
4. Storing the Decorated Cake
After decorating your Bluey cake with fondant, store it in a cool, dry place. If the weather is hot, it’s best to store the cake in the fridge to prevent the fondant from becoming soft or melting. However, if you’re using buttercream decorations or edible images, these can be more sensitive to refrigeration, so it’s best to keep the cake at room temperature. For extra protection, cover the cake loosely with a cake dome or place it in a large box to prevent dust or debris from settling on it.
5. Final Touches and Serving
When you’re ready to serve the cake, give it a little time to come to room temperature if it’s been refrigerated. This helps to maintain the texture and taste of the cake. Add any final touches, such as sprinkles or extra fondant details, just before serving to make sure everything looks fresh.
By following these steps, you’ll have a Bluey cake that’s prepared ahead of time and ready for the party without any last-minute stress. It’s all about timing and proper storage to ensure that your cake is both beautiful and delicious when the big day arrives!
Troubleshooting Common Bluey Cake Issues
Creating a Bluey cake for your child’s birthday is a fun and rewarding experience, but like any cake decorating project, there can be a few challenges along the way. Don’t worry! Below are some common issues that may arise when making a Bluey cake, along with helpful solutions to ensure your cake turns out picture-perfect.
1. Fondant Cracking or Drying Out
Issue: One of the most common problems with fondant is it cracking or becoming too dry, especially when you’re rolling it out or covering the cake.
Solution:
- Hydrate your fondant: If the fondant feels too dry, knead in a small amount of water or vegetable shortening to bring it back to a smooth, pliable consistency. Be careful not to add too much moisture at once, as it can make the fondant too sticky.
- Proper storage: If you’re not using the fondant right away, wrap it tightly in plastic wrap and store it in an airtight container to prevent it from drying out.
- Work in sections: When covering the cake, work in small sections and apply a thin layer of shortening on the cake before placing the fondant, which helps it stick better and prevents cracking.
2. Uneven Cake Layers
Issue: Your cake layers may not be evenly baked, resulting in an uneven base when it comes time to stack and decorate the cake.
Solution:
- Level the cake: Use a serrated knife or cake leveler to gently trim off the domed tops of your cake layers, ensuring they are flat and even. This will create a more stable base for stacking.
- Even baking: To avoid domed tops, use a cake strip (a damp cloth wrapped around the pan) or bake the cake at a lower temperature for a longer time. This helps the cake rise evenly without creating a dome.
3. Fondant Won’t Stick or Tear
Issue: Sometimes fondant doesn’t stick properly to the cake, or it can tear while you’re trying to smooth it out over the cake layers.
Solution:
- Use a crumb coat: Before covering the cake with fondant, spread a thin layer of buttercream or ganache (called a crumb coat). This will help the fondant adhere properly and also seal in any crumbs.
- Keep the fondant smooth: When applying the fondant, ensure it’s rolled out evenly and thinly. Too thick a layer can cause it to tear or look bulky. You can use a rolling pin to gently smooth out any tears or imperfections.
4. Bluey Character Details Not Looking Right
Issue: Sometimes the intricate details of Bluey’s face or body can be hard to replicate, especially when using fondant, and they might not look as polished as you imagined.
Solution:
- Use edible markers: To create fine details, such as Bluey’s eyes, mouth, or any small features, use edible food markers. They allow you to draw on fondant with precision, especially when the fondant details are too small to cut out.
- Print and transfer designs: If you’re worried about freehand drawing, print out an image of Bluey’s face and trace it onto the fondant. You can use a toothpick or edible pen to transfer the design, then fill it in with colored fondant.
- Practice with stencils: If freehanding is too difficult, consider using a stencil or fondant molds for creating specific shapes and designs.
5. Frosting Issues
Issue: Sometimes frosting can become too thick, too thin, or even too runny, leading to uneven layers or difficult application.
Solution:
- Adjust frosting consistency: If your frosting is too thick, add a small amount of milk or water to achieve the right spreadable consistency. If it’s too runny, add powdered sugar in small amounts until it thickens up.
- Chill the cake: After applying the first layer of frosting, refrigerate the cake for about 30 minutes to set the base. This helps the frosting firm up, making it easier to apply subsequent layers of fondant without disturbing the base layer.
6. Cake Sinking or Collapsing
Issue: The cake may start to sink or collapse after being decorated, especially if it’s too moist or the layers are too heavy.
Solution:
- Stabilize the layers: To ensure your cake stays stable, consider using dowels or straws in the center of the cake to help support the layers. If you’re stacking multiple tiers, this is especially important.
- Don’t overfill the cake: While it’s tempting to load up your cake with tons of filling or frosting, too much weight can cause the layers to collapse. Be sure to balance the amount of filling with the size of the layers to prevent this.
By troubleshooting these common Bluey cake issues, you can create a smooth and flawless design that will impress at your child’s birthday party. With a little patience and some practice, your Bluey cake will be the star of the celebration, looking just as good as it tastes!
Personalizing Your Bluey Cake for the Birthday Child
Personalizing your Bluey cake is a great way to make the celebration extra special for the birthday child. While the overall theme may be Bluey, there are many creative ways to incorporate the child’s personality, preferences, or favorite characters into the cake design. Here are several ideas for personalizing your Bluey cake:
1. Incorporate the Birthday Child’s Favorite Character
One of the best ways to personalize the cake is by focusing on the child’s favorite Bluey character. Whether they love Bluey, her sister Bingo, or the parents Bandit and Chilli, featuring the character that resonates most with the child will make the cake feel uniquely theirs. For example:
- Bluey Cake Design: Use fondant or edible markers to create Bluey’s signature face as the centerpiece of the cake. You could also have a 3D figure of Bluey standing on top.
- Bingo or Bandit: If the child prefers Bingo or Bandit, include them as secondary characters either as a part of the cake design or in a more subtle way with smaller fondant figures.
2. Use the Child’s Favorite Colors or Themes
Beyond the character, incorporating the birthday child’s favorite colors or other interests can make the cake feel personal. For example:
- Color Themes: While Bluey’s signature blue is a great starting point, adding accents in the child’s favorite colors like pink, green, or yellow can give the cake a more custom feel.
- Themed Decorations: You could also tie in other interests of the child, such as animals, nature, or even specific birthday themes. For instance, if the child loves nature, you could add fondant flowers, trees, or a small edible garden scene around Bluey.
3. Add a Personal Message or Name
Personalizing the cake with the birthday child’s name or a special message is another thoughtful touch. You can:
- Write the Name: Pipe the child’s name in a fun font on top of the cake, using colorful buttercream frosting or fondant letters.
- Birthday Message: Add a personal birthday message like “Happy Birthday [Child’s Name]!” in a playful or elegant font, which will make the cake feel even more special.
4. Highlight the Child’s Interests Beyond Bluey
If the birthday child enjoys more than just Bluey, integrating their other interests into the cake can make it even more tailored. For example:
- If the child loves cartoons in general, you could mix in other favorite characters alongside Bluey.
- For kids who are into sports, music, or superheroes, you can incorporate those themes alongside Bluey by using custom toppers or fondant designs that represent their favorite hobbies.
5. Interactive Elements
To make the cake more engaging for the child and their guests, consider adding some interactive elements to the design:
- Fondant Details: Create little details that the child can help add, like placing edible decorations or stickers onto the cake themselves.
- Toppers: If the child has a favorite Bluey toy or figurine, you can place it as a cake topper to create a fun, interactive scene that they can keep after the party.
6. Customize the Cake Flavor
While the appearance of the cake is important, the flavor can also be personalized to reflect the child’s preferences:
- Favorite Flavor: If the birthday child loves a particular flavor, whether it’s vanilla, chocolate, or something unique like strawberry or lemon, you can choose a flavor that best suits their taste.
- Special Additions: You could include their favorite fillings, like chocolate ganache, fruit fillings, or even sprinkles inside the cake to surprise them when they cut into it.
By personalizing your Bluey cake in these thoughtful ways, you’ll create a truly special treat that not only looks amazing but also makes the birthday child feel incredibly valued and celebrated. These custom touches turn a simple Bluey cake into a unique masterpiece that reflects their individuality and makes their birthday even more memorable!
Conclusion
Creating the perfect Bluey cake for your child’s birthday is an exciting and rewarding experience. By following the step-by-step guide, you’ll be able to bring this beloved character to life in a way that’s both delicious and visually stunning. Personalizing your cake with the child’s favorite flavors, colors, and characters makes it even more special, ensuring that the birthday celebration is truly one-of-a-kind.
Whether you choose to add 3D fondant figures, write a personal message, or incorporate other fun elements, the key is to make the cake a reflection of the child’s personality and interests. A well-designed Bluey cake is more than just a treat; it’s an unforgettable part of the birthday party that everyone will remember.
So, get your baking tools ready and enjoy the process of creating the perfect Bluey cake that will make your child’s celebration extra special. Don’t forget to take lots of pictures, as these memories will last a lifetime!