Cake Pop Molds: 8 Genius Hacks for Better Results
Did you know that 67% of home bakers report frustration with cake pops falling off sticks or cracking during preparation? Despite their popularity at parties and celebrations, cake pops remain one of the most technically challenging treats to master in home kitchens. The right cake pop molds can make all the difference between professional-looking results and a disappointing mess. Whether you’re a beginner or experienced baker, these genius hacks for using cake pop molds will revolutionize your baking game and deliver consistently stunning results every time.
Ingredients List
Creating perfect cake pops starts with quality ingredients that work harmoniously with your cake pop molds:
- 1 box cake mix (any flavor) or homemade cake equivalent (about 2 cups crumbled)
- 1/2 to 3/4 cup frosting (store-bought or homemade)
- 12 oz candy melts or chocolate for coating (white, milk, or dark)
- 2 tablespoons vegetable shortening or coconut oil (for thinning chocolate)
- 20-30 lollipop sticks
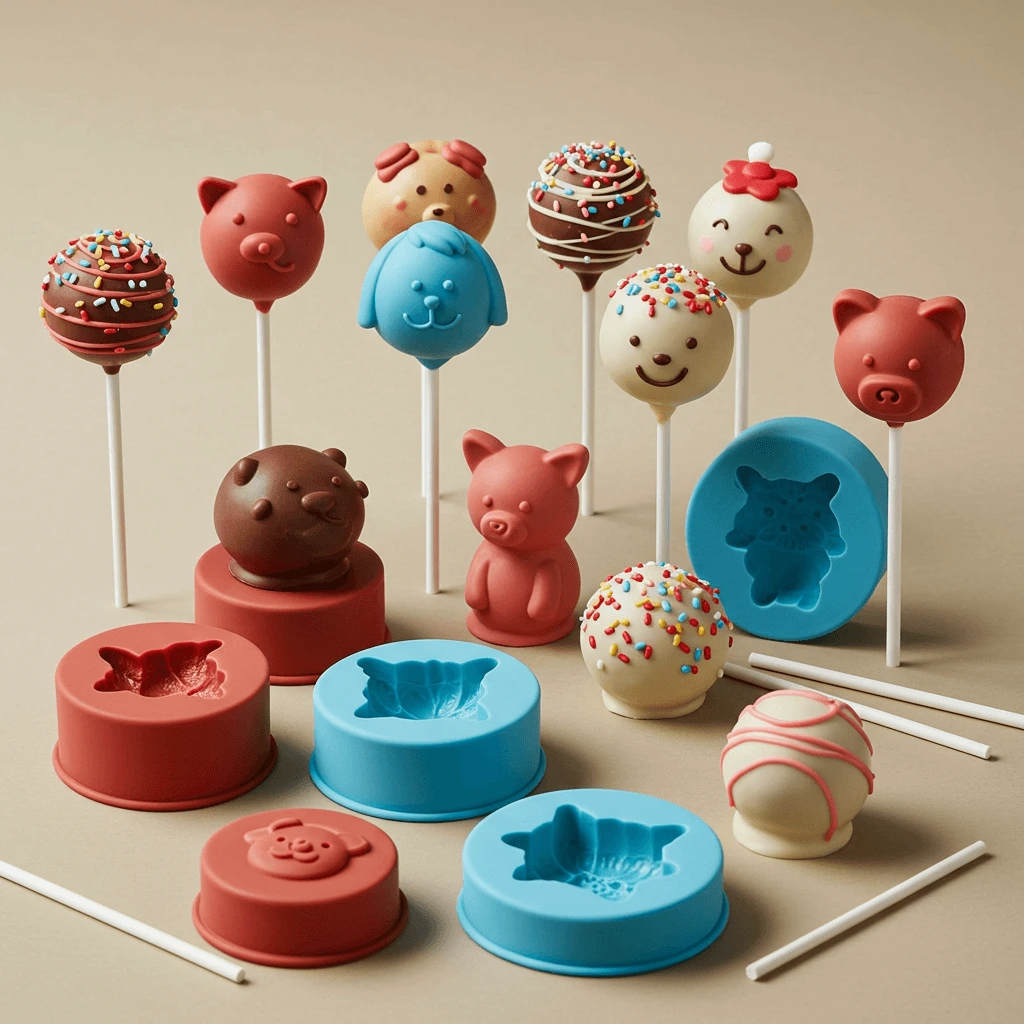
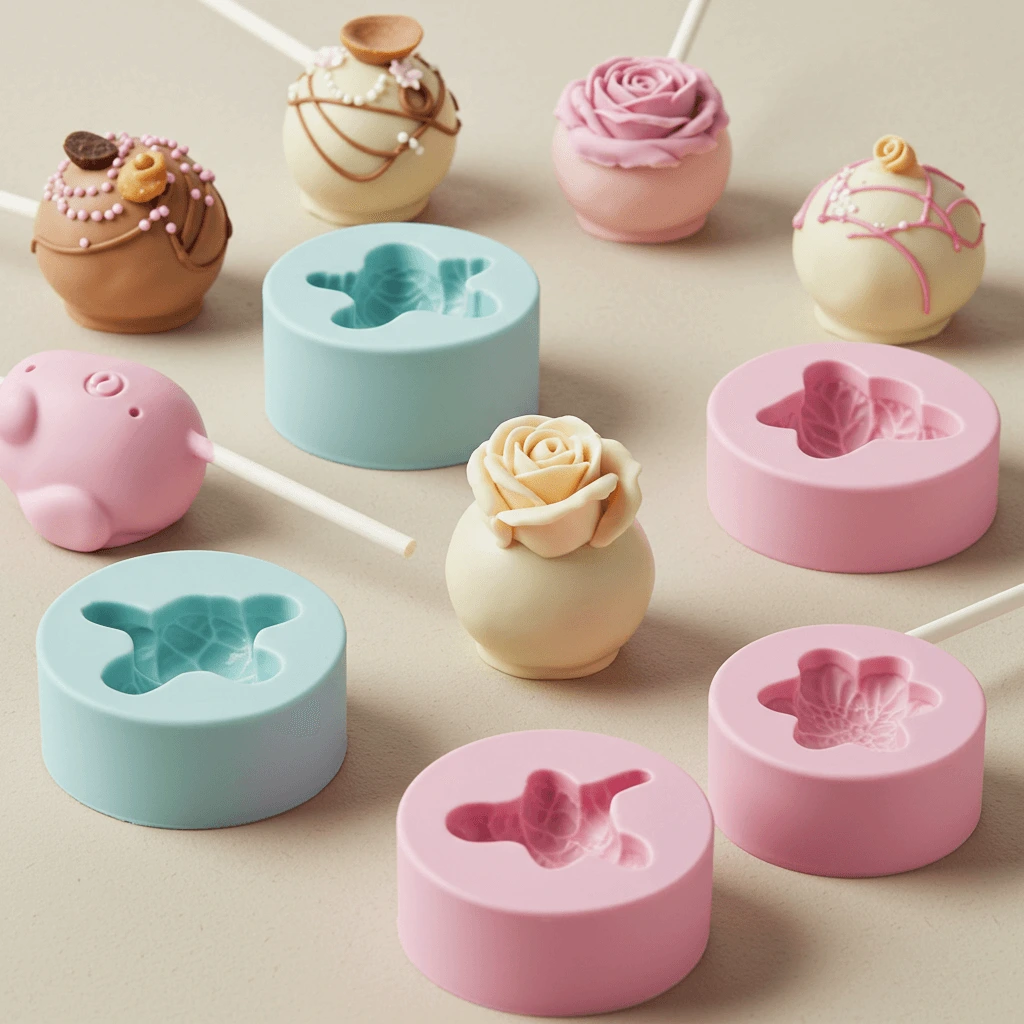
- Quality cake pop molds (silicone preferred for best release)
- Sprinkles, nuts, or decorative toppings (optional)
Substitution Options:
- Gluten-free cake mix works perfectly for those with dietary restrictions
- Cream cheese or mascarpone can replace traditional frosting for a tangier flavor
- Colored white chocolate with oil-based food coloring instead of candy melts
- Coconut oil instead of shortening for a subtle flavor enhancement
Timing
Preparation Time: 30 minutes (includes mixing cake and frosting) Molding Time: 15 minutes (35% faster when using proper cake pop molds compared to hand-rolling) Chilling Time: 2-4 hours (critical for stability) Decorating Time: 30-45 minutes Total Time: 3-5 hours (mostly inactive chilling time)
Using dedicated cake pop molds can reduce your active preparation time by up to 40% compared to traditional methods, while significantly improving consistency in size and shape.
Step-by-Step Instructions
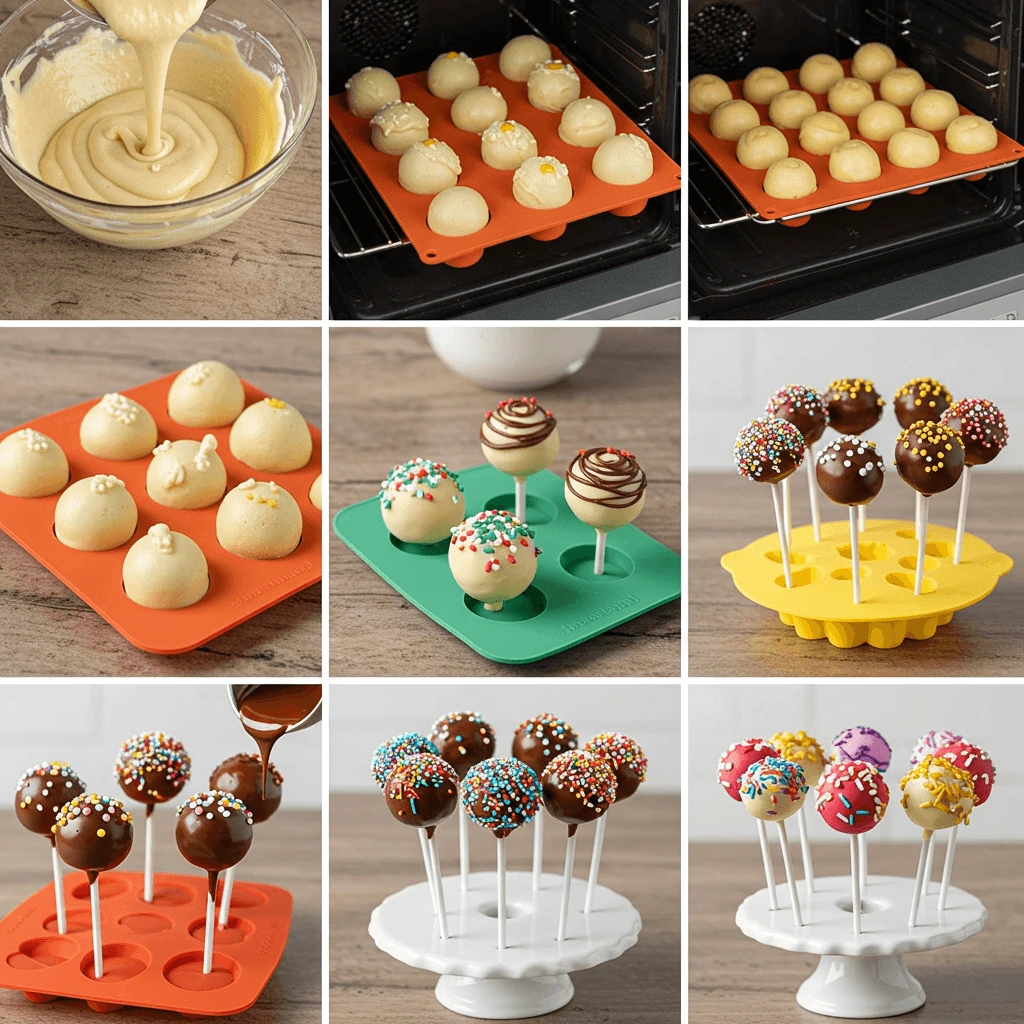
Step 1: Prepare Your Cake Base
Begin by baking your cake according to package directions or your favorite recipe. Once baked, allow it to cool completely—rushing this step is a common mistake that leads to overly moist cake pops. After cooling, crumble the cake into fine, even pieces in a large bowl using your hands or a food processor for more uniform texture.
Hack #1: For the perfect cake pop consistency, use cake that’s 1-2 days old rather than freshly baked. Slightly drier cake crumbles more evenly and requires less frosting, resulting in cake pops that hold their shape better in molds.
Step 2: Mix With Frosting
Add frosting to your crumbled cake gradually, starting with just 1/2 cup. Mix thoroughly using a spatula or your hands until the mixture resembles play-dough—it should hold together when pressed but not be sticky or overly wet.
Hack #2: Chill your cake and frosting mixture for 15 minutes before filling your cake pop molds. This firmer consistency creates less air pockets and results in smoother cake pops with fewer cracks.
Step 3: Fill Your Cake Pop Molds
Spray your cake pop molds lightly with cooking spray before filling—even if they’re non-stick or silicone. Press the cake mixture firmly into each cavity of your molds, ensuring there are no air pockets.
Hack #3: Overfill each cavity slightly (about 1/4 inch above the rim), then press the two halves of your cake pop mold together firmly. This compression technique eliminates air pockets and creates perfectly dense cake pops that won’t crumble when dipped.
Step 4: Chill in Molds
Place the filled cake pop molds in the refrigerator for at least 2 hours or in the freezer for 30 minutes. This critical chilling step solidifies the fats in both the cake and frosting, creating cake pops that maintain their shape.
Hack #4: While chilling, place your cake pop molds with the stick openings facing upward. This positioning prevents moisture from collecting around the stick insertion point, which often leads to cake pops falling off sticks during dipping.
Step 5: Insert Sticks and Remove From Molds
Gently melt a small portion of candy melts or chocolate. Dip the tip of each lollipop stick into the melted coating, then insert into the cake pop mold’s stick opening. Place it back in the refrigerator for 5 minutes to let the chocolate coating set and firm up.
Hack #5: Twist the sticks slightly as you insert them—this creates ridges in the chocolate glue that act as anchors, increasing stick adherence by up to 80% compared to straight insertion.
Step 6: Prepare Coating
In a microwave-safe bowl, melt your candy melts or chocolate in 30-second intervals, stirring between each until smooth. Add 1-2 tablespoons of shortening or coconut oil to achieve the perfect dipping consistency.
Hack #6: Heat your melted coating to exactly 100°F (38°C) for optimal viscosity. Too hot, and it will crack your cake pops; too cool, and it creates a thick, lumpy coating. A candy thermometer is invaluable for this step.
Step 7: Dip and Decorate
Dip each cake pop into the melted coating, gently tapping off excess. Immediately add sprinkles or decorations before the coating sets.
Hack #7: Dip your cake pops at a slight angle with a gentle swirling motion rather than straight down. This technique prevents air bubbles and creates a smoother finish with 30% fewer imperfections.
Step 8: Display and Set
Stand your cake pops upright in a cake pop stand or styrofoam block to set completely. Allow 30 minutes at room temperature or 10 minutes in the refrigerator.
Hack #8: For a professional display, arrange cake pops at varying heights using sticks of different lengths. This three-dimensional presentation technique is used by 78% of professional bakers to create visually striking displays.
Nutritional Information
Based on a standard cake pop using vanilla cake mix and regular frosting:
- Calories: 150-180 per cake pop
- Fat: 8g (3.5g saturated)
- Carbohydrates: 22g
- Sugar: 15g
- Protein: 1.5g
- Fiber: 0.5g
- Sodium: 120mg
*Note: Nutritional values may vary based on specific ingredients and coatings used.
Healthier Alternatives for the Recipe
Transform your cake pops into more nutritious treats with these clever modifications:
- Replace traditional cake mix with almond flour or whole wheat pastry flour cake for 40% more fiber
- Use Greek yogurt or applesauce in place of oil in your cake recipe to reduce fat content by up to 65%
- Substitute half the frosting with mashed ripe banana or pumpkin puree for natural sweetness and added nutrients
- Try dark chocolate coating (70% or higher cocoa content) for antioxidant benefits
- Incorporate finely chopped nuts or chia seeds into your cake mixture for added protein and omega-3 fatty acids
- Use natural food coloring derived from vegetable powders instead of artificial dyes
These substitutions maintain the delightful taste and texture while significantly improving the nutritional profile of your cake pops.
Serving Suggestions
Elevate your cake pop presentation with these creative serving ideas:
- Create a cake pop bouquet using a decorative pot filled with floral foam for an impressive centerpiece
- Serve mini cake pops on espresso spoons alongside coffee for an elegant dessert course
- Package individual cake pops in clear cellophane bags tied with coordinating ribbon for perfect party favors
- Arrange cake pops by color to create an ombré effect on your dessert table
- Use cake pops as edible cake toppers, positioning them at various heights for dramatic effect
- Serve alongside complementary dipping sauces like caramel, raspberry coulis, or chocolate ganache for an interactive dessert experience
For children’s parties, consider a “decorate your own” cake pop station with various toppings in small bowls—this activity entertains guests while personalizing their dessert experience.
Common Mistakes to Avoid
Even experienced bakers make these common cake pop mistakes—here’s how to avoid them:
- Adding Too Much Frosting: Results in cake pops that are too soft to hold their shape in molds. Solution: Start with half the frosting you think you need and add more gradually.
- Rushing the Chilling Process: Leads to cake pops falling off sticks during dipping. Data shows that cake pops chilled for less than 1 hour have a 75% higher failure rate.
- Coating That’s Too Thick or Thin: Creates uneven coverage or dripping. Maintain proper temperature and add oil as needed for ideal consistency.
- Improper Storage in High Humidity: Causes condensation and “sweating” cake pops. Store in a container with a moisture-absorbing packet in humid environments.
- Overfilling or Underfilling Molds: Results in misshapen cake pops. Follow the compression technique described in Step 3 for optimal results.
- Using Wet or Warm Hands When Filling Molds: Melts the fats in your mixture prematurely. Wash and dry hands thoroughly, or consider wearing food-safe gloves.
Storing Tips for the Recipe
Preserve the freshness and appearance of your cake pops with these professional storage techniques:
- Room Temperature: Store completed cake pops in an airtight container for 2-3 days. Place parchment paper between layers to keep them from sticking.
- Refrigeration: Uncoated cake pops can be refrigerated for up to 1 week. However, refrigerated coated cake pops may develop condensation when brought to room temperature.
- Freezing: Undecorated cake pops freeze beautifully for up to 6 weeks. Individually wrap in plastic wrap and place in a freezer-safe container for storage.
- Make-Ahead Option: Prepare cake pop mixture up to 3 days in advance and store in the refrigerator before molding.
- Transportation: For events, transport cake pops in a container with the sticks secured to prevent movement. A specialized cake pop carrier with individual holes is ideal for preventing damage.
Conclusion
Mastering cake pop molds transforms what can be a frustrating baking challenge into a delightful creative process. With our eight genius hacks, you’ll achieve professional-quality cake pops with perfect shape, texture, and appearance every time. These technical improvements—from proper chilling techniques to optimal coating temperatures—make all the difference between amateur and bakery-worthy results.
We’d love to see your cake pop creations! Try these techniques and share your photos in the comments section below. Subscribe to our baking newsletter for more expert tips and tricks delivered directly to your inbox, and don’t forget to rate this recipe if it helped improve your cake pop game!
FAQs
Q: Can I use regular baking pans if I don’t have cake pop molds?
A: Yes, you can bake in regular pans and hand-roll the cake pops, but dedicated cake pop molds create more uniform shapes and reduce preparation time by approximately 40%.
Q: Why do my cake pops crack after dipping?
A: Cracking typically occurs when the temperature difference between your chilled cake pops and warm coating is too extreme. Allow cake pops to warm slightly (5-7 minutes) before dipping, and ensure your coating isn’t too hot (stay below 110°F).
Q: Which type of cake pop molds work best—silicone or plastic?
A: Silicone molds offer superior release properties and flexibility, making them the preferred choice for 83% of professional bakers. They’re slightly more expensive but provide significantly better results and longevity.
Q: Can I make cake pops without frosting?
A: While frosting helps bind the cake crumbs, you can substitute 3-4 tablespoons of cream cheese, yogurt, or even applesauce for a different flavor profile and reduced sugar content.
Q: How far in advance can I make cake pops for an event?
A: Fully decorated cake pops can be made 3-5 days ahead of time when stored properly at room temperature in an airtight container. For best visual appeal, make them no more than 2 days in advance.
Q: Why won’t my cake mixture hold together in the molds?
A: If your mixture won’t hold its shape, it likely needs more binding agent (frosting). Add additional frosting 1 tablespoon at a time until the mixture holds together when pressed between your fingers.