How to Make a Show-Stopping Graduation Cake: Tips and Tutorials
Table of Contents
Graduation is a significant milestone, representing years of effort, commitment, and accomplishment. Whether it’s a high school, college, or even kindergarten graduation, a beautifully designed graduation cake is the perfect way to celebrate this special milestone. A standout cake not only serves as a delicious centerpiece but also adds a personal touch to the celebration.
From unique designs to creative decorations and mouthwatering flavors, crafting the perfect graduation cake requires thoughtful planning. Whether you’re a professional baker or a DIY enthusiast looking to make something special for a loved one, this guide will walk you through everything you need to know. Get ready to explore cake design ideas, decoration techniques, and expert tips to create a graduation cake that truly stands out!
Choosing the Perfect Cake Design
Reflecting the Graduate’s Personality and Achievements
One of the best ways to make a graduation cake stand out is to personalize it to reflect the graduate’s unique journey, personality, and accomplishments. A customized cake not only adds sentimental value but also makes the celebration even more special. Here are some creative ways to incorporate the graduate’s personality and achievements into the cake design:
1. Showcasing Academic Achievements
If the graduate has excelled in a particular subject, participated in academic competitions, or earned special honors, you can highlight these accomplishments on the cake. Consider using:
- Diploma scrolls and books: Edible fondant decorations or printed edible images of textbooks related to the graduate’s field of study.
- Honor cords and medals: Piping or fondant details to resemble graduation cords, medals, or awards.
- GPA or degree title: Adding text such as “Summa Cum Laude” or “Class of 2025 – Computer Science” to personalize the cake.
2. Incorporating School Spirit
A cake that features elements from the graduate’s school creates a strong connection to their academic journey. Some ideas include:
- School colors: Using buttercream, fondant, or edible decorations in the colors of the graduate’s school.
- Mascot or logo: Printing an edible image of the school’s mascot or logo on the cake.
- Graduation year: Boldly displaying “Class of [Year]” on the top or side of the cake.
3. Highlighting Future Goals and Career Aspirations
If the graduate is heading into a specific career field, their cake can symbolize their future path. Ideas include:
- Medical school graduates: A cake featuring a stethoscope, medical books, or a white coat.
- Engineering or science students: A cake with gears, equations, or lab equipment decorations.
- Artists or designers: A cake with paint splashes, brushes, or a mini fondant palette.
- Athletes: A cake decorated with sports equipment, jerseys, or a stadium theme.
4. Celebrating Hobbies and Passions
Beyond academics, the cake can also reflect the graduate’s passions and extracurricular activities. Whether they love music, travel, gaming, or photography, incorporating these elements can make the cake even more meaningful. Some creative ideas:
- Music lovers: Fondant musical notes, a mini piano, or a record player design.
- Travel enthusiasts: A suitcase-shaped cake, world map decorations, or edible passport stamps.
- Gamers: A cake shaped like a gaming console or decorated with video game-inspired elements.
5. Personalizing with Photos and Messages
Adding personal touches like edible images, heartfelt messages, or inside jokes can make the cake even more special. Consider:
- Edible photo prints: A collage of their favorite moments from school or graduation day.
- Custom messages: Writing a meaningful quote, inside joke, or words of encouragement on the cake.
- Handwritten notes: Using edible markers to mimic a personal message from loved ones.
Final Touches
A cake that reflects the graduate’s journey not only makes the celebration more memorable but also serves as a symbol of their hard work and future success. By incorporating elements that showcase their personality, achievements, and aspirations, you can create a truly one-of-a-kind graduation cake that will leave a lasting impression.
Selecting a Theme
Choosing the right theme for a graduation cake is key to making it stand out. A well-thought-out theme not only makes the cake visually appealing but also adds a personal touch that reflects the graduate’s journey and achievements. Whether you’re going for something classic, modern, or completely unique, here are a few creative ways to select the perfect theme
1. School Colors and Logo
One of the most popular ways to theme a graduation cake is by incorporating the graduate’s school colors and logo. This simple yet effective design choice instantly makes the cake feel personalized.
- Use fondant or edible food coloring to match the cake’s decorations to the school’s official colors.
- Consider creating a printed edible image of the school logo to place on the cake.
- Accent the cake with elements like ribbons, sprinkles, or piped frosting in coordinating colors.
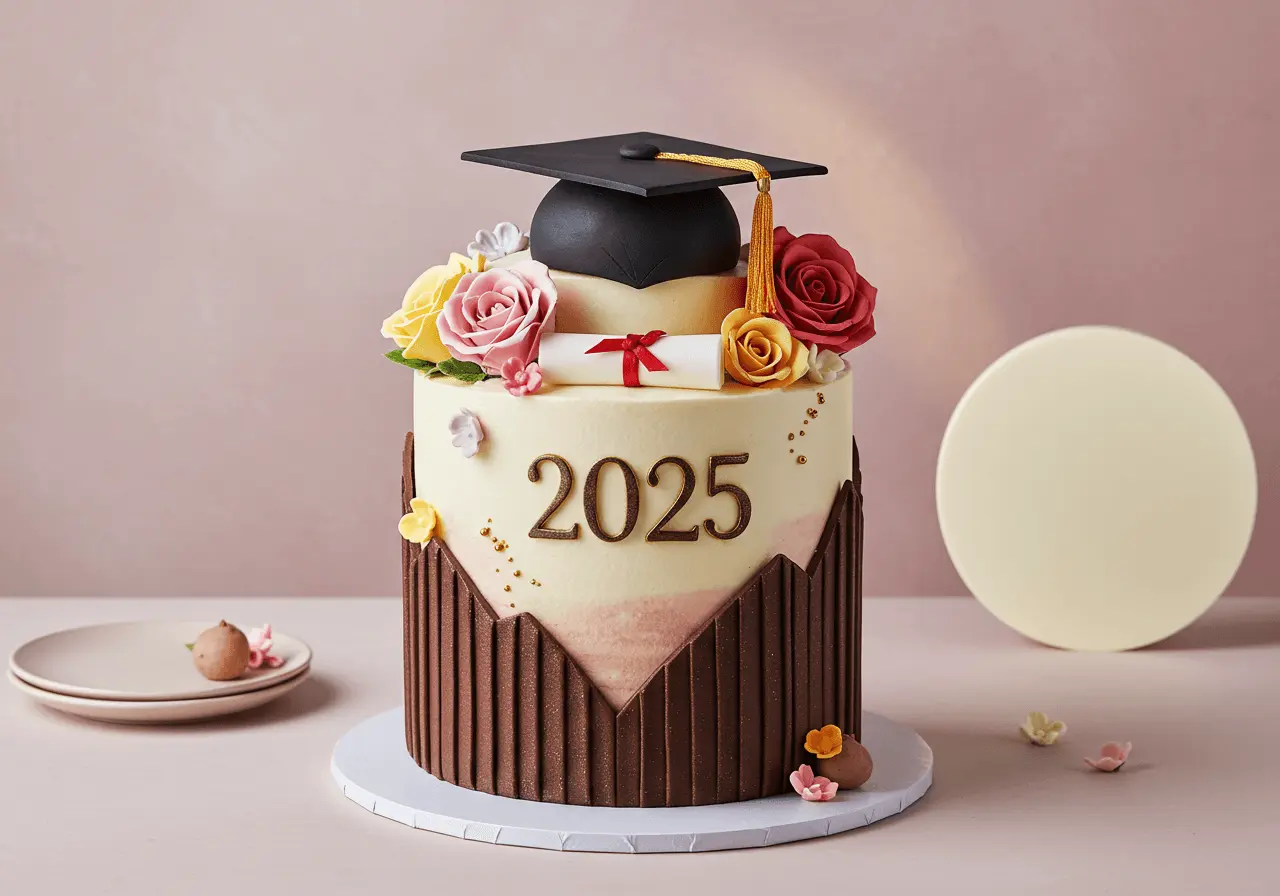
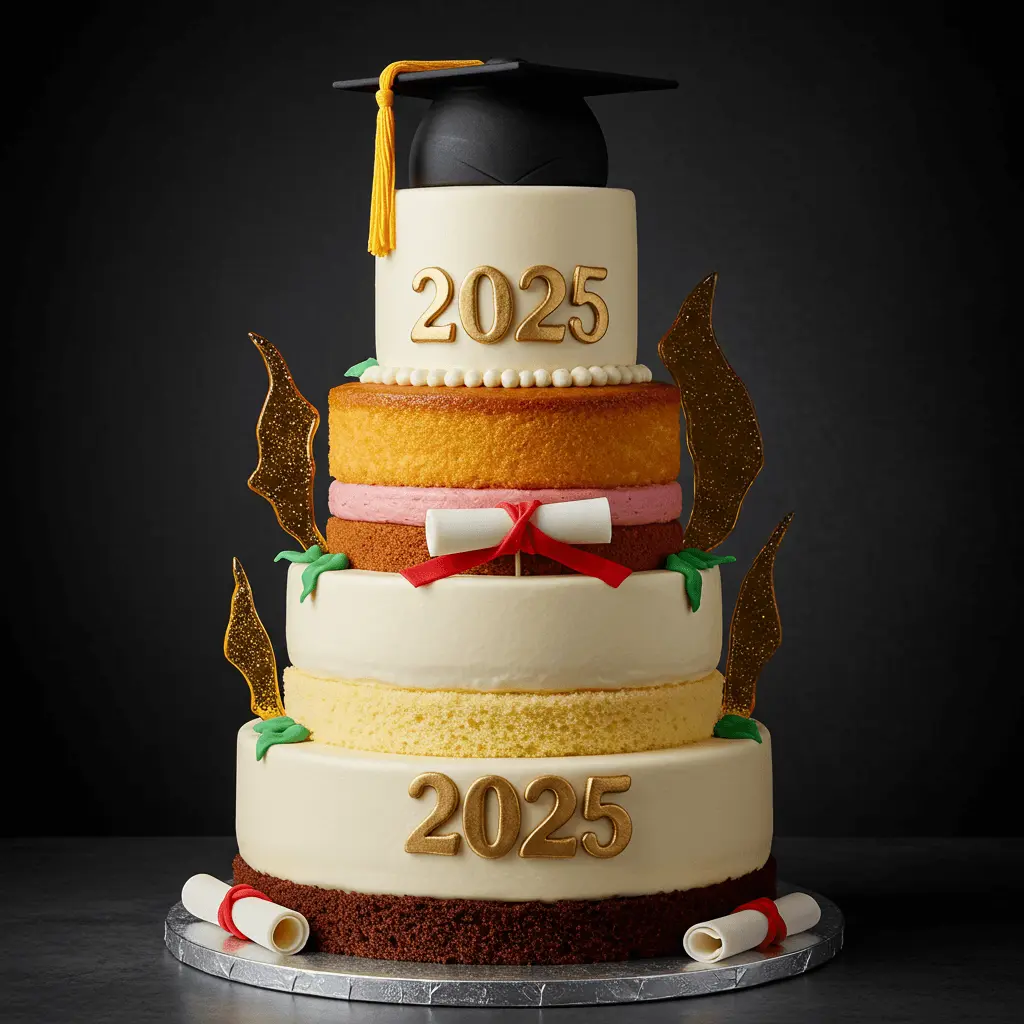
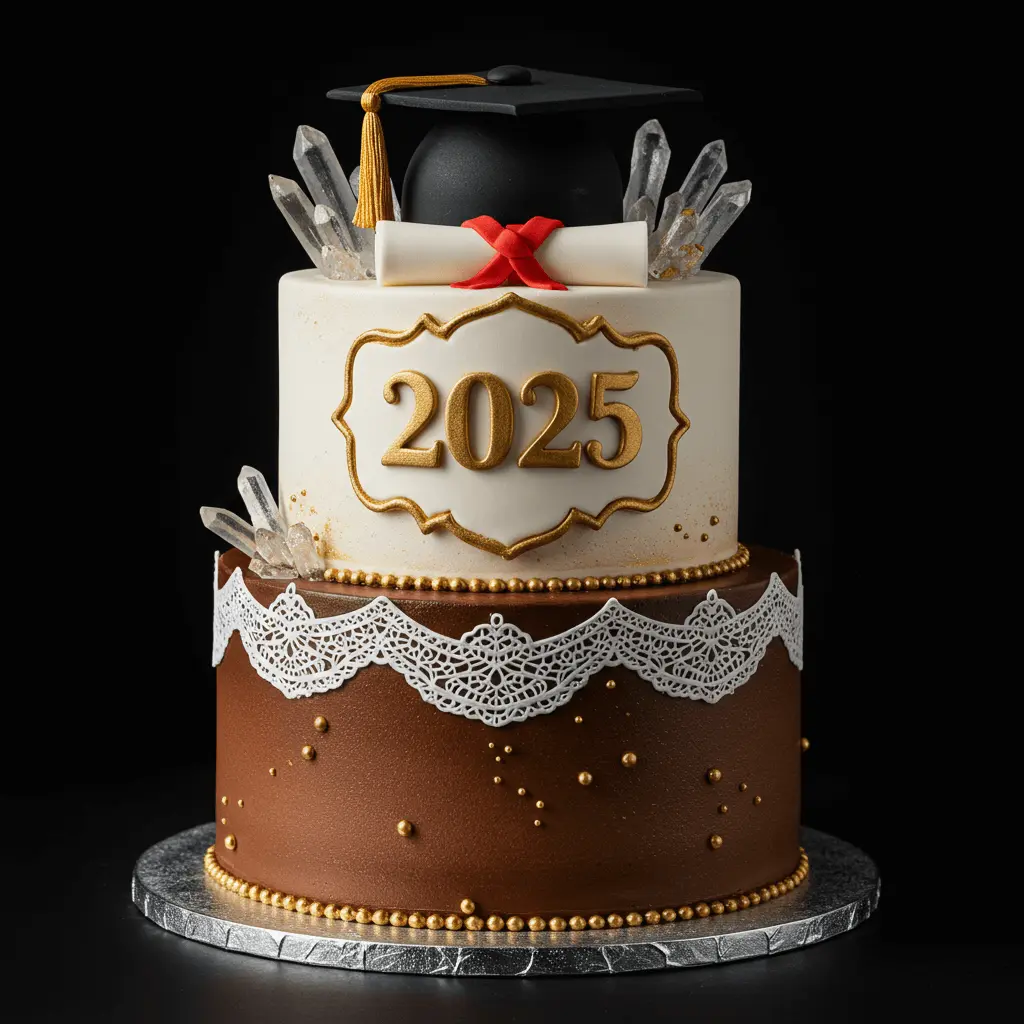
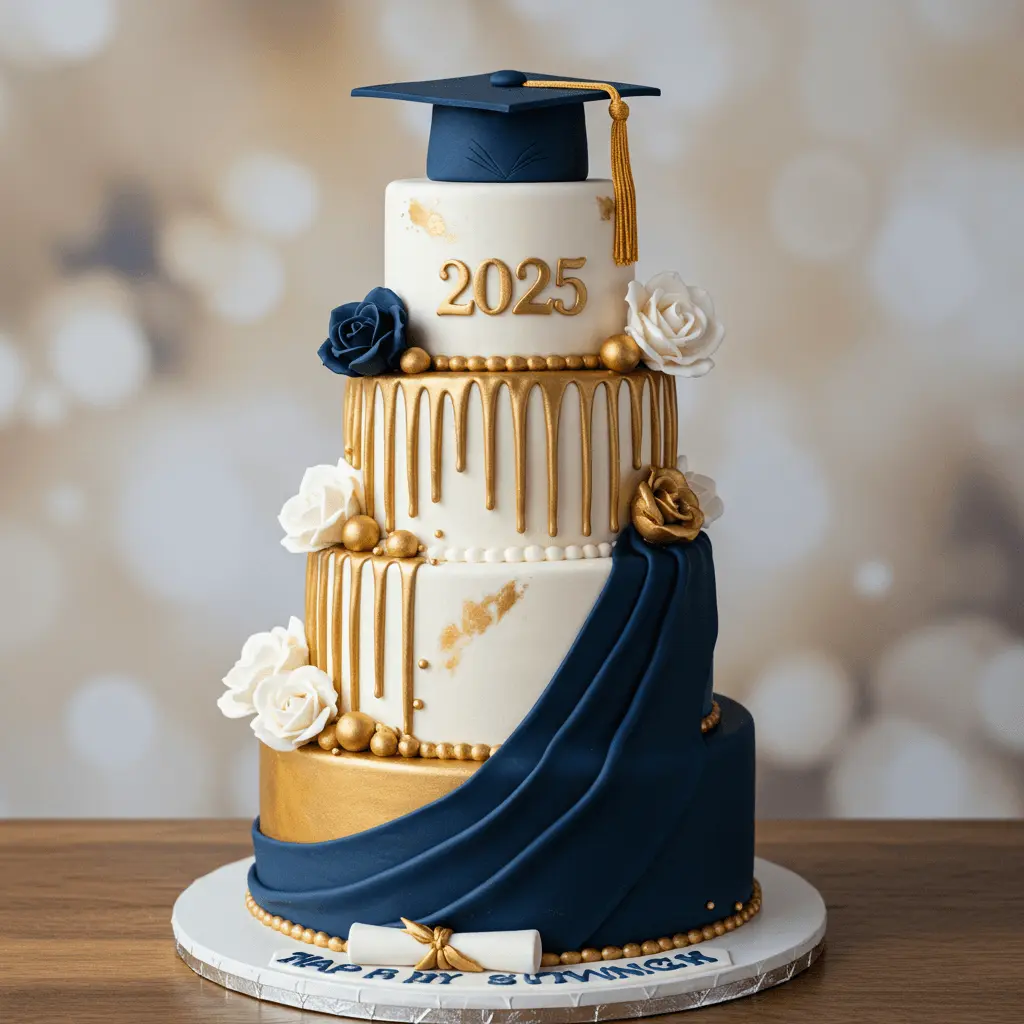
2. Graduation Cap and Diploma Theme
A classic graduation cake theme revolves around the most recognizable symbols of graduation—the cap (mortarboard) and diploma. These elements can be created with fondant, chocolate, or edible paper to give the cake a scholarly and celebratory feel.
- A single-tier cake can feature a fondant or molded chocolate graduation cap on top.
- Multi-tier cakes can incorporate a diploma scroll design wrapped around one of the tiers.
- Use gold or silver edible accents to give the cake an elegant and festive look.
3. Career or Future Aspirations Theme
For graduates heading into a specific career field, why not theme the cake around their future profession? This is a fun and meaningful way to celebrate their achievements and dreams.
- A law graduate’s cake could feature a gavel and scales of justice.
- A medical school graduate’s cake might include edible stethoscopes, syringes, or a heartbeat pattern.
- A computer science graduate’s cake could feature coding elements or a laptop design.
4. Personal Interests and Hobbies
If the graduate has a strong passion outside of their academic achievements, incorporating their hobbies or favorite activities into the cake design can make it even more special.
- A music-loving graduate might appreciate a cake decorated with edible musical notes or an instrument.
- A sports enthusiast’s cake could showcase a miniature edible version of a football, basketball, or baseball.
- A bookworm’s cake could be stacked to resemble a pile of books with their favorite titles written on them.
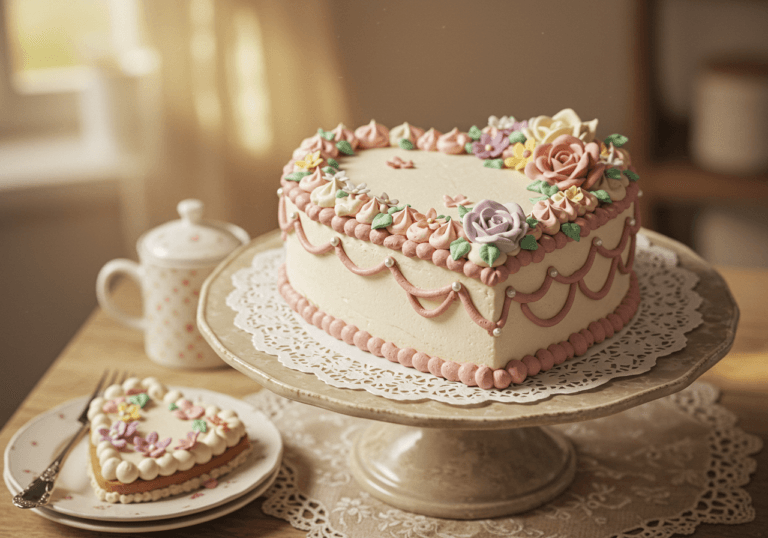
5. Minimalist and Elegant Theme
For a sophisticated approach, a minimalist yet elegant design can be a showstopper. Sometimes, less is more, and a clean, simple cake with refined details can be just as striking as an elaborate one.
- Opt for a sleek, single-color buttercream finish with gold or silver accents.
- Decorate with fresh flowers that match the graduate’s school colors.
- Add a simple yet elegant “Congratulations” topper in a modern font.
Final Thoughts
No matter which theme you choose, the key is to ensure the cake reflects the graduate’s personality, achievements, and aspirations. By incorporating meaningful elements and creative designs, you can create a graduation cake that not only looks incredible but also adds an extra layer of joy to the celebration.
Considering Cake Shape and Structure
The shape and structure of a graduation cake play a crucial role in making it stand out. While traditional sheet cakes and round cakes are always popular choices, thinking outside the box can help create a unique and memorable dessert for the celebration. Here are some creative ideas and structural considerations to help you design the perfect graduation cake:
1. Traditional vs. Unique Cake Shapes
- Sheet Cakes: A classic choice for large gatherings, sheet cakes provide a spacious surface for detailed decorations, such as a diploma, graduation cap, or school logo.
- Round or Square Cakes: Single or multi-tiered round and square cakes offer a more elegant and sophisticated look, perfect for formal celebrations.
- Number Cakes: Shaping the cake into the graduate’s class year (e.g., “2025”) adds a personalized touch and serves as a great conversation piece.
- Graduation Cap Cake: A sculpted cake shaped like a graduation cap (mortarboard) is an iconic and fun way to celebrate academic success.
2. Multi-Tiered Cakes for a Grand Look
- For a more extravagant and eye-catching presentation, consider a tiered cake.
- Two-Tier Cake: A simple yet elegant option that allows for different flavors and decoration styles.
- Three-Tier Cake: Ideal for larger celebrations, allowing for elaborate designs and multiple themes.
- Use supporting dowels and cake boards between tiers to ensure stability, especially for transport.
3. Sculpted and 3D Cakes
- If you want to create a truly one-of-a-kind cake, consider sculpted or 3D designs.
- Stacked Books Cake: A cake shaped like stacked books with edible covers featuring the graduate’s favorite subjects or school name.
- Graduation Gown Cake: A cake sculpted to resemble a graduation robe, complete with fondant details.
- Diploma Scroll Cake: A rolled-up scroll design, made using fondant or modeling chocolate, makes for a creative and thematic dessert.
4. Stability and Structural Considerations
- Choosing the right cake base and support system is key to preventing collapse or damage.
- Dense cake layers (such as vanilla, chocolate, or pound cake) hold up better for sculpted designs compared to light and airy cakes.
- Use sturdy cake boards to support each tier, ensuring smooth stacking and transport.
- Chilling the cake before final assembly helps with stability and prevents shifting during decoration.
By selecting the right cake shape and structure, you can create a visually stunning and well-balanced graduation cake that not only looks impressive but also serves as a meaningful tribute to the graduate’s achievements.
Mastering Decoration Techniques
Working with Fondant and Buttercream
When it comes to creating a graduation cake that stands out, the choice of icing and decoration techniques is crucial. Fondant and buttercream are two of the most popular options, each offering unique advantages and possibilities for your cake design.
Fondant: Smooth Finish and Versatility
Fondant is a smooth, pliable icing made from sugar, water, and gelatin, which can be rolled out to cover a cake evenly, giving it a sleek, polished look. It’s the go-to choice for those looking to create intricate designs or sculpted decorations like graduation caps, diplomas, or even school mascots. Here are some helpful tips for working with fondant:
- Smooth and Polished Surface: Fondant can be tricky to work with, but with the right technique, you can achieve a flawless, professional finish. Start by rolling out the fondant on a clean, powdered surface to prevent sticking. Once it’s the desired thickness, gently drape it over your cake and smooth it out with a fondant smoother to remove air bubbles and wrinkles.
- Coloring Fondant: Fondant can easily be colored by kneading food coloring into it. To match the graduation colors or your school’s theme, simply add a few drops of gel food coloring and work it in until you achieve the desired hue. For vivid colors, be sure to use gel-based food colors, as they don’t alter the consistency of the fondant.
- Cutting and Shaping: Fondant allows you to create detailed decorations such as ribbons, flowers, or even small edible figures. You can use cookie cutters or molds to cut out precise shapes, or you can freehand delicate designs like lettering or intricate borders for a personalized touch.
Buttercream: Creamy Texture and Delicious Flavor
Buttercream is a rich and creamy icing made from butter, powdered sugar, and a splash of milk or cream. It’s known for its smooth texture and is easier to work with than fondant when it comes to spreading and piping. While it may not offer the same sleek finish as fondant, buttercream has its own charm and can be just as impressive. Here’s how you can work with buttercream effectively:
- Classic and Fluffy Finish: Buttercream is perfect for achieving a softer, more textured finish. You can create a rustic, semi-naked cake look or use it to pipe intricate flowers or borders. To achieve a smooth finish, use an offset spatula to spread the buttercream evenly over your cake. A bench scraper can help you achieve that perfect, clean edge.
- Piping Buttercream Designs: Buttercream is fantastic for piping flowers, swirls, rosettes, and even detailed writing. Using different piping tips, you can create unique textures that will make your cake stand out. For example, a petal tip can help you create beautiful floral designs, while a star tip works well for intricate borders.
- Flavors and Variations: One of the best things about buttercream is its versatility when it comes to flavor. You can enhance your buttercream by adding flavor extracts like vanilla, chocolate, or almond, or even mix in fruit purees, such as raspberry or lemon, for a more customized flavor. Buttercream can be easily tailored to complement the flavor of your cake, ensuring that your graduation cake not only looks good but tastes great too!
Combining Fondant and Buttercream
Many bakers choose to combine both fondant and buttercream to take advantage of the strengths of each medium. For instance, you can cover your cake in a smooth layer of fondant to give it that perfect, polished finish, while using buttercream to pipe intricate designs, floral accents, or even a personalized message. This combination of techniques allows you to enjoy the best of both worlds—fondant’s sleek, professional look and buttercream’s flavor and decorative versatility.
Tips for Success
- Avoiding Cracks: Fondant can crack if it’s too thick or applied in a hurry. Be sure to apply a thin layer of buttercream as a base to help the fondant stick and act as a barrier to prevent cracking.
- Room Temperature Storage: Both fondant and buttercream work best when kept at room temperature, so avoid refrigerating your cake if possible, as this could cause the fondant to sweat and become sticky.
- Experiment with Colors and Textures: Don’t be afraid to mix and match fondant and buttercream in different colors, textures, and patterns. A graduation cake that combines a smooth fondant surface with buttercream flowers or a fondant ribbon can create a visually stunning effect.
By mastering these two techniques, you can create a graduation cake that not only stands out but is also a delicious centerpiece for your celebration. Whether you’re aiming for a sleek, modern look with fondant or a soft, textured finish with buttercream, both options will allow you to showcase your creativity and make the graduation party unforgettable.
Incorporating Edible Toppers and Embellishments
Edible toppers and embellishments are one of the most effective ways to make a graduation cake truly stand out. These creative elements can transform a simple design into something that feels personal, meaningful, and celebratory. Whether you choose to make your own or purchase pre-made options, incorporating edible decorations can elevate the aesthetic appeal of your cake and help tie in the graduation theme.
- Graduation Caps and Diplomas
- Miniature Graduation Caps: Miniature fondant or sugarpaste graduation caps placed on the top or along the sides of the cake are a classic and iconic way to symbolize the achievement. You can make these by shaping small squares of fondant, adding a tassel made from edible string, and placing them on top of the cake or even on top of individual cupcakes if you’re offering smaller treats.
- Edible Diplomas: A rolled-up fondant or sugar paper diploma can be tied with a tiny edible ribbon, representing the graduate’s hard work. These diplomas can either sit as toppers on the cake or be used as part of a cascading design to wrap around tiers or along the sides.
- Edible Images or Printed Designs
- Custom Edible Images: These are edible prints made from food-grade ink on wafer paper or icing sheets, often customized with photographs of the graduate, school logos, or inspirational quotes. They can be used to cover the entire cake surface or be strategically placed in specific spots to highlight the theme or personal details of the graduation.
- Printed Graduation Themed Designs: You can also opt for pre-made edible images with designs like graduation hats, class year numbers, or a congratulatory message. These can be an easy yet effective way to add a professional touch, especially if you’re looking to save time while still making a statement.
- Floral Embellishments
- Fresh or Edible Flowers: Fresh flowers can give your graduation cake a vibrant and elegant look. Opt for flowers in the school’s colors or flowers that hold special significance to the graduate. If you’re looking for something more edible, edible flowers like pansies, violets, or nasturtiums can make your cake look beautiful and taste delightful.
- Sugar Flowers: If you prefer a longer-lasting option, sugar flowers made from fondant or gum paste are perfect. These can be shaped into intricate designs like roses, lilies, or any flower that matches the theme of the graduation. These sugar flowers not only look stunning but also add a professional, polished touch to your cake design.
- Candied or Chocolate Decorations
- Candy Graduation Caps: Another fun and delicious option is using candies, such as chocolate or lollipops, molded into graduation hats, diplomas, or the graduate’s favorite treat. These can be placed on the cake or handed out as party favors.
- Chocolate Drip Designs: For a more modern, trendy look, consider adding a chocolate drip effect to the top of your cake, letting the rich, glossy chocolate cascade down the sides. This can be paired with smaller, intricate edible toppers to add texture and depth to the cake.
- Personalized Touches
- Class Year Numbers: Fondant or edible lettering can be used to highlight the year of the graduation. You could create the numbers in bold, playful colors that match the school’s theme or in metallic gold or silver to create an elegant, sophisticated look.
- Graduate’s Name or Initials: Personalizing the cake with the graduate’s name, initials, or even their graduation quote can make the cake feel even more special. This can be done with edible letters or custom-made sugarpaste shapes.
- Interactive Edible Decorations
- Candy Layers: You can use layers of candies or edible glitter to create an eye-catching effect that stands out. Gummy candies shaped like books or stars, or even a sprinkling of edible glitter, can bring a playful and fun dimension to the graduation theme.
- Edible Metallics: Using edible metallic paints or dusts can give your toppers a gleaming, chic finish. Gold or silver metallic details on graduation caps, ribbons, or numbers can add a sophisticated flair to the cake.
By strategically choosing and incorporating edible toppers and embellishments, you can ensure your graduation cake not only tastes amazing but also tells a personalized story of the graduate’s journey. Whether simple or elaborate, these decorations will make your cake as unforgettable as the achievement it celebrates.
Utilizing Piping Techniques for Intricate Details
Piping is a cake decorating technique that allows you to add stunning, intricate designs with precision. Whether you’re aiming for elegant scrollwork, bold lettering, or delicate floral arrangements, piping can transform a simple cake into a masterpiece. The right piping techniques can elevate your graduation cake, making it look professional and polished. Here’s how you can incorporate this technique to add those eye-catching details:
- Choosing the Right Piping Tips
The first step to perfect piping is selecting the appropriate piping tips. There are a variety of tips that can create different effects, from fine details to bold, textured designs. For instance:- Round tips (such as #1, #2, or #3): These are great for writing messages, fine details, and outlining designs.
- Star tips (such as #18 or #21): Perfect for creating textured swirls, rosettes, and borders.
- Leaf tips (such as #67 or #352): Ideal for adding realistic leaf designs or accents to flowers.
- Petal tips (such as #104): These can help create lifelike flowers, which are perfect for graduation cakes that require delicate touches.
- Mastering Basic Piping Techniques
Before diving into more complex designs, it’s important to master a few basic piping techniques that will help you achieve clean, beautiful results:- Writing and lettering: Piping your graduate’s name or “Congratulations” on the cake adds a personalized touch. Practice your lettering on parchment paper before piping onto the cake to ensure smooth, even letters.
- Borders and edges: Adding piped borders, whether simple or decorative, helps frame your cake beautifully. You can use a star tip for a scalloped edge or a smooth line with a round tip for a more minimalist look.
- Piped flowers: Use a petal or star tip to create elegant flowers that complement the cake design. You can create a stunning floral cascade or smaller accents around the cake’s base. Flowers such as roses or daisies can symbolize new beginnings and achievements, making them perfect for a graduation cake.
- Creating Intricate Details and Designs
Once you’ve mastered the basics, you can dive into more intricate designs to truly make your cake stand out. Here are some advanced piping ideas:- Graduation-specific designs: Add a graduation cap, diploma, or even a school logo using piping techniques. A graduation cap can be made by piping a square top using a star tip, and a rolled diploma can be piped with a round tip.
- Scrollwork and filigree: If you want to achieve a sophisticated look, consider piping delicate scrolls and filigree patterns across the cake. These intricate designs are perfect for making your graduation cake feel refined and special. Use a small round tip to create elegant, flowing curves.
- Textured backgrounds: Piping a textured design, such as rosettes or a basket weave pattern, can serve as a beautiful background for your graduation-themed cake. This technique adds dimension and complexity without overwhelming the overall design.
- Using Piping Gel and Royal Icing for Details
While buttercream is often the go-to for most piping work, you can also use piping gel or royal icing for even more intricate details.- Piping gel: If you want a glossy, smooth finish or to adhere edible glitter or shimmer, piping gel works wonders. It’s also perfect for writing or adding delicate outlines without the heaviness of buttercream.
- Royal icing: Ideal for creating hard, crisp lines, royal icing can be used for more detailed accents like small flowers, lattice work, or fine piping for intricate designs. This is perfect for creating the clean, delicate finish you might want on a standout graduation cake.
- Practice Makes Perfect
To achieve intricate piping designs, practice is key. Spend time experimenting with different piping tips and techniques on parchment paper or dummy cakes before applying them to your actual graduation cake. The more comfortable you are with the tools and techniques, the smoother the final result will be.
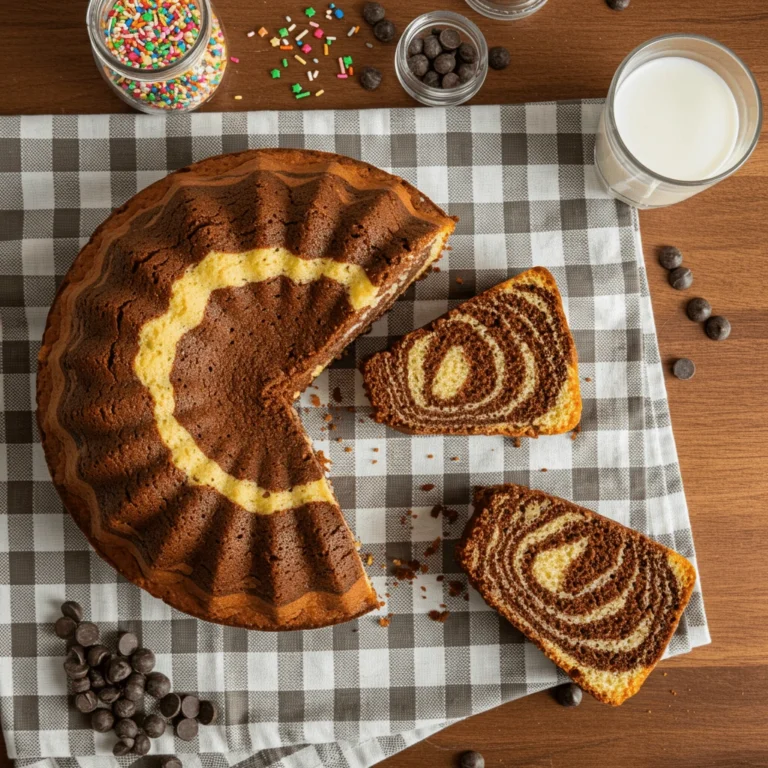
Flavor Combinations to Delight Your Guests
Classic Flavors with a Twist
When it comes to graduation cakes, classic cake flavors are always a hit. However, by adding a unique twist, you can elevate these traditional tastes and surprise your guests with something unexpected. Here are some ideas to give classic flavors a fresh and exciting makeover:
- Vanilla Cake with a Citrus Zing
Vanilla cake is a staple for many occasions, but to make it stand out, consider infusing the batter with lemon or orange zest. This bright, citrusy flavor will give your cake a refreshing twist and balance out the sweetness of the frosting. You could even add a hint of vanilla bean paste for a deeper, more aromatic flavor. - Chocolate Cake with a Chili Kick
Chocolate is a beloved classic, but pairing it with a subtle heat can create a fun contrast. Try adding a pinch of chili powder or cayenne pepper to your chocolate cake mix for a spicy surprise that lingers after each bite. For an extra touch, pair it with a rich chocolate ganache and a dash of cinnamon for an intriguing and complex flavor profile. - Carrot Cake with a Nutty Surprise
Carrot cake is another timeless favorite, known for its moist texture and warm spices. Take it to the next level by adding crushed pistachios or toasted walnuts into the batter. The nutty flavor and crunch will enhance the cake’s texture and complement the cream cheese frosting. For an added twist, you could incorporate a swirl of honey or maple syrup into the frosting for a touch of sweetness that’s just a little different. - Red Velvet with a Cream Cheese and Coconut Filling
Red velvet cake is a showstopper on its own, with its striking red color and delicate cocoa flavor. To make it even more memorable, consider adding a layer of coconut cream filling between the layers or incorporating shredded coconut into the cream cheese frosting. The coconut adds a tropical element that pairs wonderfully with the rich cream cheese frosting. - Lemon Cake with a Lavender Infusion
Lemon cake is bright and delicious, but infusing it with a touch of lavender can add a sophisticated, floral note that is both subtle and surprising. You can make lavender syrup to drizzle over the cake layers or even infuse the frosting with dried lavender buds for a gentle, aromatic flavor. This twist will impress guests with its delicate balance of citrus and floral elements. - Coffee Cake with a Mocha Buttercream
For coffee lovers, a traditional coffee cake can be transformed by pairing it with a mocha buttercream. The richness of the coffee cake combined with the smooth, chocolate-coffee frosting offers a delightful blend of flavors that’s perfect for celebrating a milestone like graduation. You can even add a layer of chocolate ganache between the cake layers for extra indulgence.
Accommodating Dietary Preferences
When creating a graduation cake, it’s important to consider the dietary needs of all your guests, ensuring that everyone can enjoy the celebration without any concerns. Dietary restrictions have become more common, whether due to allergies, health choices, or personal preferences. By offering alternative options, you can make your graduation cake accessible to a wider audience while still maintaining the flavors and aesthetics of a traditional cake.
Here are some popular dietary preferences and tips on how to accommodate them:
- Gluten-Free Cakes:
- Gluten-free diets are a growing trend, whether due to health reasons like celiac disease or gluten sensitivity, or by choice. Thankfully, gluten-free cakes can be just as delicious as their traditional counterparts. Use gluten-free flour blends made from rice flour, almond flour, or coconut flour to replace wheat flour. Adding extra moisture with ingredients like applesauce or yogurt can prevent the cake from becoming too dry. Many gluten-free cake recipes also use eggs or egg substitutes to bind the ingredients together and maintain texture.
- Flavor-wise, you can make the cake as decadent as you wish by incorporating flavors like chocolate, vanilla, or citrus. Don’t forget to frost with a gluten-free frosting made from buttercream, whipped cream, or cream cheese!
- Vegan Cakes:
- Vegan cakes exclude all animal products, such as eggs, milk, and butter. But don’t let that fool you — vegan cakes can be incredibly moist and flavorful. In place of eggs, common substitutes include flaxseed meal mixed with water (for binding) or apple cider vinegar combined with baking soda (for leavening). Plant-based milks such as almond, soy, or oat milk are great alternatives to cow’s milk. Vegan butter or coconut oil can replace regular butter in cake and frosting recipes.
- For vegan cakes, consider using non-dairy frostings like a vegan buttercream or whipped coconut cream. With the right combination of plant-based ingredients, your graduation cake can be both delicious and fully vegan.
- Nut-Free Cakes:
- Nut allergies are common and can be quite severe, so it’s essential to ensure your cake is nut-free. This means using nut-free flour (such as all-purpose flour or rice flour) and avoiding ingredients like almond milk or nut-based butter. Be mindful of cross-contamination by ensuring the kitchen tools and equipment are free from nuts.
- To make the cake just as rich and flavorful, you can use seed-based alternatives. For example, sunflower butter or pumpkin seed butter can be a great substitute for nut butter. Also, try incorporating fresh fruits or edible flowers for added texture and flavor without the risk of nuts.
- Dairy-Free Cakes:
- Dairy-free cakes cater to people who have lactose intolerance or choose not to consume dairy for other reasons. To make a dairy-free cake, simply substitute regular milk and butter with plant-based options, such as almond milk, oat milk, or soy milk. Coconut oil or margarine works well as a replacement for butter.
- Consider making a dairy-free frosting using powdered sugar, non-dairy butter, and vanilla extract. For a unique twist, coconut cream can be whipped into a dairy-free frosting that adds a deliciously creamy texture.
- Sugar-Free Cakes:
- For guests with dietary restrictions related to sugar, such as diabetics or those on a low-sugar diet, a sugar-free cake can be a fantastic option. You can replace traditional sugar with natural sweeteners like stevia, erythritol, or monk fruit sweetener. Additionally, using fruit purees (such as applesauce or mashed bananas) can add natural sweetness while providing additional moisture to the cake.
- Just be sure to adjust your recipe according to the chosen sweetener, as some sugar alternatives have different levels of sweetness and may require adjustments in the amount used.
Final Thoughts: Accommodating dietary preferences for your graduation cake doesn’t mean compromising on taste or appearance. By using a little creativity and exploring alternative ingredients, you can create a cake that suits a wide range of dietary needs while still delivering a delightful, beautiful, and delicious dessert for everyone at the celebration. Whether you’re baking for gluten-free guests, vegans, or those with food allergies, these tips will help you craft a graduation cake that stands out and satisfies every guest at your party.
Seasonal and Local Ingredients
When it comes to making a graduation cake that stands out, using seasonal and local ingredients can elevate both the flavor and the presentation. Fresh, locally sourced produce not only enhances the taste but also reflects the time of year and adds a personal touch to the cake that feels authentic and thoughtful. Here’s why incorporating seasonal and local ingredients is a great idea:
- Freshness and Flavor
Seasonal ingredients are at their peak of freshness and flavor, meaning they can make your cake taste even better. For example, in the summer, you can use fresh berries like strawberries, blueberries, or raspberries to incorporate into the cake or as a topping. These fruits are naturally sweet, juicy, and full of flavor, which enhances the overall taste of your graduation cake. Using local ingredients also ensures you’re supporting nearby farmers and artisans, which can make your cake feel more meaningful. - Cultural Connection and Personalization
Using ingredients that are locally grown or associated with the area where the graduate is from can make the cake feel deeply personal. For instance, if your region is known for producing certain fruits, nuts, or flowers, incorporating those into your cake design or flavor profile can honor that local culture. Local honey, for example, can be used as a sweetener, providing a unique flavor and also supporting local beekeepers. - Spring/Summer Fruits and Flowers
Depending on the season of the graduation, you can incorporate fresh, seasonal fruits or flowers to make the cake feel vibrant and connected to nature. In spring and summer, fruits like peaches, nectarines, cherries, or citrus fruits are in season and can add both color and fresh flavor to the cake. For a floral touch, edible flowers like lavender, pansies, or daisies are perfect for springtime graduations, adding elegance and natural beauty. - Sustainability
By choosing local and seasonal ingredients, you’re making an eco-friendly choice. Local produce doesn’t have to travel as far to reach you, which means a smaller carbon footprint. Additionally, seasonal ingredients are often more sustainable because they are grown in harmony with the environment, minimizing the need for artificial growing conditions and extensive transportation. - Unique Flavor Combinations
Local and seasonal ingredients open up the opportunity to experiment with unique flavor combinations. For example, pairing local berries with honey buttercream or incorporating citrus fruits into a cream cheese filling can give your graduation cake a distinctive taste that can’t be replicated with store-bought ingredients. Try adding a seasonal twist to classic cake flavors—such as using pumpkin puree for a fall graduation or apples and cinnamon for a cozy, autumn-inspired dessert. - Visual Appeal
Fresh, seasonal ingredients also contribute to the visual appeal of your cake. Imagine a beautiful summer graduation cake topped with a colorful mix of strawberries, blackberries, and mint leaves, or a winter graduation cake adorned with dried orange slices and a dusting of powdered sugar. These ingredients not only look stunning but also bring an extra layer of thoughtfulness and creativity to your cake.
Step-by-Step Guide to Baking and Assembling
Preparing the Cake Layers
Preparing the cake layers is one of the most crucial steps in creating a flawless graduation cake. The foundation of your cake sets the stage for all the creativity and decoration that will follow. To ensure your layers come out perfectly moist, even, and easy to assemble, here are some key tips and techniques to follow:
- Choosing the Right Cake Recipe
The first step in preparing cake layers is selecting the perfect recipe. Whether you opt for a classic vanilla, rich chocolate, or something more adventurous like red velvet, make sure the recipe you choose is reliable and produces a moist, sturdy cake that will hold up to the weight of the frosting and decorations. For a graduation cake, you might want to go for a slightly firmer texture, which is easier to cut and stack without crumbling. - Measuring Ingredients Properly
Accurate measurements are essential to ensure the layers bake evenly. Use a kitchen scale for precision when measuring flour, sugar, and other dry ingredients. Properly measured ingredients create a uniform batter that bakes evenly and rises properly, ensuring your layers aren’t too thick or thin. For best results, sift your dry ingredients to prevent lumps and ensure a smooth batter. - Baking the Layers
To achieve uniform cake layers, make sure you are using the correct size cake pans. When making tiered cakes, it’s important to choose pans that are the same size, so the layers will align properly when stacked. Grease and flour the pans generously, or use parchment paper to line the bottom to prevent sticking.
Preheat your oven to the specified temperature, and bake one layer at a time to ensure even cooking. Avoid opening the oven door too frequently while baking, as this can cause uneven rising. Bake until a toothpick or cake tester inserted into the center comes out clean and free of batter. Keep an eye on the cakes as baking times can vary depending on your oven and the size of the pans. - Leveling the Cake Layers
Once your cakes are baked and completely cooled, it’s time to level the layers. Often, cakes will rise slightly in the middle, resulting in a dome shape. To achieve a professional-looking cake, use a serrated knife or a cake leveler to cut off the domed top, ensuring that each layer is flat and even. This step is critical if you’re stacking multiple layers, as uneven layers can cause the cake to lean or be unstable. - Cooling the Layers
Cooling the cake layers is an essential step that is often overlooked. Allow the cakes to cool in their pans for about 10-15 minutes before transferring them to a wire rack. This prevents the cakes from becoming too fragile and falling apart. Allowing the layers to cool completely before decorating or stacking ensures that they maintain their structure and are easier to handle. - Torting the Layers (Optional)
If you’re making a multi-layer cake, consider torting the cake layers. This involves slicing each cake layer horizontally to create thinner layers, which gives you more room for filling and decoration. Torting can also help balance the cake’s flavor, as more filling can be added between each layer. Just be sure to use a serrated knife or a cake leveler for precise, even cuts.
Assembling and Filling the Cake
Assembling and filling a cake properly is just as important as baking it. A well-assembled cake ensures that your creation looks as good as it tastes and stays structurally sound for the big day. This process involves carefully stacking your cake layers, adding fillings, and ensuring the overall balance and smoothness of the cake. Here’s a comprehensive guide on how to achieve this:
- Leveling the Cake Layers: Before you start assembling, it’s crucial to ensure that your cake layers are level. After baking, your cake layers may have risen unevenly, leaving a domed top. To fix this, use a serrated knife or a cake leveler to trim off the domed top of each layer. This ensures that each layer is flat, which makes it easier to stack the cake and helps the layers stay level when filled.
- Placing a Cake Board or Base: Start by placing the first layer of your cake on a sturdy cake board or platter. This will provide support as you continue stacking the layers. Make sure the cake board is the same size or slightly larger than your cake for stability.
- Spreading the Filling: Now it’s time to add the filling between the layers. Choose a filling that complements the flavor of your cake—this can be anything from buttercream, cream cheese frosting, fruit preserves, ganache, or even a mousse. Use an offset spatula to spread an even layer of filling over the surface of the first layer. Be sure not to use too much filling to avoid overflow when you add the next layer.
- Tip: If you’re using a thin or runny filling, you can create a dam around the edge of the cake with buttercream to keep the filling from spilling out.
- Stacking the Layers: Carefully place the second cake layer on top of the first. Gently press down to ensure the layers are aligned. If you notice any unevenness, gently nudge the layers into place. Repeat this process for all remaining layers, making sure to spread filling evenly each time. Always ensure that the top layer is level and aligned with the rest of the cake.
- Crumb Coating: Once all the layers are stacked and filled, it’s important to crumb coat the cake. A crumb coat is a thin layer of frosting that traps any loose crumbs and gives the cake a smooth surface for the final layer of frosting. Apply a thin layer of frosting around the entire cake, using an offset spatula to smooth it out. Don’t worry about perfection at this stage—just make sure to cover all the exposed areas of the cake. After crumb coating, refrigerate the cake for at least 30 minutes to set the frosting.
- Final Layer of Frosting: After the crumb coat has set, it’s time to apply the final layer of frosting. Using the same technique, cover the entire cake with a generous amount of frosting. Smooth it out with a bench scraper or offset spatula for a professional finish. For a more textured look, you can use piping tips or a comb to create patterns on the surface.
- Adding Decorative Layers: Depending on your design, you might want to add additional decorative elements like fondant decorations, edible images, or piped borders. These elements will add personality and style to the cake, making it more unique and visually striking.
- Chill Before Decorating: Once the cake is assembled and frosted, place it in the fridge for about 30 minutes to allow the frosting to firm up. This helps maintain the shape and structure of the cake during the decoration process.
Crumb Coating and Final Icing
Crumb coating and applying the final layer of icing are crucial steps in the cake-decorating process. These techniques ensure that your cake has a smooth, polished finish and that the layers of your cake stay intact while decorating. Here’s an in-depth look at both processes:
1. What is Crumb Coating?
Crumb coating is the first layer of icing applied to your cake, which helps to lock in any loose crumbs. This thin, protective layer of frosting provides a smooth base for the final icing and prevents crumbs from ruining the clean look of your cake. The crumb coat isn’t meant to be thick or perfect; it’s just a base layer to hold everything together.
- How to Apply the Crumb Coat:
- After baking and cooling your cake layers, trim any domed tops to create flat surfaces. This ensures that the layers stack evenly.
- Apply a thin layer of frosting to the entire cake using an offset spatula or bench scraper. Don’t worry if it’s messy—this is just to catch the crumbs.
- Refrigerate the cake for about 20–30 minutes. This sets the crumb coat, making it easier to apply the final layer of icing.
2. Why Crumb Coating Matters:
The crumb coat plays a vital role in achieving a professional, clean finish on your graduation cake. By sealing in the crumbs, it allows you to create a smooth, flawless surface for the final icing. Without this step, crumbs could mix into the final layer of frosting, causing unsightly texture or uneven application.
3. The Final Layer of Icing:
Once the crumb coat has been set, it’s time for the final layer of icing. This is where you can truly let your creativity shine, as the final icing not only enhances the flavor of your cake but also defines its appearance.
- Types of Icing:
The choice of icing can vary depending on the cake’s design and flavor. Common options include:- Buttercream: A versatile option that’s smooth, creamy, and easy to work with. It can be flavored and colored to suit your theme.
- Fondant: Ideal for a smooth, sleek finish. Fondant is often used for more intricate designs, as it can be rolled out and molded into various shapes.
- Ganache: A rich, glossy finish that adds a luxurious look to your cake. Ganache is especially great for chocolate lovers.
- How to Apply the Final Icing:
- Using an offset spatula, apply a generous layer of your chosen icing over the crumb-coated cake.
- Work from the center outwards, applying a thin layer initially and gradually adding more icing until the surface is smooth.
- To create a flawless finish, use a bench scraper to scrape off excess icing while smoothing the surface.
- For a textured or more decorative look, you can use piping techniques or a comb to create patterns on the final layer.
4. Tips for a Perfect Finish:
- Work with Room Temperature Frosting: Ensure that your frosting is soft and at room temperature to make spreading easier and to avoid cracking.
- Smooth the Edges: To achieve clean edges, use a bench scraper or spatula to smooth the sides after applying the final icing. Take your time to ensure that the sides and top are as even as possible.
- Chill Between Layers: If you’re applying additional decorations (like fondant or intricate piping), refrigerating your cake between each step helps the layers set and prevents any movement or smudging.
Presentation and Serving Tips
Displaying the Cake
The presentation of your graduation cake is just as important as its flavor and design. After all, it serves as the centerpiece of the celebration and is often the first thing guests notice when they enter the venue. A well-displayed cake not only draws attention but also enhances the overall aesthetic of the event. Here are some creative and practical ways to display your graduation cake:
- Choosing the Right Cake Stand:
- The cake stand is a crucial element in displaying your graduation cake. It elevates the cake, both literally and figuratively, making it stand out as a focal point in the room. Consider using a tiered cake stand for a multi-layered cake to create a dramatic effect or a sleek, modern stand for a minimalist design. For a rustic feel, a wooden or vintage cake stand can add charm and warmth to the display.
- Backdrop and Decoration:
- Setting up a beautiful backdrop behind the cake can enhance its impact. A backdrop can range from a simple fabric drape in the graduate’s school colors to a more elaborate setup featuring a banner with the graduation year or a custom message like “Congratulations, [Name]!” Adding decorative elements such as balloons, flowers, or even string lights can also create a celebratory atmosphere around the cake.
- Cake Table Setup:
- The table where the cake sits should be carefully styled to complement the cake design. For a formal affair, a clean white tablecloth with a matching runner and elegant tableware can work wonders. If you’re aiming for a fun, casual vibe, you can go with a more playful theme, like using a tablecloth that matches the school’s mascot or colors. Placing candles, confetti, or small photo frames with the graduate’s pictures can further personalize the display.
- Lighting Considerations:
- Proper lighting can make your cake truly shine. If the event is in the evening or in a dimly lit space, consider adding soft, warm lighting around the cake to highlight it and create an inviting glow. You can use string lights, candles, or even a spotlight to draw attention to the cake, making it the center of attention during the festivities.
- Interactive Cake Display:
- For a more interactive experience, consider incorporating a themed display element. For example, if your cake features a graduation cap or a diploma design, you could create a mini “graduation ceremony” where guests can take photos with the cake before cutting it. This not only makes for great memories but also adds a fun and engaging element to your event.
By thoughtfully considering these aspects of cake display, you can create an eye-catching and memorable presentation that enhances the overall look and feel of your graduation celebration.
Cutting and Serving Portions
When it comes to cutting and serving your graduation cake, presentation and practicality go hand in hand. Not only do you want to make sure the cake is cut neatly, but you also want to ensure everyone gets a satisfying portion without compromising the design or ruining the aesthetic. Here are a few tips to help you cut and serve the cake efficiently:
- Use the Right Tools:
Ensure that you have a sharp, serrated knife to slice through the cake layers cleanly. A long, serrated knife works best, especially if you have multiple tiers. For cakes with fondant, it’s essential to use a gentle sawing motion to avoid cracking the smooth surface. For tiered cakes, you may want a cake cutter or a long cake lifter to help move each piece once it’s cut. - Cutting a Tiered Cake:
If your cake has multiple tiers, start by cutting the top tier first. If the tiers are stacked loosely and not doweled together, it’ll be easier to remove the top and cut it separately. When cutting the bottom tier, start from the center and work your way out in a circular or grid-like pattern. Ensure each piece is evenly sized so everyone gets a fair share of the cake. - Standard Serving Size:
The standard serving size for a cake is typically around 1 to 1.5 inches wide per slice. You can adjust the size based on your guest list or the number of layers you have. For larger parties, it’s best to make sure the cake is cut into small, bite-sized portions, as many people may want seconds. - Presentation of the Slices:
Once your slices are cut, present them elegantly to your guests. Place them on cake plates or dessert trays for a neat and inviting presentation. If you’ve decorated the cake with intricate toppers or designs, it’s a good idea to remove those decorative elements before slicing to preserve the design integrity. If your cake includes flowers, edible images, or fondant details, consider serving those as part of the slices or setting them aside for those who would like them as keepsakes. - Serving Etiquette:
If you’re serving the cake in a formal setting, it’s customary to have someone designated to serve the cake. They should ensure that all slices are cut evenly, and the cake is offered to guests promptly. If you’re at home or hosting a casual gathering, you can either serve the slices yourself or let guests help themselves, but make sure the cake remains looking fresh and inviting until everyone has had their share. - Storing Leftover Cake:
After the party, there’s a good chance you’ll have leftover cake. To ensure it stays fresh, cover the cake with plastic wrap or store it in an airtight container. You can refrigerate cake layers that contain fillings or frosting that may spoil. If there’s no refrigeration required, just keep the cake at room temperature. For longer storage, freezing cake slices is an option—just wrap the slices individually to preserve their taste and texture.
Storing Leftovers
Once the excitement of the graduation celebration is over, you might find yourself with some delicious cake leftovers. Properly storing leftover graduation cake ensures it stays fresh and enjoyable for days to come. Here are some helpful tips to keep your cake at its best:
- Wrap and Seal the Cake Properly
To preserve the freshness of your leftover cake, wrap it tightly in plastic wrap or place it in an airtight container. This This will help keep the cake moist and prevent it from absorbing any odors in the fridge. If the cake is still in its original tiered or decorated form, be cautious not to disturb the decoration while wrapping it. - Refrigeration or Room Temperature?
For cakes with perishable fillings or frostings (like cream cheese frosting or whipped cream), it’s best to refrigerate the leftovers. However, cakes made with buttercream or fondant can be kept at room temperature for a day or two, as long as the weather isn’t too hot. Refrigeration can sometimes cause buttercream or fondant to harden, so if you plan to serve it again soon, storing it at room temperature is a viable option. - Freezing Leftover Cake
If you have a significant amount of leftover cake, freezing is a great option to preserve it long-term. To freeze the cake, first, cut it into smaller slices. Secure each slice by wrapping it tightly in plastic wrap, then store the wrapped slices in a freezer-safe bag or container. Label the bag with the date, so you can easily track how long the cake has been stored. When you’re ready to enjoy the cake again, simply thaw it at room temperature for a few hours. Freezing can help maintain the cake’s moisture and flavor for up to 2-3 months. - How to Refresh Leftover Cake
Over time, cake can lose some of its moisture. To refresh leftover cake, you can lightly mist it with simple syrup or a flavored liquid (such as fruit juice or coffee for a unique twist). This will help rehydrate the cake and bring back its fresh taste. If the cake’s frosting has hardened in the fridge, you can also use a spatula to smooth it out again or add a fresh layer of frosting for a renewed look. - Serving Leftovers
When serving leftover cake, it’s always a good idea to bring it back to room temperature, as cold cake can be dense and less flavorful. Allow it to sit at room temperature for about 20-30 minutes before serving, and it will taste just as good as when it was freshly made.
By following these simple storage tips, you can ensure that your delicious graduation cake stays fresh and ready to be enjoyed long after the celebration ends. Whether you’re savoring a slice the next day or storing it for a future treat, your cake will remain a sweet reminder of the special occasion!
Conclusion
Creating a graduation cake that stands out is all about blending creativity, personalization, and quality ingredients to celebrate a significant achievement. Throughout this post, we’ve covered everything from choosing the perfect design to mastering decoration techniques, selecting flavors, and presenting your cake in a way that leaves a lasting impression on your guests.
The most important thing to remember is that your cake should reflect the personality and journey of the graduate. Whether you decide to use classic designs, incorporate their school colors, or add unique elements like edible images or personalized toppers, a well-thought-out cake will capture the spirit of the occasion.
Feel free to unleash your creativity and think beyond traditional ideas. A standout graduation cake isn’t just about looking impressive—it’s about creating something meaningful that ties into the celebration’s theme and the graduate’s accomplishments. From the first bite to the final slice, every detail counts in making this cake unforgettable.
Remember, your cake doesn’t have to be complex to be special. With the right techniques and some careful planning, even a simple cake can be elevated into something extraordinary. So, whether you’re making the cake yourself or working with a professional baker, take the time to infuse personal touches and showcase your graduate’s achievements. After all, a memorable graduation cake will become an unforgettable part of the celebration, leaving everyone with sweet memories that will last for years to come.