How to Make the Perfect Heart Cake: A Step-by-Step Guide
Table of Contents
A heart cake is the perfect way to celebrate love, whether it’s for Valentine’s Day, an anniversary, a birthday, or any special occasion. With its charming shape and delicious flavor, this cake is both beautiful and easy to make at home. Whether you’re using a heart-shaped cake pan or creating one from a round and square cake, the process is simple and fun.
In this guide, you’ll learn step-by-step how to bake the perfect heart cake, from choosing the right ingredients to decorating it like a pro. We’ll also share tips, variations, and storage methods so you can make a heart cake that looks as amazing as it tastes. Let’s get started! ❤️🎂
Essential Ingredients and Tools for a Heart Cake
Key Ingredients for a Soft and Moist Cake
A perfectly soft and moist heart cake starts with the right combination of ingredients. Each ingredient plays a crucial role in ensuring that your cake is fluffy, tender, and full of flavor. Here’s a breakdown of the key ingredients and their importance:
1. All-Purpose Flour (or Cake Flour for Extra Softness)
Flour is the foundation of any cake. While all-purpose flour works well, using cake flour can make your heart cake softer and lighter due to its lower protein content. If you don’t have cake flour, you can make a substitute by replacing 2 tablespoons of all-purpose flour with cornstarch for every cup used.
2. Baking Powder and Baking Soda
These leavening agents enable the cake to rise, resulting in a light and fluffy texture. Baking powder provides an even lift, while baking soda reacts with acidic ingredients like buttermilk or yogurt to enhance the cake’s fluffiness. Make sure they are fresh for the best results.
3. Butter (or Oil for Extra Moisture)
Butter gives your cake richness and flavor, while oil ensures it stays moist for longer. If you want a buttery taste with extra softness, try using a mix of butter and oil—butter for flavor and oil for added moisture.
4. Sugar (Granulated, Brown, or a Mix of Both)
Sugar doesn’t just sweeten the cake; it also locks in moisture and affects the texture. Granulated sugar is the standard choice, but adding brown sugar can provide a slight caramel flavor and make the cake even softer due to its higher moisture content.
5. Eggs
Eggs act as a binding agent and help create a stable structure while adding richness. To achieve a fluffy texture, ensure your eggs are at room temperature before mixing them in, as this helps them blend more smoothly into the batter.
6. Buttermilk (or Whole Milk for Richness)
Using buttermilk instead of regular milk adds a slight tang and extra tenderness to the cake. The acidity in buttermilk reacts with baking soda, leading to a lighter, fluffier texture. If you don’t have buttermilk, you can make a substitute by adding 1 tablespoon of lemon juice or vinegar to 1 cup of milk and letting it sit for 5 minutes.
7. Vanilla Extract (or Other Flavor Enhancements)
Vanilla extract enhances the overall flavor of the cake, making it taste richer and more aromatic. You can also experiment with almond extract, lemon zest, or cocoa powder for unique variations of your heart cake.
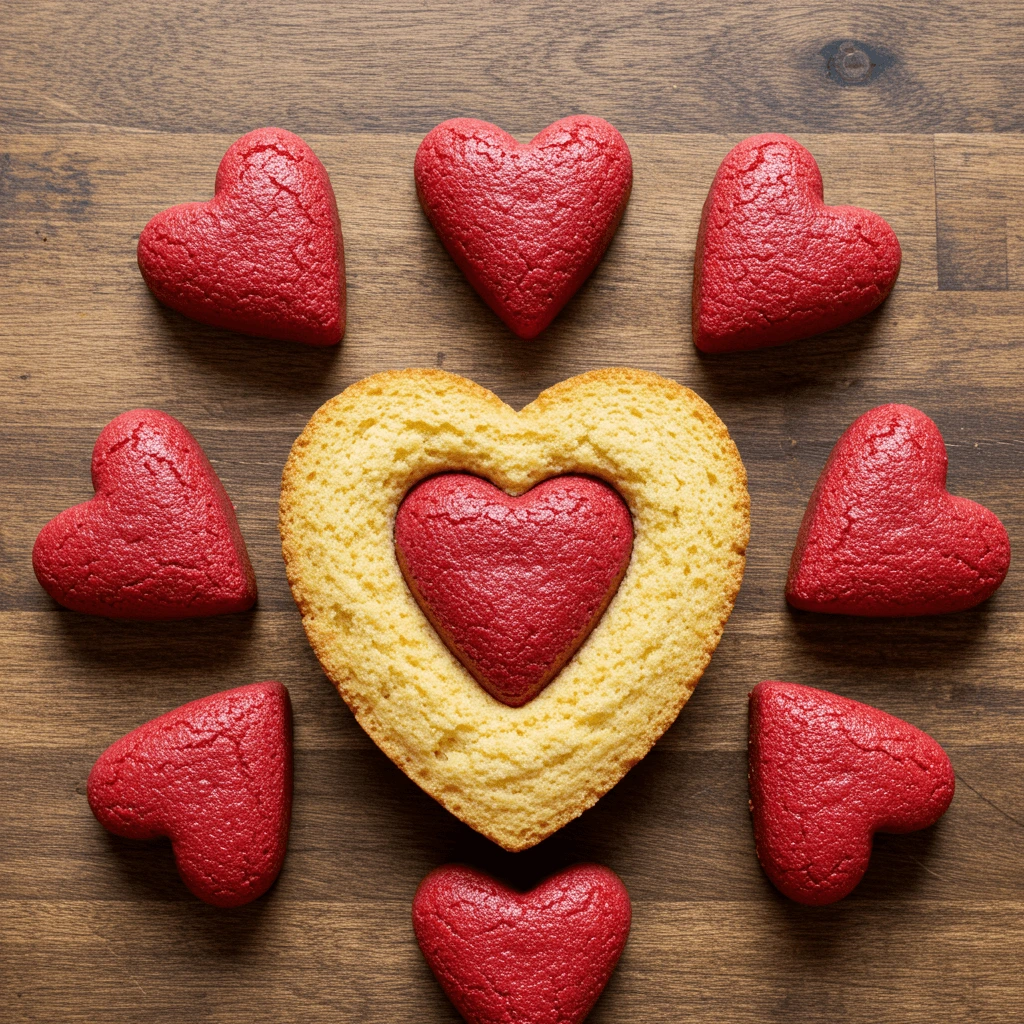
8. Red Food Coloring (Optional, for a Red Velvet Heart Cake)
If you’re making a romantic red velvet heart cake, adding red food coloring is essential. A few drops of gel food coloring work best, as they provide a vibrant color without affecting the batter’s consistency.
9. Chocolate Chips or Cocoa Powder (Optional for a Chocolate Heart Cake)
For a chocolate heart cake, you can add cocoa powder or fold in chocolate chips to enhance the flavor. Make sure to use unsweetened cocoa powder for a deep chocolate taste without extra sugar.
Pro Tip:
For an extra moist cake, you can brush the baked layers with simple syrup (a mix of sugar and water) before frosting. This helps maintain the cake’s moisture and prevents it from becoming dry.
By using these key ingredients in the right way, you’ll achieve a soft, moist, and flavorful heart cake that’s perfect for any special occasion! ❤️🎂
Choosing the Right Baking Tools
Having the right tools can make all the difference when baking a heart cake. Whether you’re using a heart-shaped cake pan or creating the shape from standard pans, the right equipment ensures even baking, smooth frosting, and professional-looking results. Here’s what you’ll need:
1. Heart-Shaped Cake Pan (or Alternative Method)
- If you have a heart-shaped cake pan, it’s the easiest way to achieve a perfect heart shape. Choose a non-stick pan to prevent sticking and ensure easy release.
- No heart-shaped pan? No problem! You can create a heart shape by baking one round cake and one square cake of the same size. Once baked, cut the round cake in half and place the two halves along two adjacent sides of the square cake to form a heart.
2. Cake Mixing and Measuring Tools
- Mixing Bowls: Use at least two—one for dry ingredients and one for wet ingredients.
- Measuring Cups and Spoons: Precise measurements are essential for achieving the perfect texture.
- Electric Mixer or Whisk: A stand mixer or hand mixer will help you achieve a smooth batter and fluffy frosting.
3. Baking Essentials for Even Cooking
- Parchment Paper or Baking Spray: Use these to ensure the cake doesn’t stick to the pan.
- Cooling Rack: Helps the cake cool evenly and prevents it from becoming soggy on the bottom.
- Toothpick or Cake Tester: Helps check if the cake is fully baked. Insert it into the center—if it comes out clean, the cake is done!
4. Frosting and Decoration Tools
- Offset Spatula: Ideal for spreading frosting smoothly across the cake.
- Piping Bags and Tips: Great for adding decorative swirls, borders, or lettering.
- Cake Turntable: Helps with even frosting and decorating for a professional finish.
- Sprinkles, Chocolate Drizzle, or Edible Pearls: Adds the final touch to your heart cake for a beautiful presentation.
By using these essential tools, you’ll make the baking and decorating process much easier, resulting in a stunning and delicious heart cake that’s sure to impress! ❤️🎂
Best Frosting and Decoration Options
The frosting and decorations you choose can transform your heart cake from simple to stunning! Whether you prefer a classic buttercream finish, a smooth fondant design, or a rich chocolate ganache drizzle, the right toppings will enhance both the flavor and presentation of your cake. Here are some top choices to consider:
1. Choosing the Perfect Frosting
The frosting sets the foundation for your cake’s final look. Here are some popular options:
- Buttercream Frosting – A classic choice that’s easy to spread and pipe. You can tint it with food coloring for a romantic red or pink hue.
- Cream Cheese Frosting – Perfect for red velvet heart cakes, this frosting is rich, tangy, and smooth.
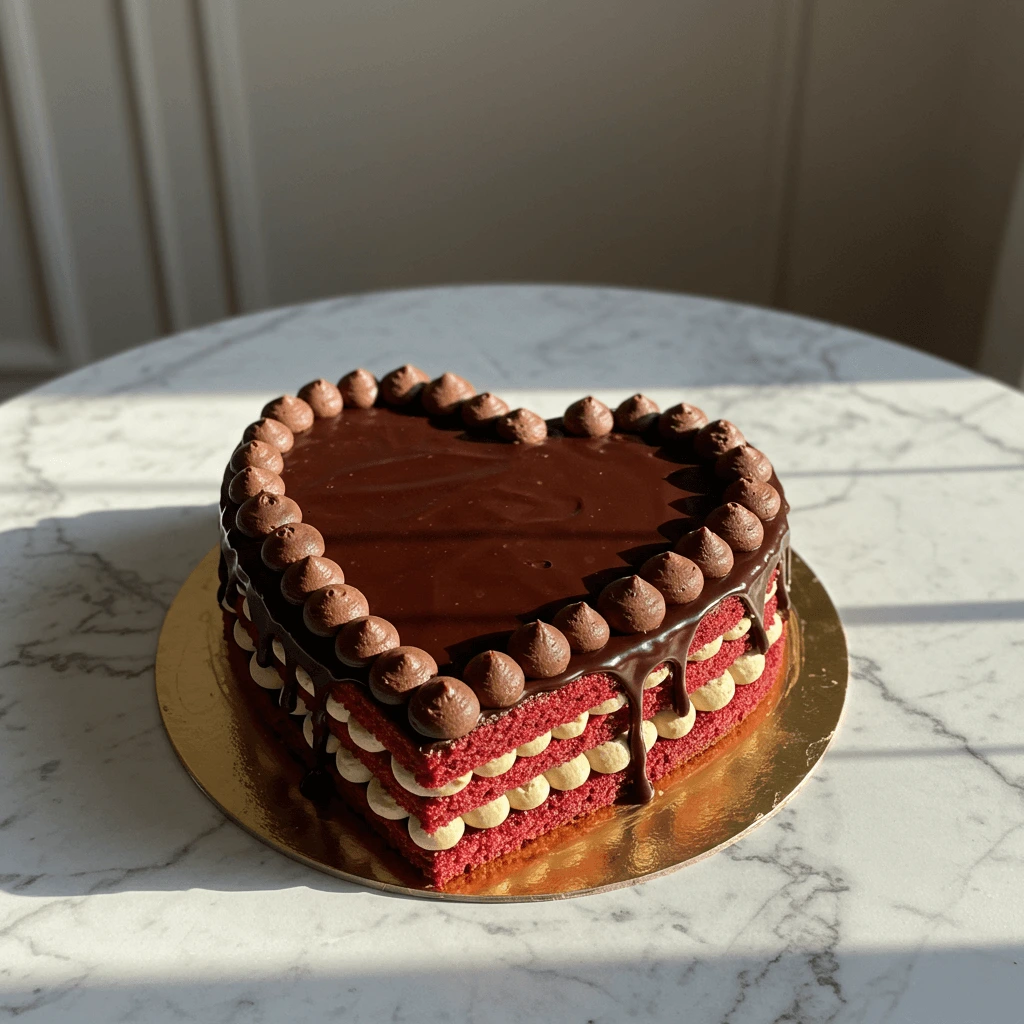
- Chocolate Ganache – A luxurious option that gives your cake a glossy, elegant finish. Drizzle it over the top for a sophisticated touch.
- Whipped Cream Frosting – Light and airy, ideal for a less sweet, fluffier option. Best for cakes served immediately.
- Fondant – If you want a smooth, polished look, roll out fondant to cover your cake completely. You can also cut out fondant hearts, ribbons, or flowers for extra decoration.
2. Piping and Texturing Techniques
Once your cake is frosted, piping designs can add a decorative flair:
- Rosettes and Swirls – Use a star piping tip to create beautiful rosettes around the edges or across the entire cake.
- Border Designs – Add a pearl, shell, or ruffled border for an elegant finish.
- Textured Effects – Use an offset spatula to create a rustic, textured look with buttercream.
3. Creative Decoration Ideas
To make your heart cake truly special, try these decoration ideas:
- Chocolate Drizzle – Pour melted chocolate over the edges for a dripping effect.
- Sprinkles and Edible Glitter – Add a touch of fun and sparkle for birthdays or celebrations.
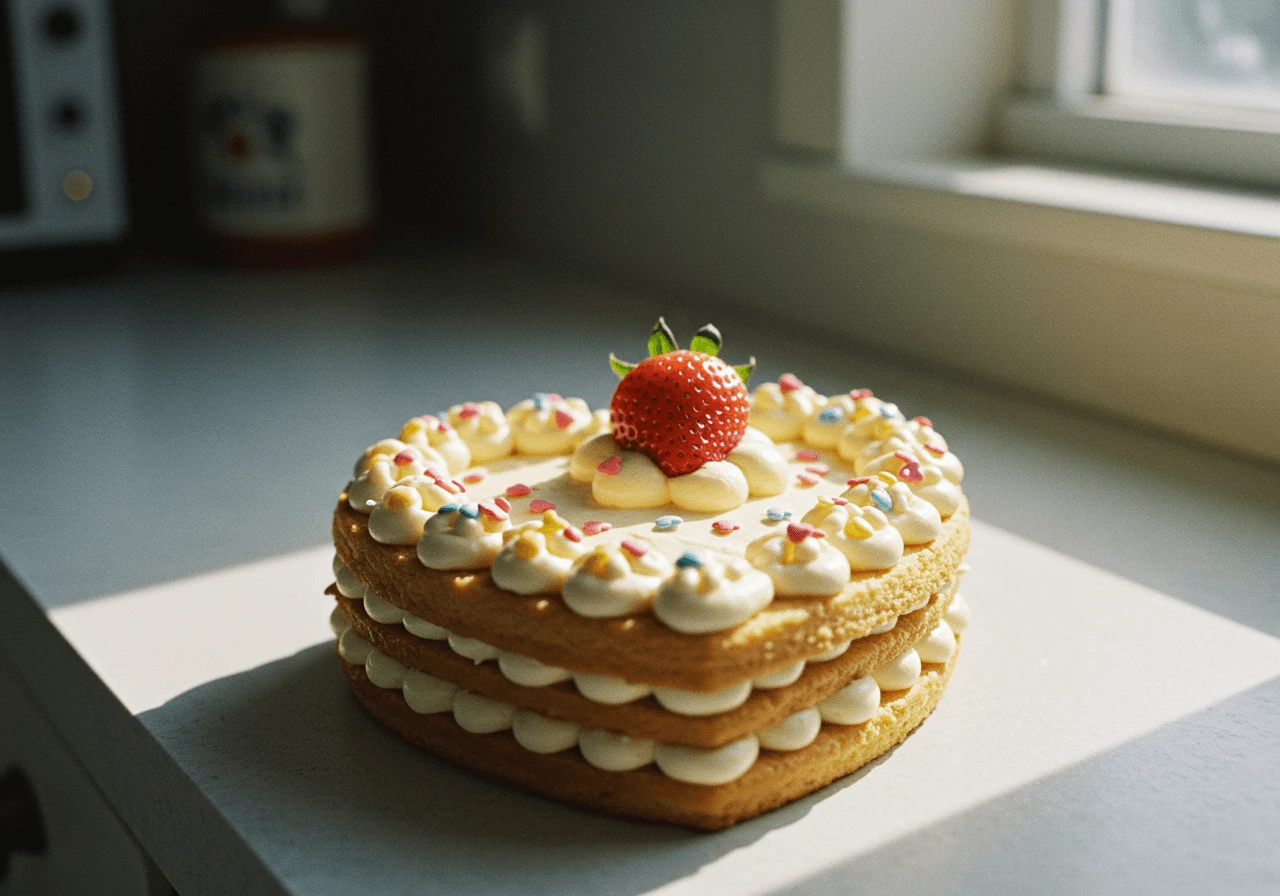
- Fresh Berries – Strawberries, raspberries, and cherries complement both chocolate and vanilla heart cakes beautifully.
- Personalized Cake Toppers – Add a Happy Anniversary, Love You, or Be Mine topper for extra charm.
- Layered Colors – Create an ombré effect by blending different shades of pink, red, or white frosting.
4. Themed Decorations for Special Occasions
- Valentine’s Day Heart Cake: Red and pink buttercream, chocolate-covered strawberries, and piped hearts.
- Anniversary Cake: Elegant white or red fondant, gold leaf accents, and edible pearls.
- Birthday Heart Cake: Bright colors, fun sprinkles, and a festive cake topper.
Step-by-Step Guide to Making the Perfect Heart Cake
Preparing the Cake Batter
A perfect heart cake starts with a well-prepared batter. The key to achieving a soft, moist, and flavorful cake lies in using high-quality ingredients and following the mixing steps carefully. Whether you’re making a classic vanilla cake, rich chocolate cake, or a romantic red velvet cake, the process remains similar.
1. Gather Your Ingredients
Before you start mixing, make sure all your ingredients are measured and at room temperature. This guarantees that the ingredients are mixed evenly, resulting in a smooth batter. Here’s what you’ll need:
- Dry Ingredients: All-purpose flour, baking powder (or baking soda, depending on the recipe), and a pinch of salt.
- Wet Ingredients: Butter (softened), eggs, milk, vanilla extract, and optional red food coloring if making a red velvet heart cake.
- Sweetener: Granulated sugar or brown sugar for a deeper flavor.
2. Mixing the Dry Ingredients
- In a medium bowl, combine the flour, baking powder, and salt by whisking them together. This helps evenly distribute the leavening agent for a uniform rise.
- If making a chocolate heart cake, sift in cocoa powder to avoid lumps.
3. Creaming Butter and Sugar
- In a large mixing bowl, beat the softened butter and sugar using a hand mixer or stand mixer until the mixture is light, pale, and fluffy (about 2-3 minutes). This step adds air to the batter, resulting in a tender cake.
- Incorporate the eggs one at a time, beating thoroughly after each addition. This prevents curdling and helps with even texture.
4. Combining Wet and Dry Ingredients
- Slowly incorporate the dry ingredients into the wet mixture, alternating with the milk. Start and end with the dry ingredients to ensure a smooth batter.
- Mix gently and avoid overmixing, as this can result in a dense and tough cake. Mix until just combined.
5. Adding Flavor and Color
- Stir in vanilla extract for a classic flavor.
- If making a red velvet heart cake, mix in red food coloring at this stage to get the signature vibrant hue.
- For extra richness, you can fold in chocolate chips, nuts, or fruit pieces.
Once your batter is smooth and well-mixed, it’s ready to be poured into the heart-shaped cake pan (or a round and square pan to create a heart shape). Now, it’s time to bake your masterpiece to perfection! 🎂❤️
Baking the Heart Cake to Perfection
Achieving the perfect heart cake starts with ensuring the baking process goes smoothly. Follow these tips to make sure your cake is soft, moist, and beautifully baked.
1. Preheat the Oven to the Right Temperature
Before you even begin mixing your ingredients, make sure your oven is preheated to the right temperature. This helps ensure even baking and prevents the cake from cooking unevenly. For most heart cake recipes, a temperature of 350°F (175°C) is ideal for a perfectly golden and fluffy texture.
2. Grease and Line the Cake Pan Properly
If you’re using a heart-shaped cake pan, make sure to grease it thoroughly with butter or cooking spray, and line it with parchment paper for easy removal after baking. If you don’t have a heart-shaped pan, you can still make a heart cake by using a round and square pan and cutting the cake into a heart shape afterward. Ensuring the pan is lined will help the cake come out in one solid piece without sticking.
3. The Right Baking Time
The baking time for a heart cake can vary depending on the size and thickness of the cake, but it typically takes about 18-25 minutes at 350°F (175°C). Check the cake at the 18-minute mark by inserting a toothpick into the center—if it comes out clean or with just a few crumbs, the cake is ready. If it comes out with wet batter, return the cake to the oven and check again after a few more minutes. Overbaking can lead to a dry texture, so it’s important to keep an eye on it during the final minutes of baking.
4. Don’t Open the Oven Door Too Soon
Refrain from opening the oven door too soon during the baking process. Doing so can cause the cake to collapse or bake unevenly. Wait until the cake has risen and firmed up a little—usually around halfway through the baking time—before checking it.
5. Cooling Time Is Key
Once your cake has finished baking, remove it from the oven and place it on a cooling rack. Allow the cake to cool completely in the pan for about 10 minutes before attempting to remove it. This prevents it from breaking or crumbling. After 10 minutes, carefully lift the cake from the pan and let it cool completely on the rack. Cooling is important because it allows the cake to firm up, making it easier to frost and decorate.
6. How to Tell If the Cake Is Fully Baked
In addition to using the toothpick test, you can also gently press the top of the cake with your finger. If the cake bounces back and doesn’t leave an indentation, it’s done. Another sign that your cake is baked to perfection is a light golden brown around the edges, while the center should be slightly firm but not wet.
Cooling and Leveling the Cake
After your heart-shaped cake has finished baking, it’s essential to let it cool properly before decorating and frosting. Cooling allows the cake to firm up, making it easier to handle without crumbling or breaking. Here’s a more detailed look at the cooling and leveling process:
1. Let the Cake Cool in the Pan
Once you remove the cake from the oven, place it on a wire rack and allow it to cool in the pan for about 10-15 minutes. This initial cooling time helps the cake set and makes it easier to remove from the pan without sticking.
2. Remove from the Pan Carefully
Once the cake has cooled slightly, carefully run a knife around the edges of the pan to loosen it. Then, gently invert the pan over the wire rack to release the cake. Be gentle to avoid any cracks or breaking, especially if the cake is still warm. If the cake sticks, give it a little more time to cool, and it will come out much easier.
3. Cool Completely Before Decorating
It’s important to let your heart cake cool completely before frosting. If you frost the cake while it’s still warm, the frosting can melt, and your decorations might not stay in place. Allow the cake to cool for at least 30 minutes to 1 hour before you begin decorating. This ensures the frosting will stay firm and help create that smooth, professional finish.
4. Leveling the Cake
Once the cake has cooled, it’s time to level it for an even surface. A level cake ensures that your frosting goes on smoothly and helps your design stay balanced.
- Trim the Top: Use a serrated knife or a cake leveler to carefully cut off any dome-shaped top of the cake. This step makes sure the top of the heart cake is flat and even.
- Even Out the Sides (Optional): If your heart cake edges are uneven, you can also trim those slightly to create a uniform, symmetrical heart shape.
- Save the Cake Trimmings: You can save the cake trimmings to crumble and use them as a topping or in cake pops!
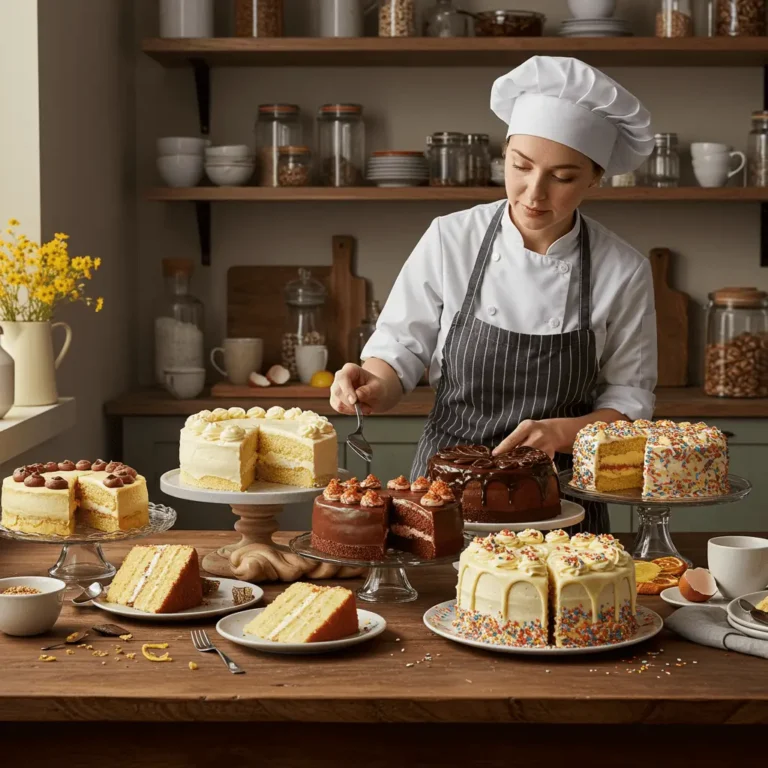
Decorating Your Heart Cake Like a Pro
Applying the First Layer of Frosting (Crumb Coat)
The crumb coat is a vital step in the cake decorating process, ensuring your heart cake looks smooth and professional. This thin, protective layer of frosting helps to seal in any loose crumbs, preventing them from mixing into the final layer of frosting and ruining your clean look. Here’s a more detailed guide on how to apply the crumb coat:
1. Prepare Your Cake for Frosting
- Once your heart-shaped cake has fully cooled, level the top if necessary to ensure an even surface. This can be done with a serrated knife or cake leveler.
- If you’ve baked multiple layers, stack them carefully, using a bit of frosting between each layer to help them stick together.
2. Apply the Crumb Coat
- Start by scooping a small amount of your frosting onto the cake using an offset spatula. This frosting should be slightly softer than your final frosting layer, so it goes on smoothly and easily.
- Spread the frosting in a thin, even layer over the entire cake, including the sides. Don’t worry about perfection—this is just the base layer to trap any crumbs.
- Be sure to cover every inch of the cake, including the edges and any nooks and crannies, to ensure the crumb coat is applied evenly.
3. Smooth It Out
- Once the crumb coat is applied, use an offset spatula or a bench scraper to gently smooth out the frosting. Hold the spatula at a slight angle and gently spin the cake on a turntable to help achieve an even, smooth coat.
- If any crumbs appear on the spatula, wipe it clean before continuing to prevent them from spreading.
4. Chill the Cake
- After the crumb coat is applied, chill the cake in the fridge for at least 30 minutes. This helps the frosting firm up and sets the crumb coat in place.
- Chilling also makes it easier to apply the final layer of frosting without disturbing the base coat.
5. Prepare for the Final Frosting Layer
- Once the crumb coat has set, you’re ready to apply the final, thicker layer of frosting. You can add more vibrant colors, intricate designs, or piping details to give your heart cake that professional touch.
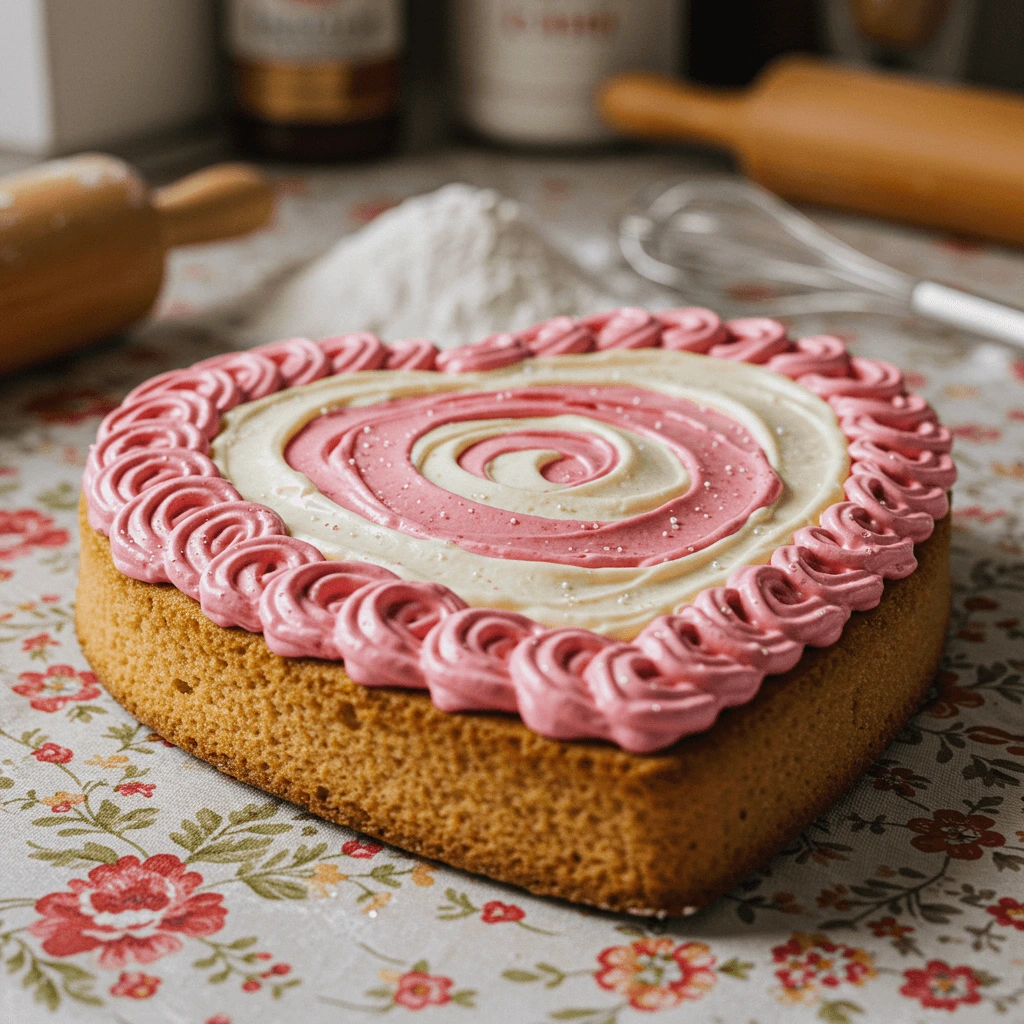
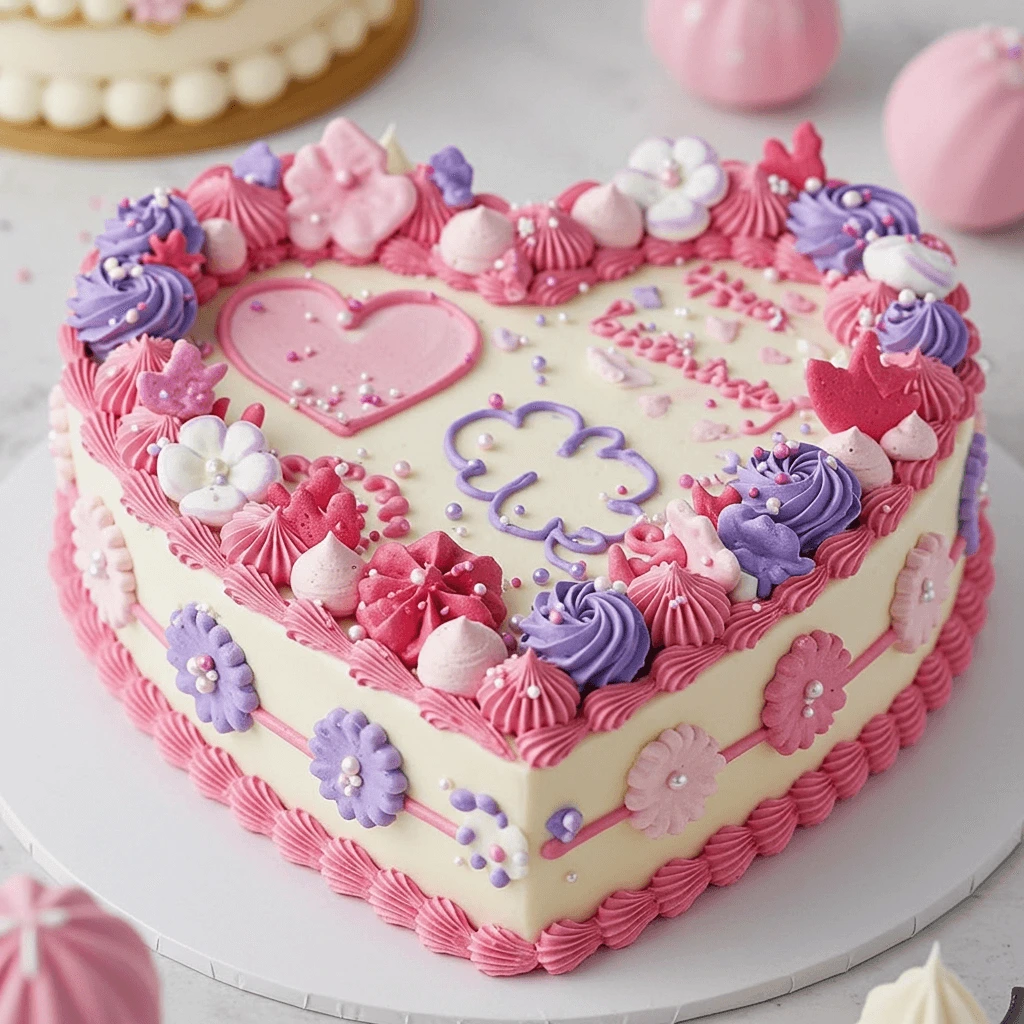
Piping and Designing a Beautiful Heart Cake
Decorating a heart cake is where the fun really begins! Whether you’re a beginner or an experienced baker, piping and designing your heart cake is an opportunity to get creative and personalize your cake for any occasion. Here are some steps and ideas to help you create a stunning heart-shaped cake that’s sure to impress your guests:
1. Choose the Right Piping Tools
Before you begin, ensure you have the proper tools for the task. A piping bag with various piping tips can make all the difference when it comes to creating intricate designs. Here are some essential piping tips to consider:
- Star tip: Perfect for making beautiful swirls, rosettes, or borders.
- Round tip: Ideal for writing messages or making small dots.
- Leaf tip: Adds elegant leaf shapes to your decorations.
2. Prepare Your Frosting
The consistency of your frosting plays a crucial role in how your design turns out. Make sure your frosting is smooth and the right consistency for piping. If it’s too soft, it will run and lose its shape, while if it’s too stiff, it might not pipe smoothly. Here’s how you can achieve the perfect frosting:
- For buttercream frosting, beat it for a few minutes until it’s light and fluffy.
- If the frosting is too thick, add a few drops of milk to thin it slightly.
- If the consistency is too thin, stir in powdered sugar to thicken it.
3. Start with a Crumb Coat
Before you dive into the fun designs, it’s a good idea to apply a crumb coat (a thin layer of frosting) to seal in the crumbs. This will provide you with a flawless foundation to work from. Once applied, chill the cake for about 15-30 minutes to firm up the crumb coat, making it easier to pipe clean designs.
4. Add Swirls, Rosettes, and Borders
Once your cake is ready for decorating, you can start piping fun designs. A classic choice for heart cakes is to pipe buttercream swirls or rosettes on top or around the edges:
- Swirls: Using a star piping tip, create beautiful swirls around the top of the cake. You can vary the size to make it look more dynamic.
- Rosettes: These are elegant flowers made from buttercream. Use a star tip, and gently squeeze while turning the piping bag in a circle to form a rosette.
- Borders: Pipe a simple border around the bottom of the cake for a finished look.
5. Add Color and Texture
The beauty of a heart cake lies in the design, and you can really play with color to make it pop. For a Valentine’s Day theme, use red, pink, or white frosting. For a more sophisticated look, try pastel shades like light pink, lavender, or peach. If you want to add texture, consider using different frosting colors and techniques, such as:
- Ombre effect: Gradually transitioning from one color to another, typically lighter to darker shades of the same color.
- Sprinkles or edible glitter: Adding a touch of sparkle can elevate the overall appearance of the cake.
- Chocolate drizzle: For a rich, decadent look, drizzle melted chocolate over the top and let it drip down the sides.
6. Personalize with Toppers and Extras
Make your heart cake even more special by adding personalized decorations:
- Message piping: Use a round piping tip to pipe a sweet message like “I love you,” “Happy Anniversary,” or simply the recipient’s name.
- Fresh flowers or berries: Adding fresh edible flowers or berries (like raspberries or strawberries) on top can bring a fresh and vibrant touch to your design.
- Fondant accents: If you want a more polished, professional look, consider using fondant to create shapes like hearts, initials, or other designs.
7. Final Touches
Once you’ve completed your piping and decorations, step back and take a look at your cake. Sometimes a few extra touches can really complete the look. Consider adding chocolate shavings, crushed nuts, or a light dusting of powdered sugar to make your cake extra special.
Creative Theme Ideas for Different Occasions
One of the best things about a heart cake is its versatility. Whether you’re celebrating Valentine’s Day, a wedding anniversary, a birthday, or just want to surprise someone special, you can easily customize the design and flavors to suit the occasion. Here are some creative heart cake theme ideas to make each celebration extra special:
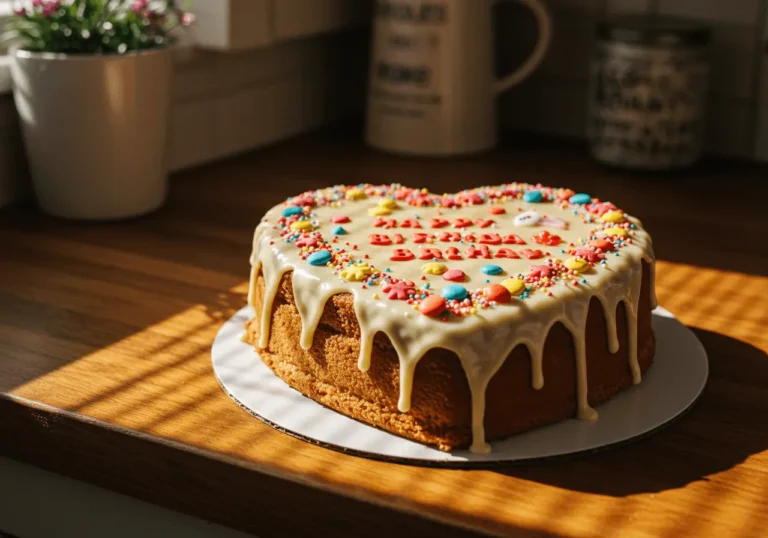
1. Valentine’s Day Heart Cake
For Valentine’s Day, the heart cake becomes the ultimate symbol of love and affection. Here’s how to make it even more romantic:
- Colors: Use shades of red, pink, and white for a classic Valentine’s Day look. You can also add a little gold or silver edible glitter to give it a magical touch.
- Decorations: Heart-shaped sprinkles, edible flowers, or chocolate shavings will give the cake a cute and festive feel. For extra sweetness, pipe “Love” or a short romantic message in the center using buttercream frosting or chocolate ganache.
- Flavor Ideas: Consider making a red velvet heart cake or chocolate cake to match the romantic vibe, and finish it off with a cream cheese frosting that’s rich and tangy.
2. Wedding Anniversary Heart Cake
Celebrate your love and commitment with a beautiful and elegant heart cake for your anniversary. This theme can be as simple or as extravagant as you like:
- Colors: Opt for white, ivory, and gold for an elegant look, or choose the couple’s wedding colors if you want a more personal touch.
- Decorations: Create delicate piping work with buttercream flowers, sugar pearls, or even a fondant bow for a sophisticated finish. You can also add fondant lace designs or gilded accents to give the cake a luxurious feel.
- Flavor Ideas: Go with a light lemon cake with buttercream frosting or a rich chocolate cake with raspberry filling—perfect for a celebration of love.
3. Birthday Heart Cake
A heart-shaped birthday cake can be both playful and personalized to make the day extra special:
- Colors: For kids’ birthdays, go with bright colors like blue, pink, or rainbow sprinkles. For adults, choose pastel colors or even a marble effect using swirls of different frosting hues.
- Decorations: Try fun birthday-themed decorations like candles, party hats, or a custom birthday message piped on the cake. You can also use fondant cutouts like balloons, stars, or hearts for a whimsical look.
- Flavor Ideas: Choose a fun, flavorful cake such as chocolate chip, funfetti, or vanilla with colorful sprinkles to make it feel festive and lighthearted.
4. Baby Shower Heart Cake
A heart cake can be a perfect choice for a baby shower, symbolizing the love and joy surrounding the new arrival:
- Colors: Use soft, pastel shades like mint green, baby blue, lavender, or pale pink. You can also go with gender-neutral colors like yellow or white if the baby’s gender is unknown.
- Decorations: Add cute baby-themed elements such as baby booties, bottles, or animals (like elephants or teddy bears). Edible pearls and fondant bows are also great additions for a delicate touch.
- Flavor Ideas: Light lemon or vanilla cake with buttercream frosting is perfect for a refreshing and sweet cake at a baby shower. You can also add a hint of strawberry or peach to give it a fruity twist.
5. Mother’s Day Heart Cake
A heart cake for Mother’s Day is a sweet way to show appreciation and love for mom. It can be as basic or as intricate as you prefer:
- Colors: Go for soft, elegant colors like blush pink, lavender, or soft peach. Consider floral accents or gold detailing for a luxurious feel.
- Decorations: Decorate the cake with buttercream flowers, edible pearls, or even a personalized message that says “Happy Mother’s Day.” Adding a floral wreath design around the heart will give the cake a more sophisticated look.
- Flavor Ideas: Vanilla or strawberry cake with cream cheese frosting is a classic choice that many moms love. You could also try a carrot cake with cream cheese frosting for a cozy, comforting option.
6. Just Because! Heart Cake
Sometimes, the best reason to make a heart cake is simply to spread some love! Surprise someone you care about with a sweet treat for no particular reason:
- Colors: You can go with vibrant rainbow colors for a cheerful cake or stick to classic red and white for simplicity and elegance.
- Decorations: Add a simple heart-shaped message such as “You’re Loved” or “Hugs and Kisses” or make it playful with sprinkles and chocolate hearts.
- Flavor Ideas: Choose flavors that suit the recipient’s taste, such as chocolate and caramel for a decadent treat or a fruit-infused cake like strawberry shortcake for a light, refreshing dessert.
Tips for Storing and Serving Your Heart Cake
How to Store Leftover Heart Cake
After enjoying a delicious heart-shaped cake, you might have some leftover slices. The good news is that with the right storage methods, you can keep your heart cake fresh and moist for several days, allowing you to savor it even after the celebration is over. Here’s how to store your leftover heart cake properly:
1. Storing at Room Temperature
If you plan to finish the cake within a few days, storing it at room temperature is the easiest and most convenient option. Here’s what to do:
- Wrap the cake tightly: Use plastic wrap or foil to wrap the leftover slices or the whole cake. This will help lock in moisture and keep the cake from becoming dry.
- Airtight container: Alternatively, you can place the cake slices in an airtight container to keep them fresh. This works especially well if the cake has frosting, as it keeps the layers intact.
- Store in a cool, dry place: Find a spot away from direct sunlight and heat sources, such as on the kitchen counter. Your heart cake will stay fresh at room temperature for up to 3 days.
2. Storing in the Refrigerator
If you don’t think you’ll finish the cake in a few days, you can store it in the refrigerator for longer freshness:
- Cover properly: Wrap the heart cake tightly in plastic wrap or place it in an airtight container. This is crucial, as refrigeration can dry out cakes if they’re not sealed properly.
- Frosting concerns: If your cake has buttercream or whipped cream frosting, storing it in the fridge is essential to prevent the frosting from melting or spoiling. However, be aware that the cake may become a bit firmer in the fridge.
- Consume within a week: Your leftover heart cake should stay fresh for up to 7 days in the refrigerator. When ready to eat, allow it to come to room temperature for the best flavor and texture.
3. Freezing Leftover Heart Cake
For long-term storage, freezing your leftover heart cake is a great option. This way, you can enjoy your cake at a later date without losing flavor or texture:
- Cut into slices: It’s easier to store cake in individual slices, so cut the leftover heart cake into portions before freezing.
- Wrap each slice: Wrap each slice tightly in plastic wrap, then cover it with aluminum foil to prevent freezer burn. For added protection, you can place the wrapped slices in a freezer-safe bag or container.
- Label and date: Don’t forget to label the cake with the date, so you can keep track of how long it’s been in the freezer.
- Thawing: When you’re ready to enjoy the frozen cake, thaw it in the fridge for several hours or allow it to come to room temperature. If you want to bring it back to life, you can microwave individual slices for about 10-15 seconds for that fresh-baked taste.
4. Tips for Storing Frosted Heart Cake
- If your heart cake is decorated with delicate frosting or fondant, be cautious when storing it. If you’re refrigerating it, ensure the frosting is well-covered to avoid air exposure and drying out.
- For a glossy finish: If you used a shiny glaze or chocolate drizzle, store the cake carefully to prevent it from becoming sticky or ruined. It’s a good idea to store the cake in a container with enough space to avoid smudging the decorations.
Freezing a Heart Cake for Later
Freezing a heart cake is a great way to preserve it for future use, whether you want to make it ahead of time or save leftovers for later enjoyment. Here’s a detailed guide on how to properly freeze a heart cake so that it stays fresh and delicious:
1. Let the Cake Cool Completely
Before you freeze your heart cake, it’s essential to cool it completely. Freezing a warm cake can cause condensation, leading to sogginess once thawed. Allow your cake to sit at room temperature for at least an hour (or until it’s completely cool).
2. Wrap the Cake Properly
To ensure the cake doesn’t get freezer burn or absorb any unwanted flavors, it’s important to wrap it securely. Follow these steps:
- For unfrosted cakes: Wrap the cake in plastic wrap or wax paper, ensuring it’s tightly covered with no air pockets. Then, wrap the entire cake in aluminum foil or place it inside a freezer-safe plastic bag for added protection.
- For frosted cakes: If your heart cake is already frosted, you’ll need to be extra careful. First, freeze the cake uncovered in the freezer for 1-2 hours until the frosting hardens. This step prevents the frosting from sticking to the wrapping. Once the frosting is firm, wrap the cake with plastic wrap and foil, or place it inside a large airtight container.
3. Label the Cake
To keep track of how long the cake has been in the freezer, make sure to label it with the date of freezing. This will help you know how long it’s been stored and ensure you use it within a reasonable time frame.
4. Freezing the Cake
Once your cake is wrapped and labeled, place it in the freezer. The cake can stay frozen for up to 2-3 months without compromising its taste or texture. Keep it on a flat surface to maintain the shape of the heart.
5. Thawing the Cake
When you’re ready to enjoy your heart cake, here’s how to thaw it:
- Remove the cake from the freezer and unwrap the plastic and foil (but leave it in the plastic wrap).
- Allow the cake to thaw at room temperature for about 2-3 hours, depending on its size.
- If you’re in a rush, you can also speed up the process by microwaving individual slices for about 15-20 seconds.
6. Refreshing the Frosting (if needed)
After thawing, the frosting may lose its smooth texture. If this happens, you can reapply a fresh layer of frosting to restore its look. You can also add a bit of extra decoration, like sprinkles, edible glitter, or fresh fruit, to make it look like it was freshly made.
Best Ways to Serve and Enjoy
Serving and enjoying your heart cake is just as important as making it! Whether it’s a special occasion or just a sweet treat, here are some creative and delicious ways to elevate your cake experience:
1. Pair with Whipped Cream or Ice Cream
A slice of heart cake is delicious on its own, but pairing it with a dollop of whipped cream or a scoop of ice cream takes it to the next level. The richness of whipped cream complements the soft, moist texture of the cake, while ice cream adds a cold, creamy contrast. Choose a flavor like vanilla, chocolate, or strawberry for a classic combo, or get creative with more adventurous flavors like mint chocolate chip or salted caramel.
2. Add Fresh Fruits for a Light, Refreshing Touch
Fresh fruits add a burst of flavor and a light contrast to the rich cake. Strawberries, raspberries, or blueberries work wonderfully, especially if you’re making a Valentine’s Day heart cake. Not only will the fruit enhance the taste, but it also adds a beautiful pop of color that enhances the cake’s visual appeal. You can place whole fruit on top of the cake or even arrange slices around the edges for an elegant presentation.
3. Serve with a Warm Drink
Pairing your heart cake with a warm drink can make it feel like a cozy, indulgent treat. If you’re serving the cake for dessert, consider pairing it with a cup of coffee, hot cocoa, or tea. A rich, aromatic drink enhances the flavors of the cake and provides a comforting experience, especially if the cake is served warm. If you’ve used chocolate ganache or rich frosting, a hot beverage will balance the sweetness beautifully.
4. Create Cake Parfaits for Individual Servings
For a fun and creative twist, turn your heart cake into individual cake parfaits. Cut the cake into small cubes and layer them in jars or glasses with your choice of toppings like whipped cream, fruit, and even a drizzle of caramel or chocolate sauce. Not only does this make serving easy, but it also adds an element of fun and allows your guests to enjoy a variety of textures in each bite.
5. Top with Edible Flowers or Decorative Elements
For a more elegant touch, consider adding edible flowers to your heart cake. Roses, violets, or pansies can make the cake look like a work of art. Fresh mint leaves also add a lovely pop of green and provide a slight freshness to balance the sweetness of the cake. Edible glitter or sparkling sugar can make the cake look even more festive, making it perfect for weddings, anniversaries, or Valentine’s Day.
6. Serve with a Sweet Sauce or Compote
If you want to really wow your guests, serve your heart cake with a sweet sauce or compote. You can create a simple raspberry or strawberry sauce by blending fresh berries with a little sugar and cooking them down to create a thick, rich sauce. A chocolate sauce or caramel sauce also works wonderfully if you’re craving something extra indulgent. Pour the sauce over the cake for an added burst of flavor and moisture.
Conclusion
Making a heart cake is a fun and rewarding experience that brings joy to any occasion. From baking to decorating, it’s a dessert that’s easy to customize, whether you’re crafting a simple cake for a casual gathering or an elaborate treat for a special celebration. With the right ingredients, tools, and creative flair, you can create a beautiful heart-shaped cake that will impress everyone.
Whether you choose to pair it with whipped cream, fresh fruits, or a warm drink, or opt for more elaborate decorations, your heart cake is sure to be a hit. It’s a versatile dessert that’s perfect for Valentine’s Day, anniversaries, birthdays, or any occasion where you want to share a little love.
Now that you have all the steps, tips, and tricks, it’s time to get baking and create a heart cake that’s as delicious as it is beautiful! Happy baking! ❤️🎂