How to Make Heart Shaped Cakes: A Step-by-Step Guide
Table of Contents
Heart-shaped cakes are a delightful way to celebrate love and special occasions. Whether it’s for Valentine’s Day, an anniversary, a wedding, or a birthday, these beautifully crafted cakes add a romantic and charming touch to any event. Their popularity has surged, thanks to social media trends and the endless creative decorating possibilities.
In this guide, we’ll walk you through everything you need to know about making heart shaped cakes—from selecting the right ingredients and tools to baking, assembling, and decorating like a pro. Whether you’re a beginner or an experienced baker, you’ll learn how to create a stunning cake that looks as good as it tastes. Let’s get started! ❤️🎂
What You Need to Make a Heart Shaped Cakes
Essential Ingredients for a Soft and Moist Cake
Achieving a soft and moist heart-shaped cake starts with selecting the right ingredients. The perfect balance of flour, fat, liquid, and leavening agents ensures a tender crumb and delicious flavor. Below are the key ingredients that contribute to a perfectly baked cake:
1. Cake Flour vs. All-Purpose Flour
- Cake flour is the best option for a light and airy cake because it has a lower protein content, resulting in a softer texture.
- If you only have all-purpose flour, you can make a substitute by replacing 2 tablespoons of flour with cornstarch for every cup used.
2. Sugar – The Sweet Component
- Granulated sugar not only sweetens the cake but also helps retain moisture.
- For an extra soft cake, some bakers use a combination of brown sugar and white sugar, as brown sugar adds a slight caramel flavor and additional moisture.
3. Butter or Oil – Which One to Use?
- Butter provides a rich flavor and a tender crumb. It also helps incorporate air when creamed with sugar, making the cake light and fluffy.
- Vegetable oil or a combination of butter and oil can be used to enhance moisture retention, preventing the cake from drying out.
4. Eggs – The Binding Agent
- Eggs add structure and stability to the cake.
- Using room temperature eggs ensures even mixing and a smooth batter.
5. Dairy – The Secret to Moisture
- Whole milk or buttermilk helps keep the cake soft and tender.
- Buttermilk also adds a slight tanginess, balancing the sweetness. If you don’t have buttermilk, you can easily substitute it by adding 1 tablespoon of vinegar or lemon juice to 1 cup of milk and letting it sit for a few minutes.
6. Baking Powder and Baking Soda – The Leavening Agents
- These ingredients help the cake rise by creating air pockets in the batter.
- Ensure your baking powder and baking soda are fresh, as expired leavening agents can result in a dense cake.
7. Vanilla Extract – Enhancing the Flavor
- A good-quality pure vanilla extract enhances the cake’s overall flavor.
- For a unique twist, you can also use almond extract, lemon zest, or cocoa powder to infuse different flavors.
8. Optional Additions for Extra Moisture
- Sour cream or Greek yogurt can be added to the batter for an ultra-moist texture.
- Applesauce or mashed bananas can also be used as a natural moisture booster while adding a subtle sweetness.
Final Tip:
To achieve the perfect texture, measure ingredients accurately using a kitchen scale whenever possible. Overmixing the batter can lead to a tough cake, so mix just until combined. With the right balance of these ingredients, your heart-shaped cake will turn out soft, moist, and absolutely delicious! 🎂❤️
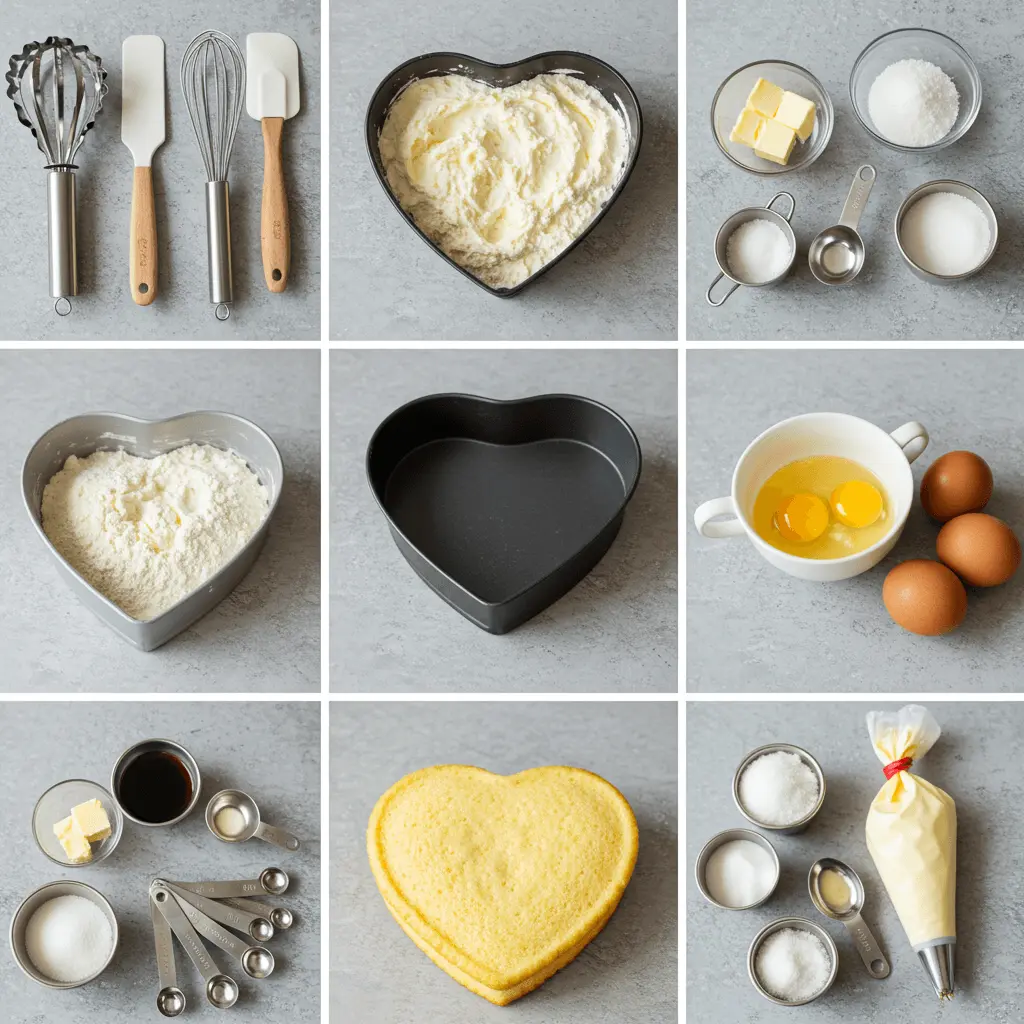
Must-Have Tools for Baking and Decorating
Creating a perfect heart-shaped cake requires not only the right ingredients but also essential baking and decorating tools. Having the proper equipment ensures that your cake bakes evenly, holds its shape, and is decorated beautifully. Here’s a breakdown of the must-have tools for baking and decorating your heart-shaped cake like a pro.
1. Heart-Shaped Cake Pan
A heart-shaped cake pan is the easiest way to achieve a symmetrical heart shape without extra cutting and shaping. These pans come in different sizes, allowing you to bake single-layer or multi-layer cakes. If you don’t have a heart-shaped pan, don’t worry—you can create one by cutting a round and square cake and assembling them into a heart shape.
2. Cake Leveler or Serrated Knife
A cake leveler or a long serrated knife helps create even cake layers by trimming off domed tops. This ensures that the cake stacks neatly without tilting, making it easier to frost and decorate. Leveling the cake also enhances the overall aesthetic and stability of the final design.
3. Piping Bags and Decorating Tips
To achieve beautiful vintage-style decorations or modern designs, piping bags and decorating tips are essential. Here are some common tips used for heart-shaped cakes:
- Star tip (#1M or #2D) – For creating rosettes and textured borders.
- Round tip (#3 or #5) – Ideal for writing messages or making small details.
- Leaf tip (#352) – Perfect for adding buttercream leaves around floral designs.
Reusable or disposable piping bags make it easy to apply buttercream frosting smoothly and with precision.
4. Offset Spatula and Bench Scraper
An offset spatula is crucial for spreading frosting evenly across the cake while preventing fingerprints or uneven edges. A bench scraper is another great tool that helps create smooth, professional-looking sides on your cake. These tools are especially useful for achieving a clean finish before adding piping details.
5. Rotating Cake Turntable
A cake turntable makes decorating much easier by allowing you to rotate the cake while piping, spreading frosting, or adding intricate details. This tool ensures smoother finishes and more precise designs, especially when working with buttercream or fondant.
6. Food Coloring and Edible Decorations
Adding a personal touch to your cake is easy with food coloring and edible decorations. Gel-based food colors work best because they provide vibrant shades without altering the consistency of the frosting. Other decorations include:
- Edible pearls and sprinkles for an elegant look.
- Gold or silver edible glitter to add a touch of sparkle.
- Fondant flowers or hearts for a more decorative finish.
7. Cooling Rack and Cake Board
After baking, a cooling rack helps the cake cool evenly and prevents soggy bottoms. Once cooled, transferring the cake to a cake board makes decorating and serving much easier. Cake boards also provide stability, especially if you’re making a layered heart-shaped cake.
Final Thoughts
Using the right tools ensures that your heart-shaped cake turns out just as beautiful as it is delicious. Whether you’re making a simple cake for a small gathering or an elaborate multi-layered masterpiece, these essential tools will help you achieve bakery-quality results with ease. Happy baking! 🎂❤️
Choosing the Right Flavor and Color
One of the most exciting parts of making a heart-shaped cake is selecting the perfect flavor and color combination. The right choice can elevate your cake, making it both visually stunning and irresistibly delicious. Whether you prefer classic flavors or want to experiment with something unique, here’s how to make the best decision for your heart-shaped creation.
Popular Flavor Choices for Heart-Shaped Cakes
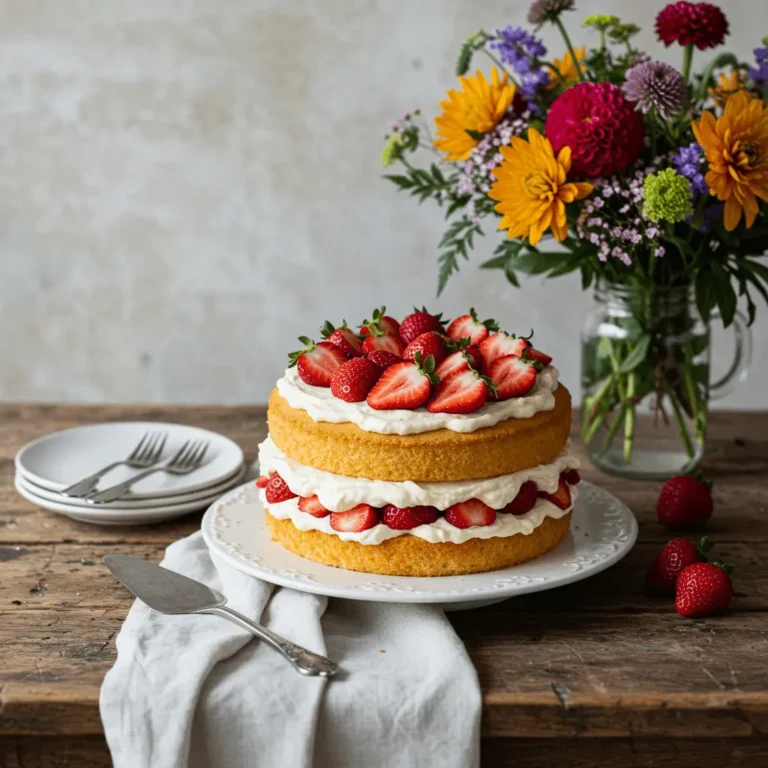
- Classic Vanilla Cake – A timeless favorite that pairs well with almost any frosting or filling. Vanilla cake is light, fluffy, and a great option if you’re decorating with colorful buttercream or fondant.
- Rich Chocolate Cake – Perfect for chocolate lovers, this indulgent option provides a deep, decadent taste that pairs beautifully with fruit fillings or ganache.
- Red Velvet Cake – Known for its vibrant red color and hint of cocoa flavor, red velvet is a popular choice for romantic occasions like Valentine’s Day and weddings.
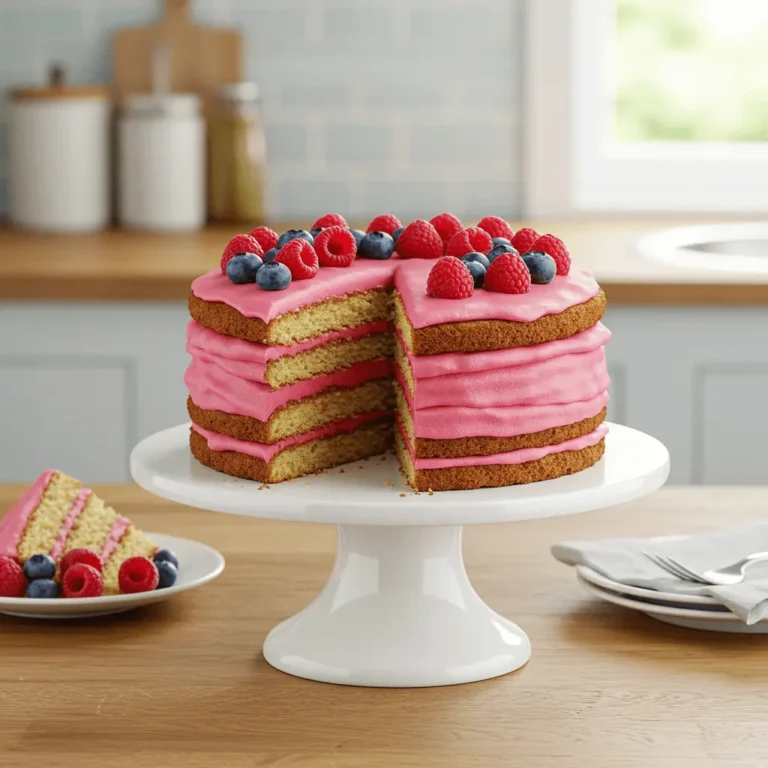
- Strawberry Cake – A naturally pink cake with a sweet, fruity flavor that enhances the romantic theme of heart-shaped cakes.
- Lemon or Orange Cake – If you’re looking for a refreshing citrus flavor, these cakes add a zesty twist while maintaining a soft texture.
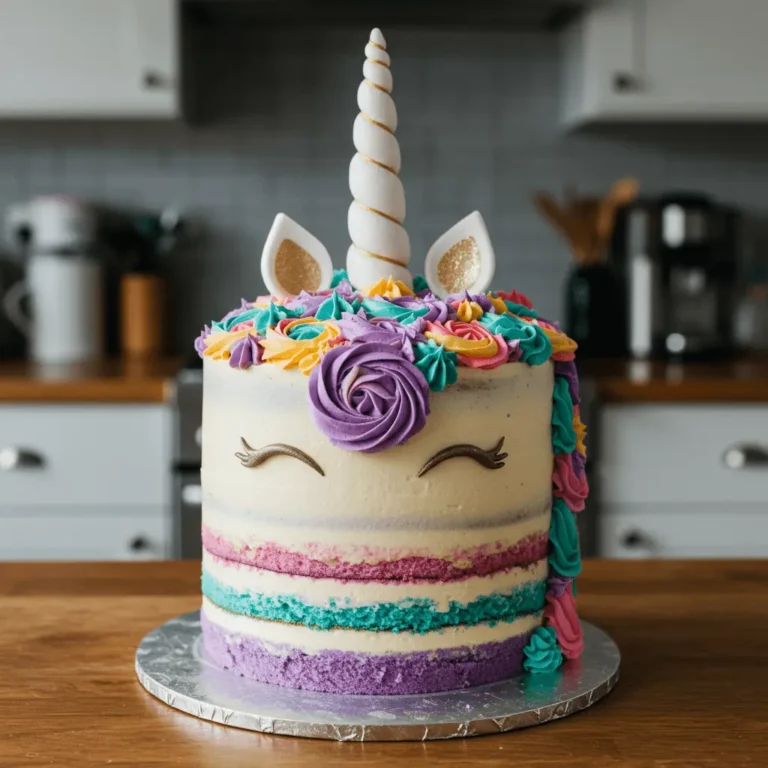
- Funfetti Cake – A playful and colorful option featuring sprinkles inside the batter, perfect for birthdays and celebrations.
Selecting the Right Color for Your Heart Cake
The color of your cake plays a crucial role in achieving the desired aesthetic. While traditional red and pink shades dominate heart-shaped cakes, there are many creative ways to customize your cake’s color:
- Romantic Tones: Red, pink, or deep burgundy shades enhance the romantic appeal of a heart-shaped cake. You can achieve these colors using natural food coloring or gel-based food dyes for a vibrant effect.
- Pastel Hues: Soft pastel shades like baby pink, lavender, or peach create a delicate and elegant look, often used for weddings and anniversaries.
- Bold and Unique Colors: If you want a more modern or unconventional heart cake, consider using deep purple, soft blue, or even black buttercream for a trendy and eye-catching design.
- Ombre Effect: Blending multiple shades, such as light pink fading into a deeper red, can add a sophisticated touch to your cake.
Tips for Achieving the Perfect Cake Color
- Use Gel Food Coloring – Gel-based food coloring provides a more concentrated pigment without altering the cake’s texture like liquid food coloring can.
- Mix Colors Gradually – Always add food coloring in small amounts to avoid overpowering the batter or frosting.
- Consider Natural Alternatives – For a more organic approach, try beetroot powder for red, matcha for green, or blueberry juice for purple hues.
By carefully selecting the right flavor and color, you can create a heart-shaped cake that not only tastes amazing but also looks stunning for any special occasion. Whether you’re aiming for a classic romantic feel, a playful funfetti design, or a bold statement cake, the possibilities are endless! ❤️🎂
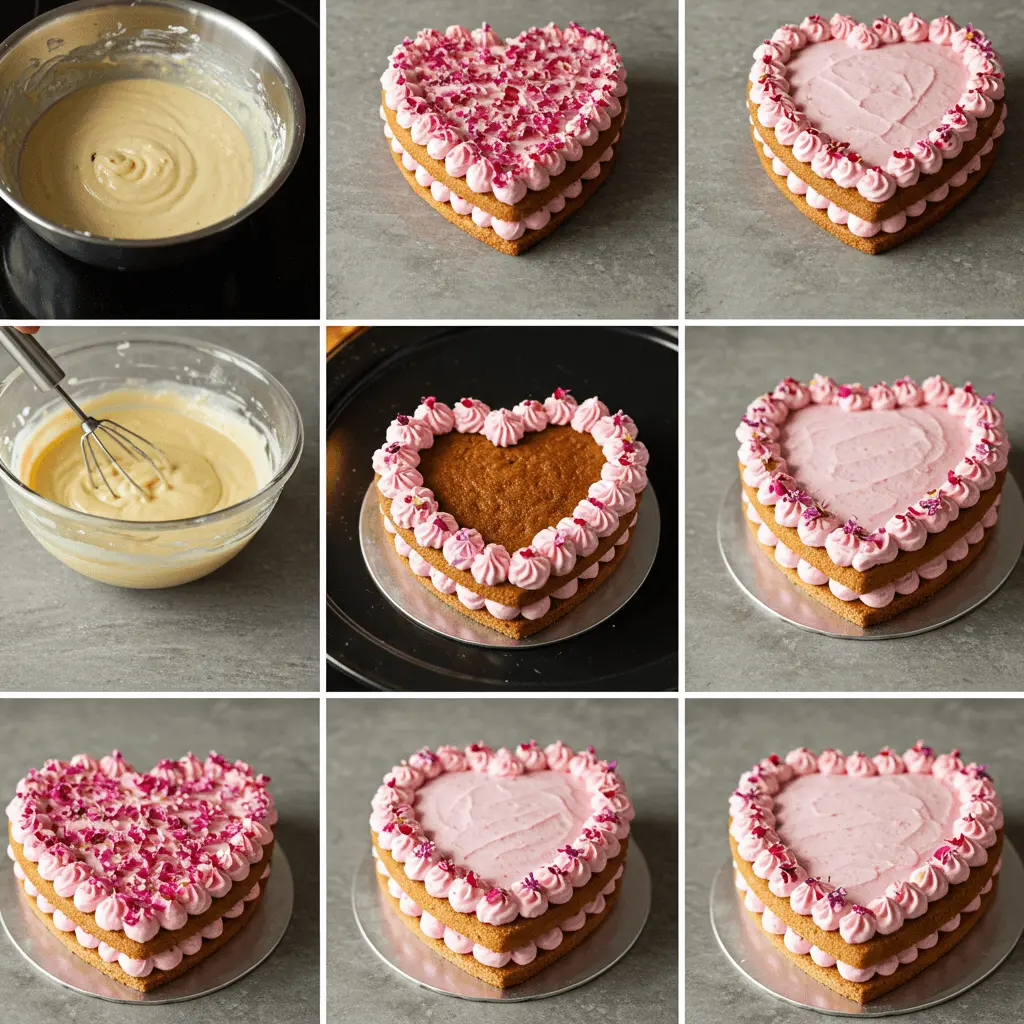
Step-by-Step Guide to Baking a Heart Shaped Cakes
Mixing and Baking the Perfect Cake
The first step in making a perfect heart-shaped cake is ensuring your cake batter is mixed just right. Follow these tips for a smooth, fluffy cake:
- Prepare Your Ingredients
Before you start mixing, make sure all your ingredients are at room temperature. This includes butter, eggs, and milk. Room temperature ingredients blend better and create a smoother batter, leading to a fluffier texture. If your butter is cold, it can cause the batter to clump, and the cake may not rise as evenly. - Creaming the Butter and Sugar
Start by creaming your butter and sugar together until the mixture is light and fluffy. This step incorporates air into the batter, which helps your cake rise. Use a hand mixer or stand mixer on medium speed to beat the butter and sugar for about 3-4 minutes. - Adding the Eggs
Once the butter and sugar are properly creamed, add eggs one at a time. Mix well after each addition to ensure the batter remains smooth. This process prevents the eggs from curdling and ensures even distribution throughout the cake. - Combining Dry and Wet Ingredients
In another bowl, sift the dry ingredients: flour, baking powder, and a pinch of salt.
This removes any lumps and ensures even distribution of the leavening agents. Gradually add the dry ingredients to the creamed butter mixture, alternating with your milk. Begin and end with the dry ingredients. Mix gently until everything is just combined—over-mixing can make your cake dense. - Incorporating Food Coloring (Optional)
If you want to add some color to your cake, now’s the time. Use a few drops of gel food coloring (which gives more vibrant hues than liquid food coloring) and gently fold it into the batter. This is perfect for creating pastel or bold colors for special occasions, like Valentine’s Day. - Baking the Cake
Preheat your oven to 350°F (175°C) and make sure your heart-shaped cake pan is well-greased with butter or non-stick spray, or line it with parchment paper for easy removal. Pour your batter into the pan, filling it about halfway or slightly more to allow room for the cake to rise.Bake for 25-30 minutes, or until a toothpick inserted into the center of the cake comes out clean or with only a few moist crumbs clinging to it. Baking times can vary depending on your oven, so start checking around the 25-minute mark.Once the cake is done, allow it to cool in the pan for about 10 minutes before transferring it to a wire rack. This cooling time allows the cake to firm up and makes it easier to handle when decorating.
Cooling and Preparing the Cake for Decoration
Once your heart-shaped cake has finished baking, it’s crucial to allow it to cool properly before moving on to the decorating stage. This step is often overlooked but plays a significant role in achieving a smooth, beautiful finish. Here’s how to properly cool and prepare your cake for decoration:
1. Let the Cake Cool in the Pan
After taking the cake out of the oven, let it rest in the cake pan for about 10–15 minutes. This allows the structure to set slightly and makes it easier to remove from the pan without breaking. The cake will still be a bit fragile during this time, so avoid touching it too much.
2. Transfer to a Cooling Rack
Once the cake has slightly cooled in the pan, carefully remove it and transfer it onto a cooling rack. This step is essential to avoid creating a soggy base. By placing it on a wire rack, air can circulate around the cake, helping it cool more evenly. Be sure to leave plenty of space between layers if you’ve baked multiple heart-shaped cakes for stacking.
3. Level the Cake for Even Layers
If you’re stacking or layering your heart-shaped cake, it’s a good idea to level the top. Once the cake has cooled completely, use a serrated knife to carefully trim any domed areas off the top, creating a flat surface. This ensures even frosting application and creates a more professional, polished look.
4. Chill the Cake Before Decorating
For the best results, especially when using buttercream, it’s a great idea to chill your cake in the fridge for about 30 minutes to 1 hour. This helps to firm up the cake and frosting, making it easier to decorate without the layers sliding apart. If you’re using fondant, this step is crucial, as it allows the fondant to adhere better to the cake’s surface.
5. Prepare the Cake for Icing
Before applying your frosting or fondant, it’s helpful to apply a crumb coat—a thin layer of frosting that seals in any loose crumbs. Spread a thin, even layer of buttercream over the entire cake, making sure to cover all the edges. Once the crumb coat is applied, chill the cake again for about 15–20 minutes to set the frosting before adding the final decorative layer.
By following these steps, you ensure that your cake is properly prepared for decoration, making the process smoother and more enjoyable. A well-cooled and leveled cake will give you a clean, flawless base, allowing your frosting and decorations to shine!
Cutting a Heart Shape Without a Special Pan
While a heart-shaped cake pan makes things easier, it’s entirely possible to create a heart-shaped cake using a regular round cake pan. If you don’t have a heart-shaped pan on hand, don’t worry! Follow these simple steps to carve out a perfect heart shape from a round cake.
- Bake a Round Cake
Start by baking your cake in a standard round cake pan. Any cake recipe will work, but a slightly dense cake like vanilla, chocolate, or red velvet holds up well for carving. - Cool the Cake Completely
Once baked, allow the cake to cool fully on a wire rack. It’s essential that the cake is firm before cutting to avoid crumbling or uneven slices. - Mark the Heart Shape
Place a piece of parchment paper or wax paper over the top of your cake and draw or trace a heart shape on it. You can use a template from online sources or freehand it. Ensure the heart is proportional to the size of your cake. - Cut the Cake into Two Halves
Using a sharp serrated knife, carefully cut the cake into two even halves from the top to the bottom. This will form two semicircles. - Carve the Heart Shape
Place the parchment template on top of your cake and align it to the middle. Cut along the lines of the heart, starting from the top center. You’ll end up with two top pieces that form the curves of the heart, and one bottom piece for the point. - Trim and Adjust for Symmetry
After cutting, you may need to adjust the edges slightly to ensure they’re even and symmetrical. You can always trim a little extra if necessary. - Assemble the Heart Shape
Carefully assemble the pieces by joining the two curved halves at the top and placing the pointed bottom piece at the center. You’ll now have a perfect heart-shaped base to decorate!
This technique is a fun and budget-friendly alternative to using a specialized pan and allows you to customize the size and shape of your heart-shaped cake. Once it’s assembled, you can move on to decorating it with your favorite buttercream, fondant, or other decorations to complete the look.
The beauty of this method is that it gives you the flexibility to create different sizes and styles, so it’s perfect for any event—whether you’re making a large heart-shaped cake for a party or small individual servings.
Decorating Your Heart Shaped Cakes Like a Pro
Buttercream vs. Fondant – Which Is Better?
When it comes to decorating heart-shaped cakes, two of the most popular options are buttercream frosting and fondant. Each has its unique qualities, so choosing the right one depends on your personal preferences, the type of cake you’re making, and your level of decorating skill. Let’s break down the pros and cons of both, so you can decide which is best for your heart-shaped creation.
Buttercream Frosting: A Classic Choice
Buttercream is the traditional choice for cake decoration. It’s creamy, smooth, and easy to work with, making it perfect for beginners and experienced decorators alike. Here’s why you might choose buttercream:
- Texture and Flavor: Buttercream is soft and sweet, making it an ideal frosting for those who love a rich, flavorful cake. It has a smooth, velvety texture that’s easy to pipe and spread, allowing for a variety of decorating techniques, such as creating rosettes, swirls, or intricate borders.
- Decorating Flexibility: Buttercream offers flexibility in terms of both appearance and taste. You can easily add food coloring to achieve your desired shade, whether you’re going for a pastel look or something more vibrant. It’s also easy to add flavor extracts, like vanilla or almond, to suit your cake’s flavor profile.
- Ease of Application: If you’re new to cake decorating, buttercream is much easier to work with. It doesn’t require as much precision as fondant, and it’s more forgiving, allowing you to fix any mistakes without ruining the overall look of your cake.
- Cons: Buttercream is soft and prone to melting in warm conditions. If your cake will be exposed to high temperatures, you may need to refrigerate it to keep the frosting firm. Additionally, while it’s great for piping techniques, it may not give you the same smooth, sleek finish that fondant does.
Fondant: Sleek and Elegant
Fondant is a sugar-based icing that’s rolled out into sheets and draped over the cake to create a smooth, polished finish. It’s commonly used for more intricate and refined designs, making it a popular choice for weddings and formal events. Here’s why fondant might be the right option for you:
- Sleek Finish: Fondant gives cakes a smooth, glossy finish that’s difficult to achieve with buttercream. If you want a flawless, sleek look, especially for cakes with a lot of decorative elements, fondant is the way to go. It’s perfect for creating sharp edges and achieving that professional-level look.
- Decoration Precision: Fondant can be easily shaped into flowers, bows, and other intricate decorations, making it ideal for detailed designs. It can also be tinted with food coloring or molded into various shapes and textures for a more personalized touch.
- Durability: Fondant has a firmer texture than buttercream, which means it holds its shape better and is less likely to melt. It also holds up well in warm weather, which makes it a good choice for outdoor events or cakes that will be on display for long periods.
- Cons: Fondant can be quite sweet, which may not appeal to everyone. Its chewy texture is different from the soft, creamy consistency of buttercream, and it can sometimes overpower the flavor of the cake. Additionally, fondant can be more challenging to work with, especially for beginners, as it requires rolling and precise application.
Which One is Right for Your Heart-Shaped Cake?
Ultimately, the choice between buttercream and fondant comes down to the look and texture you prefer for your heart-shaped cake. If you’re going for a soft, creamy texture and enjoy a more casual, colorful design, buttercream is the way to go. It’s also easier to work with, making it a great choice for beginners. On the other hand, if you want a sleek, polished finish with intricate decorations, fondant will help you achieve that professional, elegant look.
No matter which option you choose, both buttercream and fondant can help you create a beautiful, delicious heart-shaped cake that’s perfect for any special occasion.
Mastering Piping Techniques for a Stunning Look
When it comes to decorating a heart-shaped cake, the piping technique is key to achieving that elegant, professional finish. Piping allows you to create beautiful designs with precision, giving your cake a polished, eye-catching look. Mastering a few basic piping techniques will elevate your cake to the next level, no matter your skill level.
Here are some popular techniques you can use to decorate your heart-shaped cake:
- Shell Borders
One of the most iconic piping designs, the shell border is perfect for outlining the edges of your cake or creating a delicate border along the bottom. To create this design, use a star piping tip and apply pressure while moving your hand back and forth, creating a series of “U” shapes that connect to form a smooth, flowing border. - Rosettes
Rosettes are another beautiful piping design that can be used to create a vintage, elegant look on your cake. With a large star tip, start by piping a small dot at the center of your desired rosette area. Then, spiral the frosting outwards to form a full, circular rosette. These can be arranged all over the cake or used to frame the heart shape for extra visual appeal. - Ruffles
For a romantic, soft appearance, consider using the ruffle piping technique. With a petal or ruffle piping tip, apply pressure and pull the frosting downwards to create ruffled edges along the sides of the cake. This technique works wonderfully for creating a layered, textured look around the cake. - Cursive Writing
Adding personal touches like names or short messages is easy with piping cursive writing. Use a fine round tip to carefully pipe words on top of the cake or along the side. This is a great way to personalize your heart-shaped cake for a special occasion, whether it’s a heartfelt message for Valentine’s Day or the couple’s names for a wedding. - Adding Details with Edible Decorations
Once you’ve mastered the basic piping techniques, you can further enhance the design of your cake with edible decorations like pearls, sprinkles, or edible glitter. These finishing touches add dimension and sparkle, giving your cake an extra bit of glamour.
Pro Tip: Practice makes perfect! Before piping on your cake, practice on a piece of parchment paper to get comfortable with the flow and pressure needed to create your designs. The more you practice, the more confident you’ll become in creating those stunning, intricate details.
By mastering these piping techniques, you’ll be able to turn your heart-shaped cake into a beautiful, show-stopping centerpiece for any special event. Whether you’re aiming for a minimalist design or a cake covered in intricate piping, these techniques will help you achieve a stunning and professional look!
Creative Decoration Ideas for Any Occasion
Decorating a heart-shaped cake offers endless possibilities, and it’s the perfect canvas for adding a personal, creative touch. Here are some ideas to inspire your decoration for different occasions:
- Romantic Valentine’s Day Cake
- Colors & Theme: For a traditional Valentine’s Day vibe, opt for soft shades like red, pink, and white. You can even use different tones of red to create a beautiful ombre effect.
- Decorative Elements: Decorate the cake with red velvet cake layers, heart-shaped sprinkles, edible glitter, or chocolate hearts. Consider using buttercream piping to create delicate rosettes or a simple romantic message written in cursive, such as “Be Mine” or “Love You”.
- Additional Touches: You can use edible pearls or gold leaf for a sophisticated, elegant look, or sprinkle on some rose petals to elevate the romantic feel.
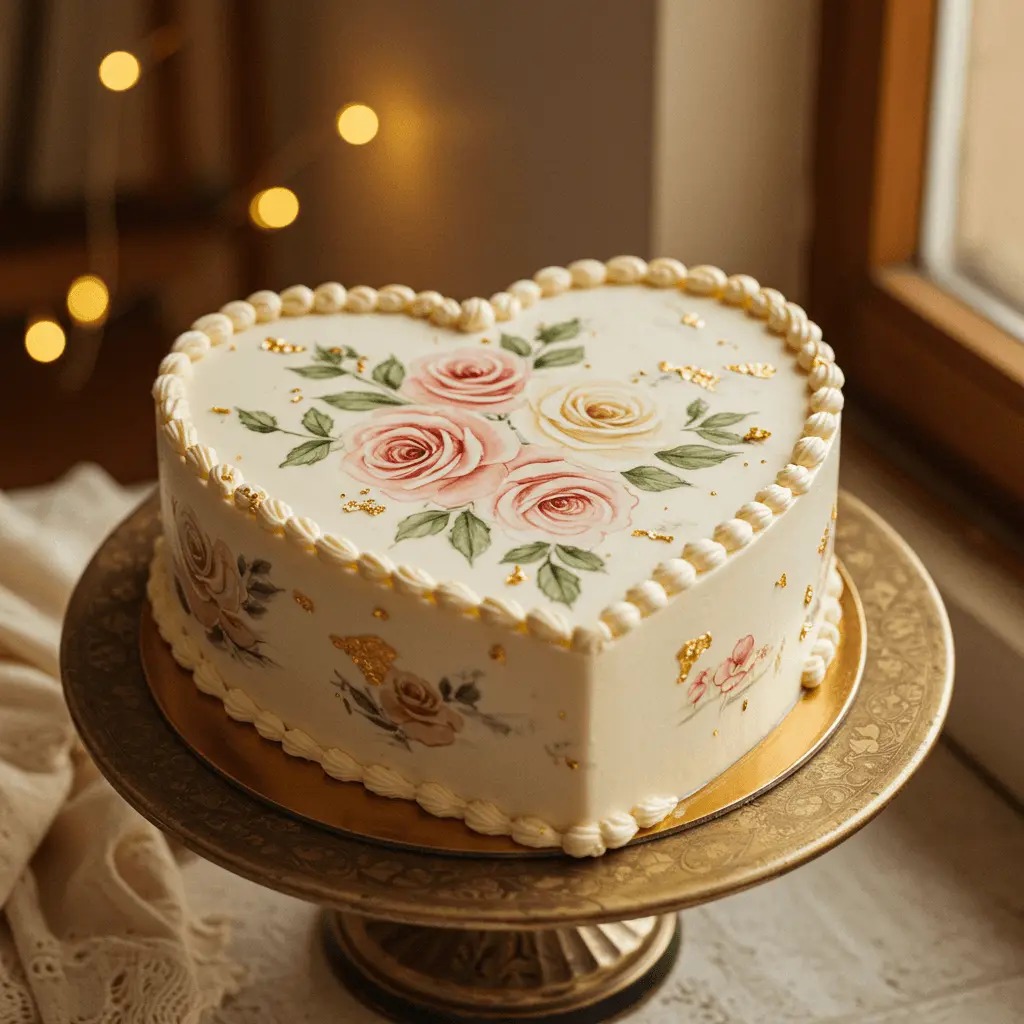
- Elegant Wedding Cake
- Colors & Theme: Soft pastels like blush pink, lavender, or mint green work beautifully for weddings. Alternatively, a classic white cake with subtle accents of gold or silver can create a timeless and elegant look.
- Decorative Elements: Try adding a floral touch—either real or sugar flowers such as roses, peonies, or baby’s breath. If you’re looking for a vintage aesthetic, lace piping or fondant ruffles can create a delicate, old-fashioned look.
- Additional Touches: You could also top the cake with personalized cake toppers or a simple, elegant monogram to represent the couple’s initials.
- Birthday Cake with Fun, Bold Designs
- Colors & Theme: For a fun birthday celebration, you can go wild with color! Think bright, bold shades like yellow, blue, purple, or rainbow hues. A tie-dye effect with rainbow buttercream can add a playful flair.
- Decorative Elements: Decorate the heart-shaped cake with birthday-themed toppers, like candles, confetti, or a cheerful “Happy Birthday” message. For a more modern twist, add chocolate shards, colorful sprinkles, or gummy candies around the edges.
- Additional Touches: Don’t forget a layer of whipped cream for a light and airy feel, or a drizzle of chocolate ganache to create a rich and indulgent finish.
- Mother’s Day Cake
- Colors & Theme: Soft pastel colors like pale pink, lavender, or peach are perfect for a Mother’s Day cake. You can also go for a more floral theme with colors that reflect spring—such as light greens, yellows, and light blues.
- Decorative Elements: A floral design featuring fondant or buttercream flowers—like daisies or roses—will be sure to impress. Consider adding a custom message like “Best Mom” or “Love You Mom” in elegant script writing.
- Additional Touches: You could also incorporate elements like butterfly-shaped sugar decorations, edible pearls, or miniature heart decorations that are meaningful to your mom.
- Baby Shower Cake
- Colors & Theme: For a gender-neutral baby shower, choose soft pastel tones like mint green, soft yellow, or peach. For a more gender-specific theme, pink for a girl or blue for a boy works well.
- Decorative Elements: You can use baby-themed decorations, such as tiny booties, rattles, or fondant figures of a baby onesie or baby bottle. Piping techniques like simple shell borders can create a polished look.
- Additional Touches: Adding a baby’s name or the words “Welcome Baby” on top of the cake with a cute fondant topper would be an adorable finishing touch. You can also use soft baby blue ribbon or fondant baby shapes around the edges.
- Anniversary Cake
- Colors & Theme: Classic colors like silver, gold, and white work great for anniversary cakes, symbolizing timeless love. Alternatively, use the couple’s wedding colors or romantic shades like deep red or gold for an elegant touch.
- Decorative Elements: A simple, elegant design with a thin gold leaf, delicate sugar flowers, and soft buttercream can evoke a sense of love and longevity. You could also add a romantic quote or personal message to make the cake even more special.
- Additional Touches: If you’re feeling creative, you could make edible lace or fondant ribbons that tie into the celebration of the couple’s enduring love.
General Tips for Heart Shaped Cake Decorations
- Piping Techniques: Use different piping tips to create various textures and designs, such as swirls, rosettes, or stars. You can also use decorative writing for personalized messages.
- Toppers and Edible Decorations: Consider using edible flowers, sugar pearls, edible glitter, or chocolate shards to add extra flair to your heart-shaped cake.
- Cake Toppers: For a whimsical or fun touch, add cake toppers that match the occasion—whether it’s a figurine, a message, or small cut-out shapes (e.g., hearts, stars, or flowers).
Common Pitfalls to Avoid When Making a Heart-Shaped Cakes
Overbaking or Underbaking the Cake
One of the most common mistakes when baking heart-shaped cakes (or any cake, for that matter) is overbaking or underbaking, which can affect both the texture and flavor. Here’s how to avoid these pitfalls:
Overbaking
When you overbake a cake, it can turn dry, crumbly, and overly dense. A perfectly baked heart-shaped cake should have a moist, soft crumb that holds together without falling apart. Overbaking happens when the cake is left in the oven for too long or at too high of a temperature, causing the moisture to evaporate. The result is a cake that lacks the airy and light texture we strive for.
How to Avoid Overbaking:
- Always preheat your oven to the right temperature (usually around 350°F/175°C for a heart-shaped cake) before placing the cake inside.
- Set a timer for the recommended baking time, and check for doneness about 5 minutes before the time is up.
- Use a toothpick test: Insert a toothpick into the center of the cake—if it comes out clean (with just a few crumbs sticking to it), the cake is done. If it comes out wet with batter, it needs a bit more time.
- Keep an eye on the color: If the edges of the cake are starting to darken significantly, it’s a sign that it may be overbaking.
Underbaking
On the flip side, underbaking occurs when the cake is taken out of the oven before it has fully set. This can leave the middle of the cake gooey or uncooked, and the cake may sink in the center as it cools, leading to a dense, unpleasant texture. An underbaked cake can also have raw batter in the middle, which will affect its flavor and overall quality.
How to Avoid Underbaking:
- Make sure your oven is properly preheated, as uneven heating can cause underbaking.
- Be mindful of the baking time in your recipe. Even if you think the cake is almost done, give it a few extra minutes if the batter still seems soft or too moist.
- Test for doneness with a toothpick or cake tester to ensure that it’s fully cooked in the center.
- If your cake has a thick batter (like for a layered heart-shaped cake), it may need more time to cook through. Consider lowering the oven temperature slightly and extending the baking time to ensure it cooks evenly.
Why It Matters
Achieving the perfect balance between overbaking and underbaking is crucial for the success of your heart-shaped cake. The right texture will give you a cake that’s moist, fluffy, and light—ideal for decorating with frosting, fondant, or piping techniques. If the cake is too dry from overbaking or too raw from underbaking, all the decorating effort could go to waste.
To summarize, always pay close attention to your cake’s baking time and check for doneness regularly. This ensures you have a perfectly baked heart-shaped cake ready to decorate and enjoy!
Using the Wrong Type of Frosting
When it comes to decorating a heart-shaped cake, the frosting you choose can make or break the final result. Not all frostings are created equal, and using the wrong type can lead to frustrating decorating challenges or even affect the overall taste and texture of the cake.
For heart-shaped cakes, buttercream frosting is often the go-to choice, especially for intricate designs. It’s smooth, holds its shape well when piped, and can be easily tinted with food coloring to achieve those beautiful pastel shades that give a vintage or romantic vibe. The consistency of buttercream makes it ideal for decorating techniques like piping rosettes, creating smooth layers, or even writing cursive messages.
On the other hand, whipped cream may seem like a lighter alternative, but it can be tricky to work with when decorating cakes. Whipped cream doesn’t hold up as well under piping or layering, especially in warmer environments, as it tends to soften and melt more quickly. While it’s delicious and perfect for frosting a simple cake, it’s not the best choice for detailed designs on heart-shaped cakes.
Another option, fondant, is often used for a smooth, polished look. However, it’s not as flavorful as buttercream, and some people find its texture a bit too chewy. While fondant works well for creating smooth, clean surfaces, it can be harder to work with, especially if you’re just starting out. Additionally, fondant tends to have a more “artificial” look compared to the homemade charm of buttercream frosting.
In short, while you may be tempted to experiment with different frosting types, buttercream is generally the best choice for heart-shaped cakes. It provides the perfect balance of texture, taste, and decorative versatility, ensuring that your heart-shaped masterpiece turns out beautifully, holds its shape, and tastes as amazing as it looks.
Not Letting the Cake Cool Properly
One of the most common mistakes when baking heart-shaped cakes is not allowing the cake to cool properly before decorating. While it might be tempting to dive right into frosting a freshly baked cake, this step is crucial for achieving the best results.
Here’s why patience is key:
- Prevent Melting Frosting: When a cake is still warm, the frosting (especially buttercream) will begin to melt as soon as it touches the surface. This can result in a messy, uneven layer of frosting that doesn’t hold its shape, ruining the overall appearance of your cake. By letting the cake cool completely, you give the frosting a stable surface to adhere to, ensuring a smooth, flawless finish.
- Maintain Cake Structure: A warm cake is more delicate and prone to breaking or crumbling when handled. If you try to frost it while it’s still hot, the weight of the frosting may cause parts of the cake to collapse or tear. Cooling the cake thoroughly allows it to firm up, making it easier to frost and assemble without damaging the cake.
- Better Frosting Adherence: If you skip this step, the heat from the cake can cause the frosting to slip off or slide around. When the cake is fully cooled, the frosting will adhere better, creating cleaner lines and preventing any sliding or smudging.
How to Cool the Cake Properly:
- Cool in the Pan First: Once your heart-shaped cake is out of the oven, let it cool in the pan for about 10-15 minutes. This allows the cake to set slightly and makes it easier to remove without breaking.
- Transfer to a Wire Rack: After cooling in the pan, transfer the cake to a wire rack to allow air to circulate around it. This ensures the cake cools evenly on all sides and prevents soggy spots from forming at the bottom.
- Patience Is Key: Depending on the size of your cake, it may take anywhere from 30 minutes to an hour to cool completely. While it’s tempting to speed up the process, avoid refrigerating a hot cake, as this can cause moisture to build up and make the frosting soggy.
In summary, letting your heart-shaped cake cool completely is a simple but essential step that guarantees a beautifully decorated and structurally sound final product. Don’t rush this process—your cake will thank you for it!
Conclusion
Making a heart-shaped cake is a fun and rewarding experience, perfect for celebrating special occasions like Valentine’s Day, anniversaries, or birthdays. By following the right steps—from choosing the best ingredients to letting your cake cool properly—you can create a stunning cake that looks as good as it tastes. Whether you’re using buttercream or fondant, experimenting with colors and piping techniques, or adding decorative touches like edible glitter or pearls, the possibilities are endless.
Remember, patience is key at every stage, especially when it comes to cooling your cake properly before decorating. This simple step ensures your frosting stays beautiful and your cake maintains its perfect shape.
Now that you have all the tips and tricks, it’s time to try baking your own heart-shaped cake and impress your loved ones with your cake-making skills. Share your creations on social media or leave a comment below—I’d love to see how your cakes turn out! Happy baking! ❤️🎂