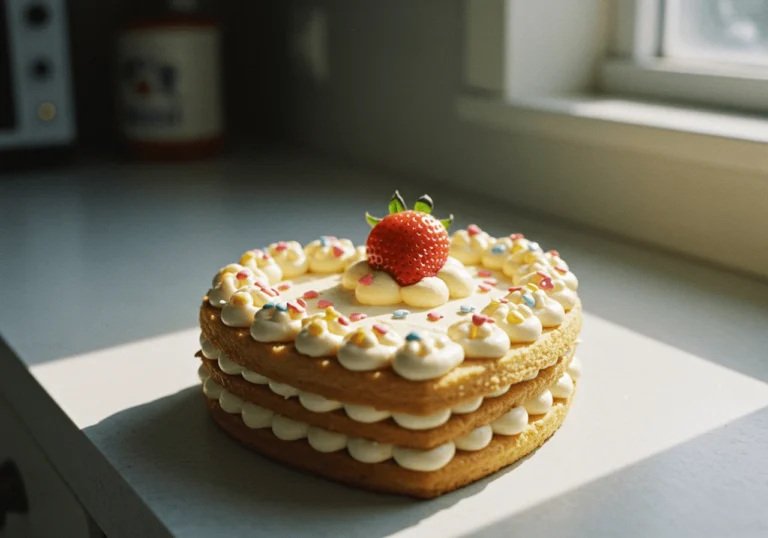

How to Make a Vintage Heart Cake: A Step-by-Step Guide
Table of Contents
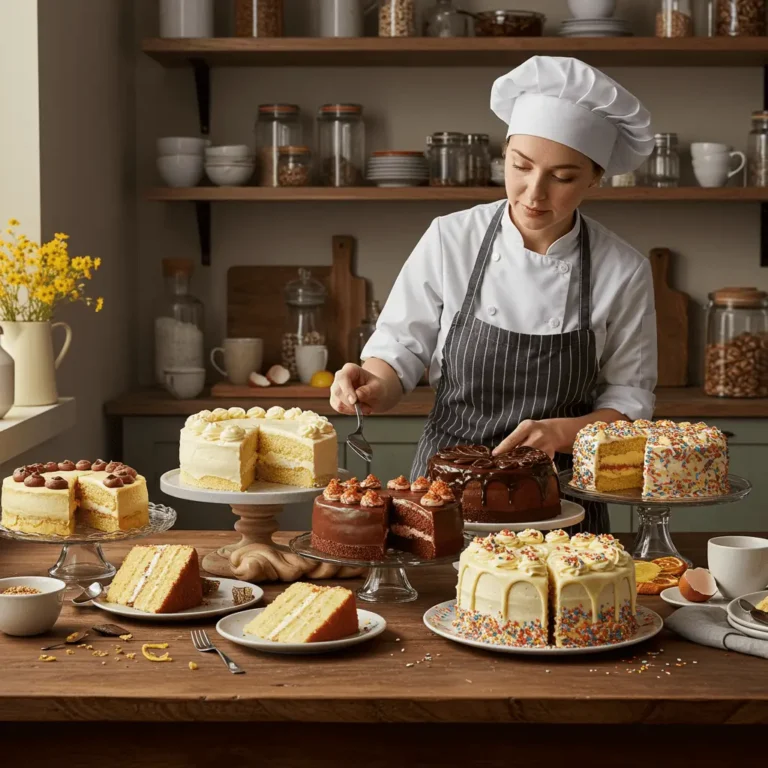
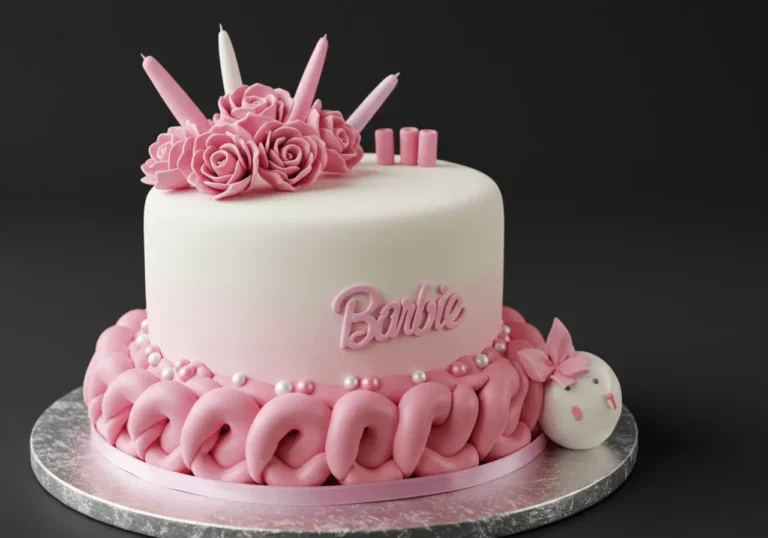
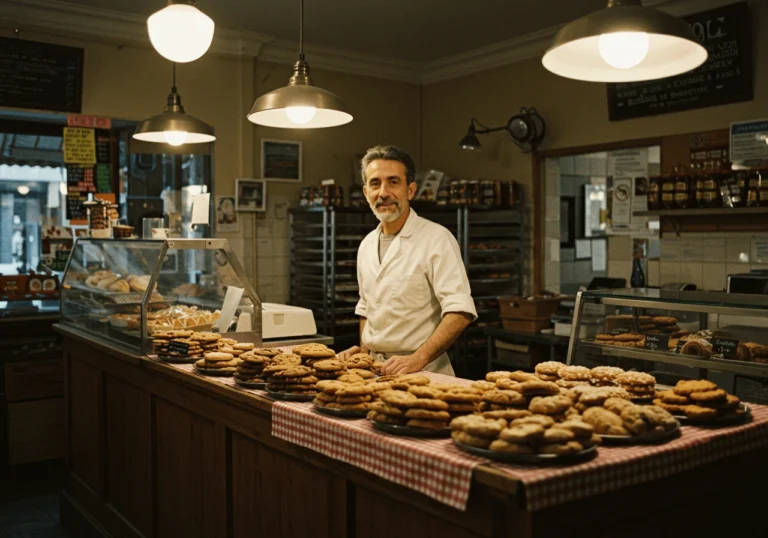
There’s something undeniably charming about a vintage heart cake—with its delicate pastel colors, intricate piping, and nostalgic appeal, it perfectly captures the elegance of retro baking. Inspired by 90s and Y2K aesthetics, these cakes have made a huge comeback, trending on social media platforms like TikTok, Instagram, and Pinterest. Whether for birthdays, anniversaries, or Valentine’s Day, a vintage heart cake is a showstopper that adds a touch of romance to any celebration.
In this guide, we’ll take you through a step-by-step process to create your own vintage heart cake at home. From selecting the right ingredients to mastering classic buttercream piping techniques, you’ll learn everything you need to know to bring this nostalgic treat to life. Let’s get started! 😊🎂
What is a Vintage Heart Cake?
The Origin of Vintage Heart Cakes
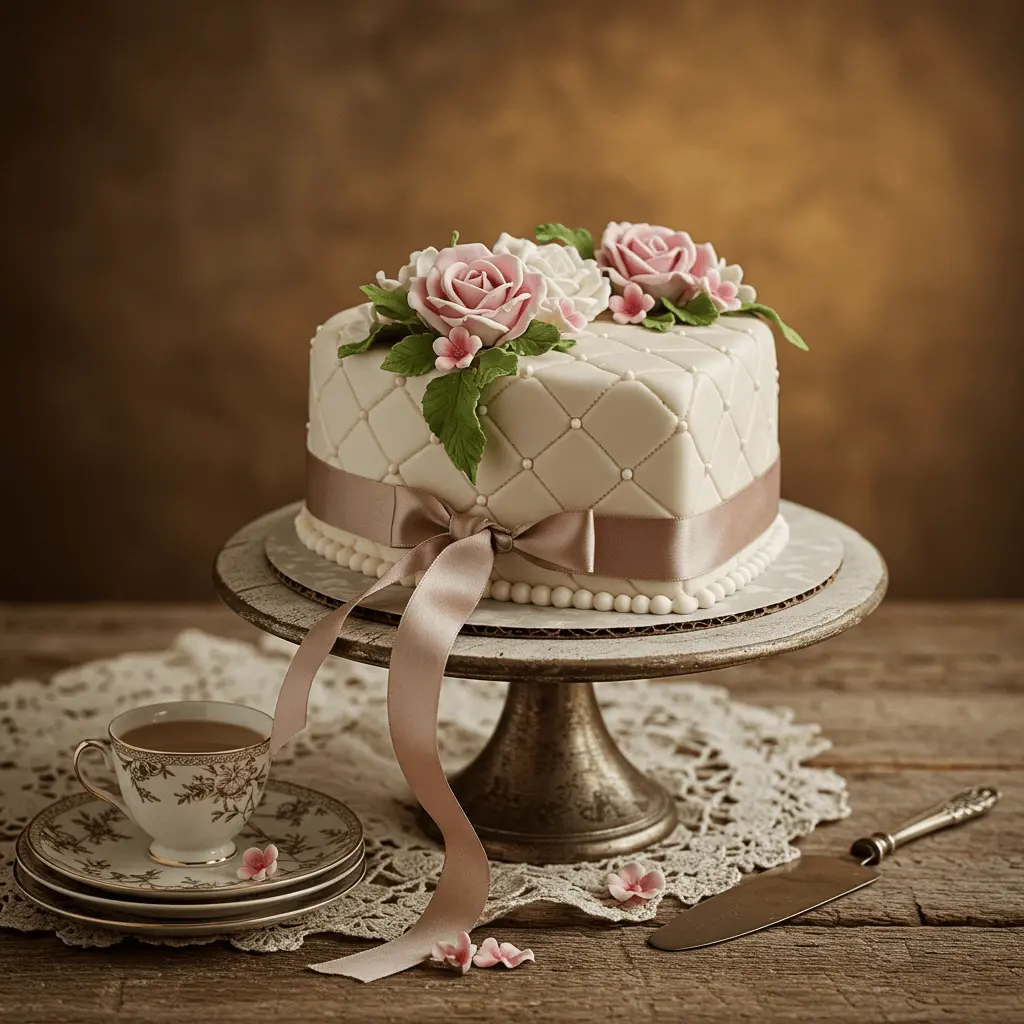
The vintage heart cake is more than just a dessert—it’s a nostalgic throwback to classic baking styles from past decades, particularly the 1950s through the early 2000s. These cakes draw inspiration from the elegant, handcrafted designs of mid-century bakeries, where intricate buttercream piping, pastel hues, and delicate floral details were the hallmarks of celebration cakes.
Mid-Century Influence: The Rise of Decorative Cakes
During the 1950s and 1960s, home baking became a cherished tradition, especially for birthdays, weddings, and anniversaries. Heart-shaped cakes were popular for romantic occasions like Valentine’s Day, symbolizing love and affection. With the widespread use of buttercream frosting and piping techniques, bakers began creating elaborate cakes with roses, borders, and cursive lettering, a signature style that remains iconic today.
90s and Y2K Nostalgia: The Rebirth of Vintage Aesthetics
Fast forward to the 1990s and early 2000s, when bold yet whimsical designs took center stage. Cakes during this era often featured soft pastel colors, charming piped borders, and playful messages in cursive writing. This was the era of hyper-personalized birthday cakes—a time when bakeries would craft unique, dreamy designs tailored to each occasion.
Social Media’s Role in the Vintage Cake Revival
The recent resurgence of vintage heart cakes can be credited to the rise of nostalgic trends on social media platforms like TikTok, Instagram, and Pinterest. With the growing interest in retro aesthetics, Y2K fashion, and pastel color palettes, bakers and cake artists have embraced the vintage cake trend, reintroducing it with modern twists. Many home bakers and influencers now share tutorials on how to create these cakes, making them more accessible and trendy than ever before.
Today, the vintage heart cake isn’t just a dessert—it’s a statement piece, combining the charm of the past with modern creativity. Whether it’s for a birthday, wedding, or just for fun, these cakes continue to captivate baking enthusiasts and dessert lovers alike.
Why Vintage Cakes Are Trending Again
In recent years, vintage heart cakes have taken over social media, becoming one of the most sought-after cake styles for birthdays, anniversaries, and special celebrations. But what’s behind this sudden resurgence of old-school cake designs? Let’s explore the reasons why these retro-inspired treats are making a big comeback.
1. The Power of Social Media (TikTok, Instagram, Pinterest)
Platforms like TikTok, Instagram, and Pinterest have played a significant role in reviving nostalgic baking trends. Videos showcasing beautifully decorated vintage heart cakes often go viral, inspiring home bakers and professionals alike to recreate these artistic desserts. The visually appealing aesthetic—soft pastel colors, intricate piping, and delicate cursive writing—makes these cakes perfect for social media feeds.
Additionally, baking influencers and cake artists are constantly sharing tutorials, time-lapse videos, and step-by-step guides, making it easier than ever for enthusiasts to try their hand at making vintage cakes at home. The hashtag #VintageCake has gained millions of views, proving that the trend isn’t slowing down anytime soon.
2. Nostalgia & The Y2K Aesthetic Revival
The love for 90s and early 2000s aesthetics has resurfaced across fashion, design, and now—baking! Many people who grew up in that era associate these cakes with classic birthday parties, old-school bakeries, and family celebrations, creating a strong sense of nostalgia.
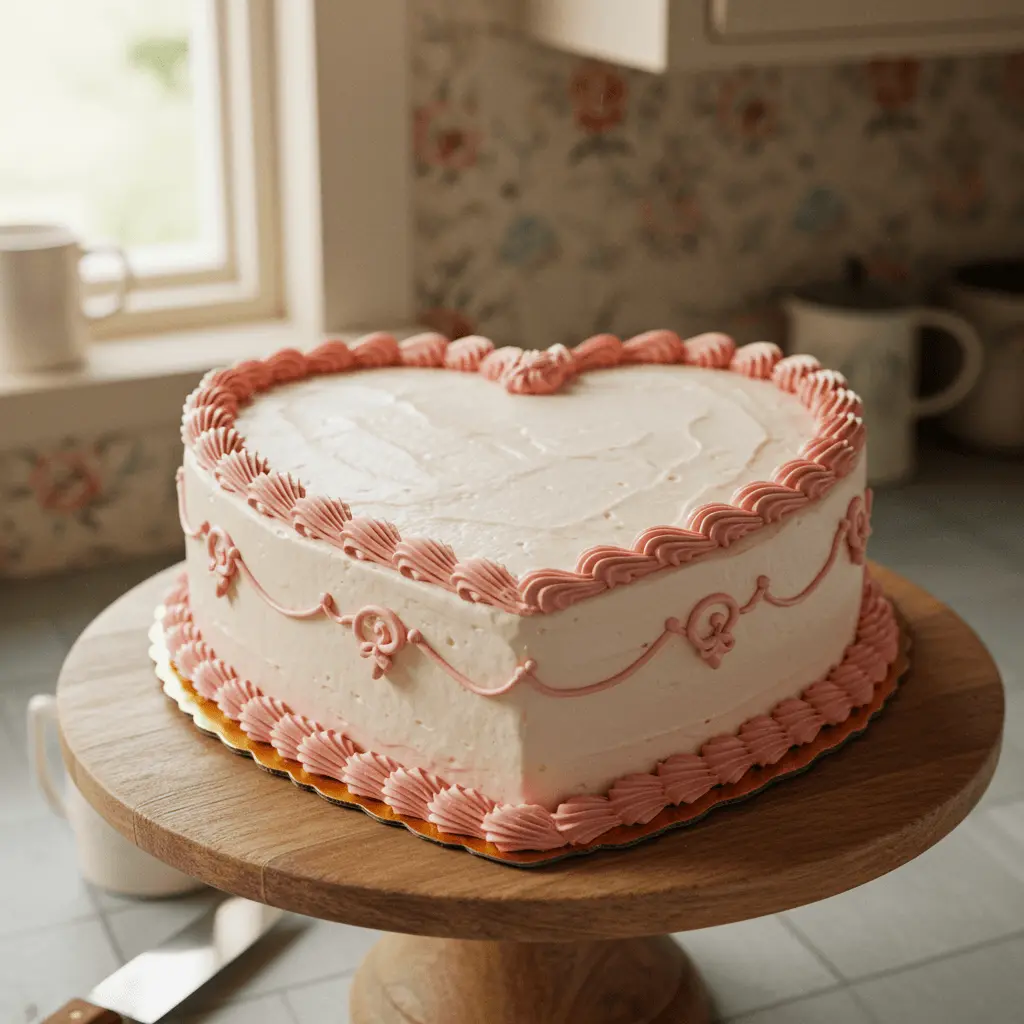
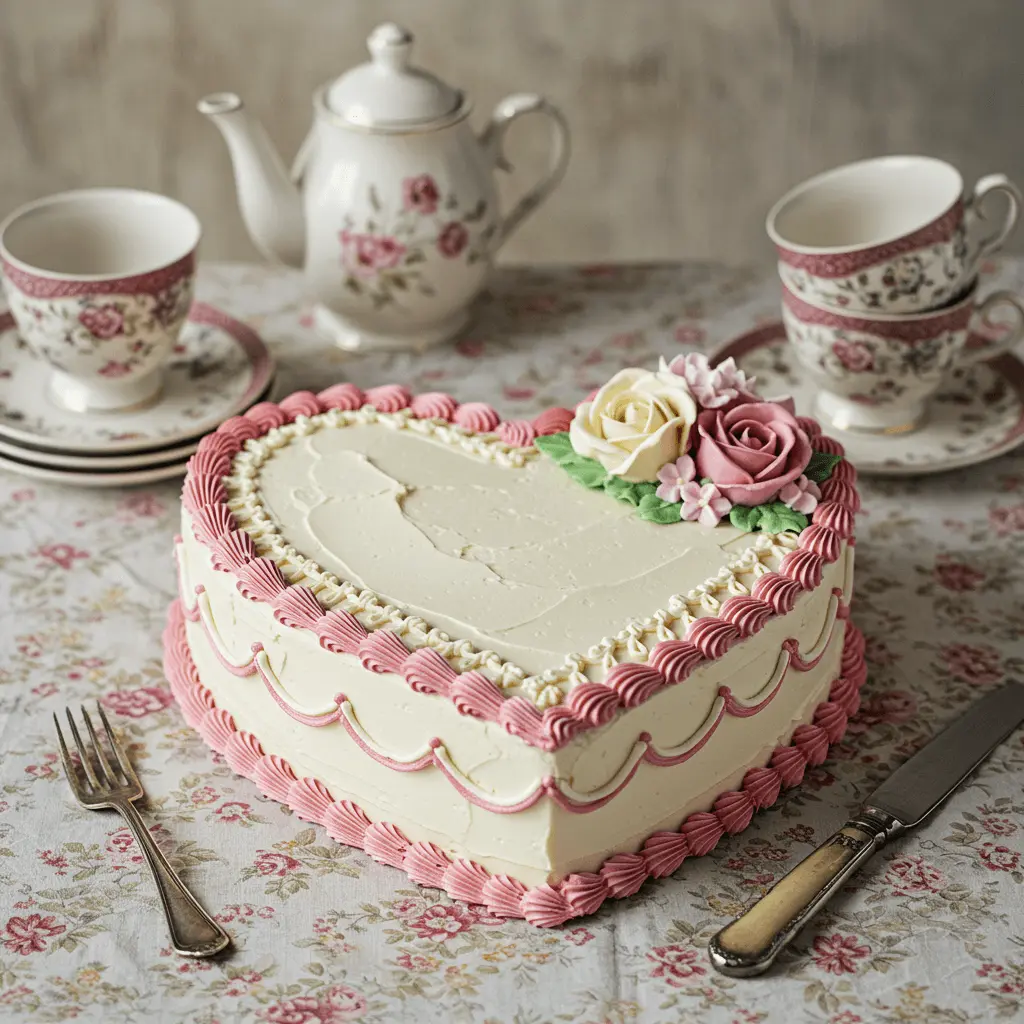
The Y2K aesthetic embraces all things whimsical, cute, and over-the-top, which aligns perfectly with the intricate details of vintage heart cakes—think buttercream rosettes, piped pearl borders, and personalized messages in cursive writing. As trends from the past continue to cycle back into popularity, it’s no surprise that vintage cakes are enjoying their time in the spotlight once again.
3. Aesthetic Appeal & Customization
One of the main reasons why vintage heart cakes are so popular is their endless customization options. Whether you prefer a romantic pink and white design, a bold red velvet version, or a soft pastel ombré look, these cakes can be tailored to match any occasion or personality.
Cake decorators love the ability to experiment with:
- Different piping techniques (rosettes, shell borders, pearl dots).
- Personalized messages in elegant cursive.
- Unique color palettes beyond traditional pink and white (lavender, mint green, baby blue).
The vintage heart cake is more than just a dessert—it’s a statement piece that brings both artistry and nostalgia together in one beautifully crafted cake.
4. The Return to Homemade, Handcrafted Baking
As more people embrace home baking and DIY cake decorating, the demand for intricate, hand-piped cakes has increased. Unlike modern cakes that rely on fondant and edible prints, vintage cakes are known for their handmade buttercream details, making them feel more personal and special.
Many professional bakers and home enthusiasts are rediscovering the joy of traditional cake decorating, using piping bags and frosting techniques that were once staples in classic bakeries. This return to handcrafted artistry aligns with the broader trend of appreciating handmade, small-batch, and nostalgic food experiences.
Final Thoughts
Whether it’s driven by social media trends, nostalgia, aesthetic appeal, or a love for handcrafted baking, vintage heart cakes have cemented their place as one of the most stylish and beloved cake trends today. Their ability to blend romantic, retro, and whimsical elements makes them the perfect cake choice for anyone looking to create a beautiful and memorable dessert.
Popular Vintage Cake Styles
Vintage cakes are known for their charming, nostalgic appeal. They often feature traditional ingredients, elegant designs, and an old-world craftsmanship that can transport us to a bygone era. Here are some of the most popular vintage cake styles:
- Buttercream Cakes A true staple in vintage cake culture, buttercream cakes are known for their smooth, creamy frosting and ability to hold intricate designs. Whether piped with delicate flowers, swirls, or lace patterns, buttercream cakes often have a timeless appeal. They were a favorite choice for celebrations like weddings and anniversaries during the mid-20th century.
- Fruitcakes Fruitcakes have a long history and are often associated with vintage celebrations, especially during the holidays. These cakes are rich in dried fruits, nuts, and spices, and they tend to have a dense texture. Decorated with marzipan or icing, fruitcakes can feature intricate designs that make them look elegant and festive.
- Layer Cakes Layer cakes, especially those with multiple tiers, have been popular since the late 1800s. These cakes often feature rich fillings such as custard, fruit preserves, or chocolate ganache between the layers. Classic vintage layer cakes might include flavors like lemon, vanilla, or chocolate, often decorated with rosettes or piped borders.
- Chiffon Cakes Chiffon cakes became very popular in the 1940s and 1950s. Known for their light, airy texture, chiffon cakes are made with oil instead of butter, making them incredibly moist. A vintage chiffon cake is often paired with fruity fillings or whipped cream for a simple yet delicious dessert.
- Angel Food Cakes Light and fluffy, angel food cakes have been a popular vintage choice for their delicate texture. Made primarily of egg whites and sugar, these cakes are often served with fresh berries or a dusting of powdered sugar, making them the perfect dessert for summer gatherings.
- Carrot Cakes Carrot cake is another vintage favorite, especially from the 1960s onward. Typically moist and flavorful, this cake combines grated carrots with spices like cinnamon and nutmeg. It’s often topped with rich cream cheese frosting, making it a comforting yet sophisticated dessert.
- Red Velvet Cakes With its striking red color and velvety texture, red velvet cake has become synonymous with vintage charm. This cake is typically layered with cream cheese or buttercream frosting and is perfect for events where a pop of color is desired. Red velvet’s unique flavor profile, blending cocoa and buttermilk, makes it a classic vintage choice.
- Pound Cakes A timeless classic, pound cakes originated in the 18th century and are often associated with vintage kitchens. Made with equal parts butter, sugar, flour, and eggs, this dense cake is versatile and can be flavored with citrus zest, vanilla, or even a splash of whiskey. The cake’s simple elegance is its most endearing feature.
Ingredients & Tools You’ll Need
Essential Ingredients for a Soft and Fluffy Cake
Achieving a soft and fluffy cake requires the right balance of ingredients. Every component plays a vital role in texture, moisture, and overall flavor. Here are the essential ingredients you’ll need to create a cake that is light, airy, and melts in your mouth:
- Flour: The foundation of any cake, flour provides structure. For a lighter texture, cake flour is the best choice, as it has a lower protein content than all-purpose flour. This results in a softer crumb. If you don’t have cake flour on hand, you can substitute it by removing two tablespoons of all-purpose flour per cup and replacing it with cornstarch.
- Baking Powder or Baking Soda: These leavening agents are key to making your cake rise. Baking powder is typically used for recipes that include acidic ingredients, while baking soda is great for cakes with acidic components like buttermilk or citrus. Both help to create air pockets in the batter, which is what makes the cake fluffy.
- Butter or Oil: Fat plays a critical role in both flavor and texture. Butter adds richness and flavor, but oil creates a moister, lighter texture. When creamed together with sugar, butter helps to trap air in the batter, contributing to a fluffier cake. If you prefer a non-dairy option, oils such as vegetable or canola oil work well to maintain softness.
- Eggs help bind the ingredients and add moisture to the mixture. They also help with the structure and texture of the cake. For a fluffier cake, make sure to beat the eggs well before adding them to the batter, which helps incorporate air into the mixture.
- Sugar: Sugar not only sweetens the cake but also helps with the structure. It helps in retaining moisture, preventing the cake from becoming dry. Additionally, sugar contributes to the browning of the cake, giving it a beautiful golden color.
- Milk or Other Liquid: Liquids, such as milk or buttermilk, add moisture and help activate the dry ingredients like flour and baking powder. Buttermilk, in particular, provides extra tenderness and a slightly tangy flavor, which can enhance the cake’s overall taste and texture.
- Vanilla Extract: While not a structural ingredient, vanilla extract enhances the overall flavor of your cake, adding depth and a sweet, aromatic note that complements the other ingredients. You can also experiment with other extracts, such as almond or lemon, to infuse unique flavors.
- Salt: A pinch of salt may seem small, but it is essential for balancing the sweetness and enhancing the flavors in your cake. It also helps to control the fermentation of yeast or the action of baking soda/baking powder.
Best Tools for Decorating a Vintage Heart Cake
When creating a vintage heart cake, the right tools can make all the difference in achieving that classic, charming look. Here are some must-have tools for perfecting your vintage cake:
- Piping Bags and Tips
Piping bags are a baker’s best friend for detailed and precise decoration. For vintage-style cakes, use a variety of piping tips like the round tip for delicate lines, star tip for ruffles and borders, and the leaf tip for intricate detailing. With these, you can create elegant lace designs, floral patterns, and other vintage-inspired decorations. - Fondant Roller and Smoother
Fondant gives a smooth, polished finish to your vintage heart cake. A fondant roller helps roll out even layers, while a fondant smoother helps eliminate air bubbles and creases, ensuring a perfect surface. These tools are essential if you’re looking to create a flawless, old-fashioned design. - Vintage Stencils
Adding intricate, vintage-style patterns to your cake is easy with cake stencils. These can be used to create detailed lace, floral, or damask designs. Simply place the stencil on top of your cake and dust with powdered sugar, cocoa powder, or edible glitter for a soft, romantic effect. - Cake Turntable
A cake turntable is indispensable when decorating a vintage heart cake. It allows you to easily rotate your cake, providing better control and a more even design. With this tool, you can pipe, smooth, and arrange your decorations with precision. - Edible Paints and Dusts
To achieve the soft, vintage feel, edible paints and dusts are ideal for adding color accents to your cake. Use them to create delicate highlights or to paint over stenciled designs. Gold or pearl dust can give your cake a classic, antique look that’s perfect for vintage themes. - Floral Tools
If you’re adding sugar flowers or fresh flowers to your cake, a few floral tools like petal dust, flower formers, and wire cutters will help you shape and position the flowers precisely. These tools help create beautiful vintage roses, lilies, or other blossoms that match the romantic theme of your cake. - Cake Decorating Brushes
Soft, fine-tipped brushes are perfect for applying delicate details like dusting edible glitter or painting fine lines on the cake. These brushes are particularly useful for achieving the elegant, fine details typical of vintage designs. - Ribbon and Lace
For a truly vintage look, ribbons or lace appliqué can be wrapped around the base of the cake or layered between tiers. These elements add texture and a soft, antique feel to your cake. Ribbons in satin, lace, or even burlap can tie together your vintage theme effortlessly.
By using these essential tools, you’ll be well on your way to creating a stunning vintage heart cake that is both visually striking and delicious.
Choosing the Right Buttercream & Food Coloring
When it comes to creating a Vintage Heart Cake, selecting the right buttercream and food coloring is key to achieving that timeless, beautiful look. The buttercream should be smooth, creamy, and easy to work with, while the food coloring needs to create soft yet vibrant hues to match the vintage theme.
1. Choosing the Buttercream:
The type of buttercream you use will affect both the texture and the final aesthetic of your cake. The most common options are:
- American Buttercream: This is the most popular and easiest buttercream to make. It’s sweet, smooth, and holds its shape well, making it ideal for piping delicate designs like rosettes or hearts. If you’re aiming for a vintage feel, American buttercream can be flavored with vanilla, almond, or a touch of lemon zest for added depth.
- Swiss Meringue Buttercream: Known for its silky texture and less sweet taste, Swiss meringue buttercream is a great choice if you’re looking for a more refined flavor. This buttercream is also perfect for achieving smooth finishes and intricate decorations.
- Italian Meringue Buttercream: This is another great option for a smooth, less sugary taste. Its creamy consistency makes it easy to spread and pipe, creating elegant vintage-style decorations. It’s also slightly more stable in warm weather compared to Swiss meringue buttercream.
- Cream Cheese Buttercream: If you prefer a tangy flavor, cream cheese buttercream is an excellent choice. It pairs perfectly with cakes like carrot cake, red velvet, or even chocolate cake, bringing a unique taste that complements the vintage style.
2. Selecting the Right Food Coloring:
Vintage cakes typically feature soft pastel shades or classic hues, which help create a nostalgic, timeless look. The type of food coloring you use will influence the intensity and smoothness of the colors. Here are some great options:
- Gel Food Coloring: Gel food coloring is the best choice for achieving vibrant colors without watering down your buttercream. It’s concentrated, so only a small amount is needed to create rich hues like soft pink, lavender, or peach. Gel colors mix easily and provide a more intense, consistent shade compared to liquid coloring.
- Powdered Food Coloring: If you’re aiming for a more muted, vintage palette, powdered food coloring is a great option. It gives a softer finish to the buttercream and can be mixed with a little water or clear alcohol to create subtle, vintage shades.
- Natural Food Coloring: For a more organic approach, consider using natural food coloring made from plant extracts. These can produce softer, earthy tones like pastel yellows, greens, and blues. While the colors may not be as vibrant as synthetic dyes, they offer a beautiful, understated vintage vibe.
- Edible Glitter and Dust: To add an extra vintage touch, consider using edible glitter or pearl dust to decorate your buttercream. These can be brushed onto the surface or mixed into your buttercream for a subtle shimmer that enhances the nostalgic feel of the cake.
3. Blending Colors for a Vintage Look:
Once you’ve chosen your buttercream and food coloring, you can mix and match to achieve the perfect vintage look. For a romantic, vintage style, opt for soft shades like blush pink, pale lavender, butter yellow, or mint green. These colors evoke a sense of elegance and nostalgia, perfect for a heart-themed cake.
- Ombre Effect: One popular vintage technique is the ombre effect, where the color gradually transitions from light to dark. This can be done with buttercream to create a soft gradient that looks visually stunning and sophisticated.
- Pastel Accents: Adding a pastel-colored buttercream to your cake’s decorative elements, like piped rosettes or intricate lace details, will help create the vintage vibe. Pairing two or three complementary pastel colors can make your cake look soft, elegant, and timeless.
With the right buttercream and food coloring choices, your Vintage Heart Cake will capture the nostalgic, beautiful essence you’re aiming for. By selecting the appropriate frosting consistency and blending your colors harmoniously, you can create a cake that not only looks amazing but tastes delightful, too!

Step-by-Step Guide to Making a Vintage Heart Cake
Baking the Perfect Heart Cake
Baking the perfect heart cake requires attention to detail and a bit of patience. To ensure your heart-shaped cake turns out beautifully, it’s essential to follow the right steps from choosing the right pan to properly baking and cooling the cake. Here are some tips to help you get it just right:
- Choose the Right Heart-Shaped Cake Pan
The first step to a perfect heart cake is selecting the right pan. Heart-shaped pans come in various sizes, so choose one that fits your desired cake size and serving portions. If you don’t have a heart-shaped pan, you can also use a round pan and shape the cake with a knife or even create a DIY heart shape using parchment paper. - Prepare Your Cake Batter
Use a reliable cake recipe or your favorite cake mix, but make sure to prepare the batter properly. Follow the instructions carefully for mixing and ingredient measurements. If you’re making a vintage-style heart cake, opt for classic flavors like vanilla, chocolate, or red velvet that are often associated with the nostalgic feel of vintage desserts. - Grease and Flour the Pan
To prevent your cake from sticking, generously grease your heart-shaped pan with butter or cooking spray and then lightly flour it. This will help the cake slide out easily after baking, keeping the shape intact. - Pour and Level the Batter
Pour the cake batter into the pan, filling it about halfway for a fluffy, even bake. Use a spatula to level the batter and ensure it bakes evenly. - Bake at the Right Temperature
Preheat your oven according to the recipe’s instructions. Bake the cake at the recommended temperature, usually between 325°F and 350°F (165°C – 175°C). Keep an eye on it as baking times can vary depending on the size of the pan and the thickness of the batter. To check if the cake is done, insert a toothpick into the center—if it comes out clean, the cake is ready. - Allow the Cake to Cool
Once baked, let the heart cake cool in the pan for 10-15 minutes. Afterward, turn it out onto a wire rack to cool completely. Cooling the cake thoroughly before frosting ensures the frosting won’t melt and gives you a cleaner, more professional finish. - Check for Evenness
After cooling, check the cake for any unevenness on top. If necessary, use a serrated knife to gently level the top of the cake before frosting.
By following these steps, you’ll ensure that your heart cake turns out perfectly baked and ready for the next step—decorating it into a beautiful vintage-inspired masterpiece.
Assembling and Layering Your Cake
Once your vintage heart cake components (cake layers, frosting, and decorations) are ready, it’s time to assemble and create the beautiful, layered masterpiece. Follow these steps for a professional-looking result:
- Prepare Your Cake Layers
Begin by ensuring that your cake layers are completely cooled before assembly. This prevents melting or uneven frosting. If necessary, level the tops of each layer with a serrated knife to create a flat surface for stacking. - Layer Your Cake with Precision
Start with your first cake layer as the base. Place it on your cake stand or a flat surface. If you’re using a heart-shaped cake pan, ensure the pointed side is facing down for proper alignment. Spread a generous layer of frosting on top, smoothing it evenly with an offset spatula. Be careful not to over-apply the frosting, as you want it to complement the cake, not overpower it. - Add More Layers
Continue adding your cake layers one by one, repeating the process of frosting each layer as you go. When stacking multiple layers, gently press down each layer to ensure it sticks and remains level. A slight tilt or misalignment can lead to a lopsided cake. - Apply a Crumb Coat
After all layers are stacked, apply a thin, even coat of frosting over the entire cake. This is known as a “crumb coat” because it helps seal in any crumbs, creating a smooth surface for the final layer of frosting to stick to. Don’t worry if it’s not perfectly smooth at this stage; it’s just a base for the final decorative layer. - Chill Before Final Frosting
Refrigerate the cake for 20-30 minutes to set the crumb coat. This will make it easier to apply the final layer of frosting and prevent crumbs from mixing into it. - Finish With the Final Coat of Frosting
Once the crumb coat is firm, apply a thicker layer of frosting over the entire cake. Use your offset spatula or cake smoother to achieve a clean, smooth finish. For a rustic look, you can leave the frosting textured with gentle swirls, or opt for a sleek, modern appearance by smoothing it completely. - Add Decorative Touches
Now comes the fun part: decorating your vintage heart cake. You can pipe intricate designs along the edges, add edible flowers, or use vintage-inspired cake toppers, such as lace or delicate sugar pearls. Consider adding an extra layer of frosting or ganache around the base for a finished, polished look. - Final Presentation
Once your cake is assembled and decorated, place it in the refrigerator until ready to serve. This will help set the frosting and ensure your design stays intact until the big reveal. When serving, cut the cake with a sharp knife, making sure to preserve the clean layers you’ve worked so hard to create.
Decorating Like a Pro – Piping & Icing Techniques
Mastering the art of cake decorating can be the difference between a homemade dessert and a professional masterpiece. While it takes some practice, anyone can learn the basic techniques of piping and icing to create beautiful, intricate designs. Whether you’re making a birthday cake, a wedding cake, or a simple treat for yourself, these tips will help you pipe and ice like a pro.
1. Choose the Right Tools To get started, it’s essential to have the right tools. Invest in quality piping bags, tips, and spatulas to achieve clean and precise results. A flexible, reusable piping bag is an excellent choice, and various piping tips will give you a range of options for different styles of decoration.
- Piping bags: Disposable bags work well, but reusable ones can offer more control and reduce waste.
- Piping tips: Common tips like #1, #2 for fine lines, or #21 for stars are great for beginners.
- Spatulas: A small offset spatula is perfect for smoothing out icing, and a bench scraper can help create sharp edges for a professional look.
2. Master the Basic Piping Techniques The beauty of cake decoration often comes from mastering a few simple piping techniques that can be combined in different ways.
- Roses: Start by holding the piping bag at a 45-degree angle. Begin at the center of where you want the rose, piping in a swirl motion outward, overlapping each petal as you go. This creates a natural, layered look.
- Shells and Stars: A shell design is created by holding the piping bag at a 45-degree angle and squeezing the bag gently while pulling it back. For stars, use a star tip (like #21), keeping the bag perpendicular to the surface and squeezing out a star shape with each squeeze.
- Ruffles: Use a petal tip for ruffles, piping from top to bottom in a zigzag motion. Ruffles can add a delicate and elegant touch to any cake.
3. The Importance of Consistency in Icing The key to achieving a smooth and professional finish is consistency in your icing. Whether you’re making buttercream, royal icing, or ganache, the texture of the icing matters.
- Buttercream: Ensure the buttercream is soft enough to spread smoothly but stiff enough to hold its shape. If it’s too runny, it will slide off your cake; if it’s too stiff, it will be difficult to spread.
- Royal Icing: This icing is perfect for piping intricate details, like lace designs or flowers. It should have a consistency that is firm yet still soft enough to pipe delicate details.
- Ganache: A ganache pour requires a slightly thicker consistency than a smooth glaze. The best way to get it right is by letting the ganache cool slightly before pouring it over your cake, allowing for a neat drip effect.
4. Creating Smooth Surfaces with the Right Techniques For a flawless, smooth cake surface, consider using a method called the “crumb coat.” This is a thin layer of icing applied Across the entire cake to lock in the crumbs. Once this is set, apply the final layer of icing, using a bench scraper or offset spatula to smooth it out evenly.
- Use a rotating cake stand: A rotating stand will help you maintain an even surface while smoothing out the icing.
- Hot spatula technique: Dip your offset spatula in warm water, dry it, and then use it to smooth the surface of your icing. This helps create a silky finish.
5. Advanced Techniques for Expert Decorators Once you’ve got the basics down, you can experiment with more advanced techniques, such as airbrushing, sugar flowers, and even edible painting. These techniques will take your cake decorating to the next level and provide endless possibilities for design.
- Airbrushing: A cake airbrush is a tool that allows you to apply food-safe colors to your cakes in a fine mist, creating gradients, shading, and a professional look.
- Sugar Flowers: These intricate decorations can be made using gum paste or fondant and can be used to adorn cakes with beautiful, realistic flowers.
- Edible Painting: Using food-safe paint and brushes, you can create intricate, detailed designs on your cakes, such as floral patterns, landscapes, or even portraits.
By perfecting your piping and icing techniques, you’ll be able to transform any cake into a stunning work of art that will impress your guests and elevate your baking skills.
Common Mistakes to Avoid When Making a Vintage Cake
Choosing the Wrong Type of Frosting
One of the most common mistakes when making a cake is choosing the wrong type of frosting, which can significantly affect both the texture and flavor of your cake. The frosting serves as a key element that enhances the overall experience, and selecting the wrong type can lead to a less-than-satisfactory result. Here are some considerations for picking the right frosting for your cake:
- Consistency Matters
Some cakes require a thicker, sturdier frosting to hold their shape, while others are better complemented by a lighter, fluffier frosting. For example, a dense cake like a carrot or red velvet cake can benefit from a cream cheese frosting, which is thick and rich, while a delicate sponge cake might require a lighter buttercream or whipped cream frosting to avoid overpowering the texture. - Flavor Pairings
Different frosting flavors complement different types of cake. For example, a rich chocolate cake pairs well with a chocolate buttercream or ganache, while a fruit-flavored cake (such as lemon or strawberry) can benefit from a tangy cream cheese frosting or a simple vanilla buttercream. Using a frosting that doesn’t match the flavor of the cake can result in an imbalance of taste that detracts from the overall experience. - Environmental Factors
Temperature and humidity can influence the consistency and durability of frosting. For instance, butter-based frostings like American buttercream can melt easily in warm conditions, leading to a soggy, unstable finish. If you’re baking in a hot climate or need a frosting that holds up well outside of refrigeration, consider using fondant or meringue-based frostings, which tend to hold their shape better in warmer environments. - Texture and Aesthetics
The texture of your frosting is just as important as its flavor. A smooth, silky frosting might look beautiful on a layer cake, but it can be challenging to apply to a cake with more intricate designs or textures. On the other hand, a frosting that’s too thick or grainy might create a less visually appealing finish. Choose a frosting that aligns with the look and feel you’re going for—whether it’s a smooth finish, a rustic texture, or a more elaborate piped design. - Dietary Restrictions
It’s important to keep dietary needs in mind when selecting frosting. For example, if you have guests with dietary restrictions such as dairy-free or vegan preferences, you can opt for non-dairy frostings like coconut cream or avocado-based frostings. Similarly, gluten-free options are available if you need to cater to guests with gluten sensitivities. Using the right type of frosting ensures that everyone can enjoy your cake without feeling left out.
Overloading the Design
When creating a cake, especially something like a vintage heart cake, it’s easy to get carried away with decorations. However, overloading the design can result in a cluttered and chaotic look that distracts from the cake’s main theme and beauty. While it’s tempting to use multiple colors, textures, and decorations, it’s important to find a balance.
Overloading your cake design can:
- Confuse the Theme: If there are too many elements competing for attention, the vintage heart theme may get lost. A successful design often relies on a few key focal points that convey the theme clearly.
- Take Away from the Elegance: Vintage cake designs often embrace simplicity and elegance. Too many decorations, such as excessive piping or too many different flowers, can make the cake look less refined and more overwhelming.
- Overwhelm the Flavor: When you pile on too many decorations, you risk overshadowing the taste of the cake. Keep in mind that the cake’s flavor should remain the star, while the decorations complement it.
To avoid overloading the design, start by choosing a limited color palette that fits the vintage aesthetic—soft pastels or muted tones work well. Focus on one or two statement decorations, such as delicate piping, small edible pearls, or a minimalist floral arrangement. Always remember that less is more, and the beauty of a vintage heart cake lies in its subtle details.
Not Letting the Cake Cool Properly
One of the most common mistakes when baking cakes, including vintage heart cakes, is not allowing it to cool properly before icing or decorating. This might seem like a time-saver, but it’s a crucial step to ensure your cake has the perfect texture and appearance. Here’s why it matters:
- Preventing Melted Frosting: If you frost your cake while it’s still warm, the heat from the cake will cause the frosting to melt. This results in a gooey, uneven layer of frosting that can drip down the sides, ruining the look of your cake.
- Maintaining Cake Structure: Allowing the cake to cool completely helps it set and firm up. A warm cake is more fragile and can break apart, especially when you try to move it or add decorations. If you cut into it too soon, the cake might be too soft and could crumble, leaving you with a mess instead of neat, clean slices.
- Enhancing Flavor: Cooling your cake also allows the flavors to settle and blend. Freshly baked cakes can sometimes taste overly sweet or too rich when they’re hot, as the ingredients haven’t fully melded. Giving the cake time to cool helps the flavors develop and results in a more balanced taste.
- Creating a Smooth Surface: If you plan to apply fondant or smooth frosting for a clean, polished finish, a warm cake will make it difficult to achieve that smooth texture. It’s best to let the cake cool completely to room temperature before applying any decorations to prevent any unwanted texture or lumps.
Tips for Proper Cooling:
- Allow the cake to cool in its pan for about 10-15 minutes before transferring it to a wire rack to cool completely.
- For even faster cooling, you can place the cake in the fridge for a short period after it has cooled down a bit at room temperature, especially if you’re working with delicate frosting.
By giving your cake the time it needs to cool properly, you’ll set yourself up for a much better decorating experience and ensure a visually appealing and delicious result.
FAQs About Vintage Heart Cakes
Can I Make a Vintage Cake Without a Heart-Shaped Pan?
Absolutely! While a heart-shaped pan can give your cake a traditional vintage look, it’s not essential to achieving that charming, old-fashioned aesthetic. If you don’t have a heart-shaped pan, there are plenty of creative alternatives that can still give your cake the same nostalgic vibe.
1. Use a Round or Square Pan
You can easily use a standard round or square cake pan. Once baked, you can trim the edges of the cake to create a heart shape. This can be done carefully with a sharp knife or cake leveler, following a heart outline drawn on paper as a guide.
2. Heart-Shaped Cake Mold
If you don’t have a traditional heart-shaped pan, you can use a heart-shaped silicone mold or even a metal cookie cutter placed inside a regular cake pan. Pour the batter into the mold and bake as usual. Afterward, carefully remove the mold to reveal your heart shape.
3. DIY Heart Shape with Foil
For a no-cost alternative, you can create your own heart-shaped pan using aluminum foil. Crumple and shape the foil into a heart shape, then place it inside a round cake pan. Pour your cake batter inside the foil mold and bake. Once the cake is ready, carefully remove the foil to reveal your heart-shaped creation.
4. Decorative Vintage Frosting Techniques
If shaping the cake is not an option, you can still create a vintage heart effect by focusing on the decoration. For example, frost your cake with pastel-colored buttercream or whipped cream, adding delicate floral piping or lace-like designs to enhance the vintage aesthetic.
These simple yet effective techniques allow you to replicate a vintage heart cake look without needing specialized equipment. Whether through creative shaping or stunning decoration, you can still achieve that timeless, heartwarming vibe that makes vintage cakes so special!
How Long Does a Vintage Heart Cake Last?
A Vintage Heart Cake, like any other cake, has a specific shelf life depending on the ingredients used and the storage method. Generally, if the cake is freshly baked and properly stored, it can last for about 3-4 days at room temperature. However, if you want to extend its freshness, consider refrigerating it. This can help maintain the cake’s quality for up to a week.
Here are a few factors to consider when determining how long your vintage heart cake will last:
- Storage Conditions:
- Room Temperature: If the cake is covered in fondant or buttercream, it can typically stay fresh at room temperature for 3-4 days, as long as it’s kept in a cool, dry place.
- Refrigeration: If the cake contains perishable fillings like cream cheese frosting or whipped cream, it should be stored in the fridge to prevent spoilage. In this case, it will last up to 7 days.
- Freezing: For longer storage, freezing your vintage heart cake is a great option. Secure it well with plastic wrap and foil to protect it from freezer burn. When properly stored, it can last up to 3 months in the freezer.
- Ingredients Used:
- Cakes with simple ingredients like flour, eggs, and butter usually last longer, especially if the cake is kept in a sealed container.
- Cakes with delicate fillings or toppings, like cream cheese or mousse, will have a shorter shelf life and require more careful storage.
- Decorations:
- If your vintage heart cake features intricate decorations like fondant flowers or edible pearls, these may impact the cake’s freshness. Fondant can help preserve the cake by acting as a protective layer, but delicate decorations may lose their texture after a few days, especially if exposed to moisture.
- Signs of Freshness:
- Texture: A fresh vintage heart cake should be moist but firm. If it becomes dry or hard, it’s time to dispose of it.
- Smell: If the cake starts to emit an off smell, this is a sign that the ingredients have begun to spoil.
- Appearance: Watch for any mold or discoloration, especially if it’s been stored for a while.
By following these storage tips, you can ensure that your vintage heart cake stays as fresh as possible for as long as possible. But, always remember, cakes are best enjoyed soon after baking for the ultimate taste and texture!
What Are Some Creative Color Combinations for a Unique Look?
When it comes to creating a unique and visually stunning cake, the right color combination is key to making it stand out. Here are some creative color combinations that can give your cake a distinctive look, whether you’re designing for a special occasion or just want to try something new:
- Pastels with Bold Accents
Mixing soft pastel colors like lavender, mint green, and pale pink with bold accents like gold, navy, or charcoal creates an elegant contrast. This combination works especially well for vintage or rustic-themed cakes, giving them a modern yet timeless vibe. - Neon and Metallic
For a more contemporary and edgy look, combine neon shades like electric blue or hot pink with metallics like silver or gold. The metallic sheen will tone down the vibrancy of the neon hues, while the neon colors add energy and excitement to the design. Perfect for parties, birthdays, or any occasion that calls for a pop of fun! - Earthy Tones with Jewel Tones
Earthy tones such as terracotta, burnt orange, and moss green combined with rich jewel tones like emerald, ruby red, or sapphire blue create a sophisticated yet grounded feel. This combination works especially well for fall or nature-inspired cakes, giving them a sense of warmth and luxury. - Monochromatic Shades
Using various shades of the same color (like different shades of pink, blue, or green) can create a smooth, cohesive look that is both stylish and subtle. You can play with different textures and gradients to add depth while keeping the overall color scheme unified and elegant. - Black and White with a Splash of Color
A timeless and classic combination, black and white can be livened up by adding a bright accent color like coral, mustard yellow, or turquoise. This bold contrast creates a high-impact, chic design perfect for both formal events and casual celebrations. - Tropical Paradise
For a lively and fun vibe, consider pairing tropical colors such as coral, teal, mango yellow, and palm green. This combination brings to mind sunshine, beaches, and warm weather, making it an ideal choice for summer parties, weddings, or destination-themed cakes. - Soft Neutrals with Metallic Highlights
Using neutral tones like beige, ivory, or soft gray paired with metallic accents like gold or copper can create a sophisticated, understated look. This combination works well for elegant weddings, anniversaries, or any event where you want the cake to look refined but not too flashy. - Bold Contrasts
For a daring and artistic look, combine colors that are opposites on the color wheel, such as orange and blue, purple and yellow, or red and green. This high-contrast combination draws attention and creates a striking visual impact, making it perfect for bold and unconventional cake designs.
Conclusion
In conclusion, creating a Vintage Heart Cake is a fun and rewarding way to showcase your baking skills while adding a touch of nostalgia to your dessert table. Whether you’re celebrating a special occasion like Valentine’s Day, an anniversary, or just want to bake something beautiful for loved ones, this cake offers a perfect blend of classic design and modern flavor.
By following the step-by-step instructions, you can craft a visually stunning and delicious cake that will impress everyone who gets a slice. The combination of rich cake layers, smooth frosting, and delicate decorations will create a vintage-inspired masterpiece that stands out at any gathering.
Don’t forget to customize your cake with your personal touch — whether it’s adding edible flowers, unique icing patterns, or even a personalized message on top. The beauty of this cake lies in its versatility, allowing you to adapt it for various occasions while keeping the timeless heart shape front and center.
With a bit of patience and creativity, you can bring this charming vintage dessert to life in your own kitchen. Happy baking, and may your Vintage Heart Cake be as delightful to make as it is to eat!